
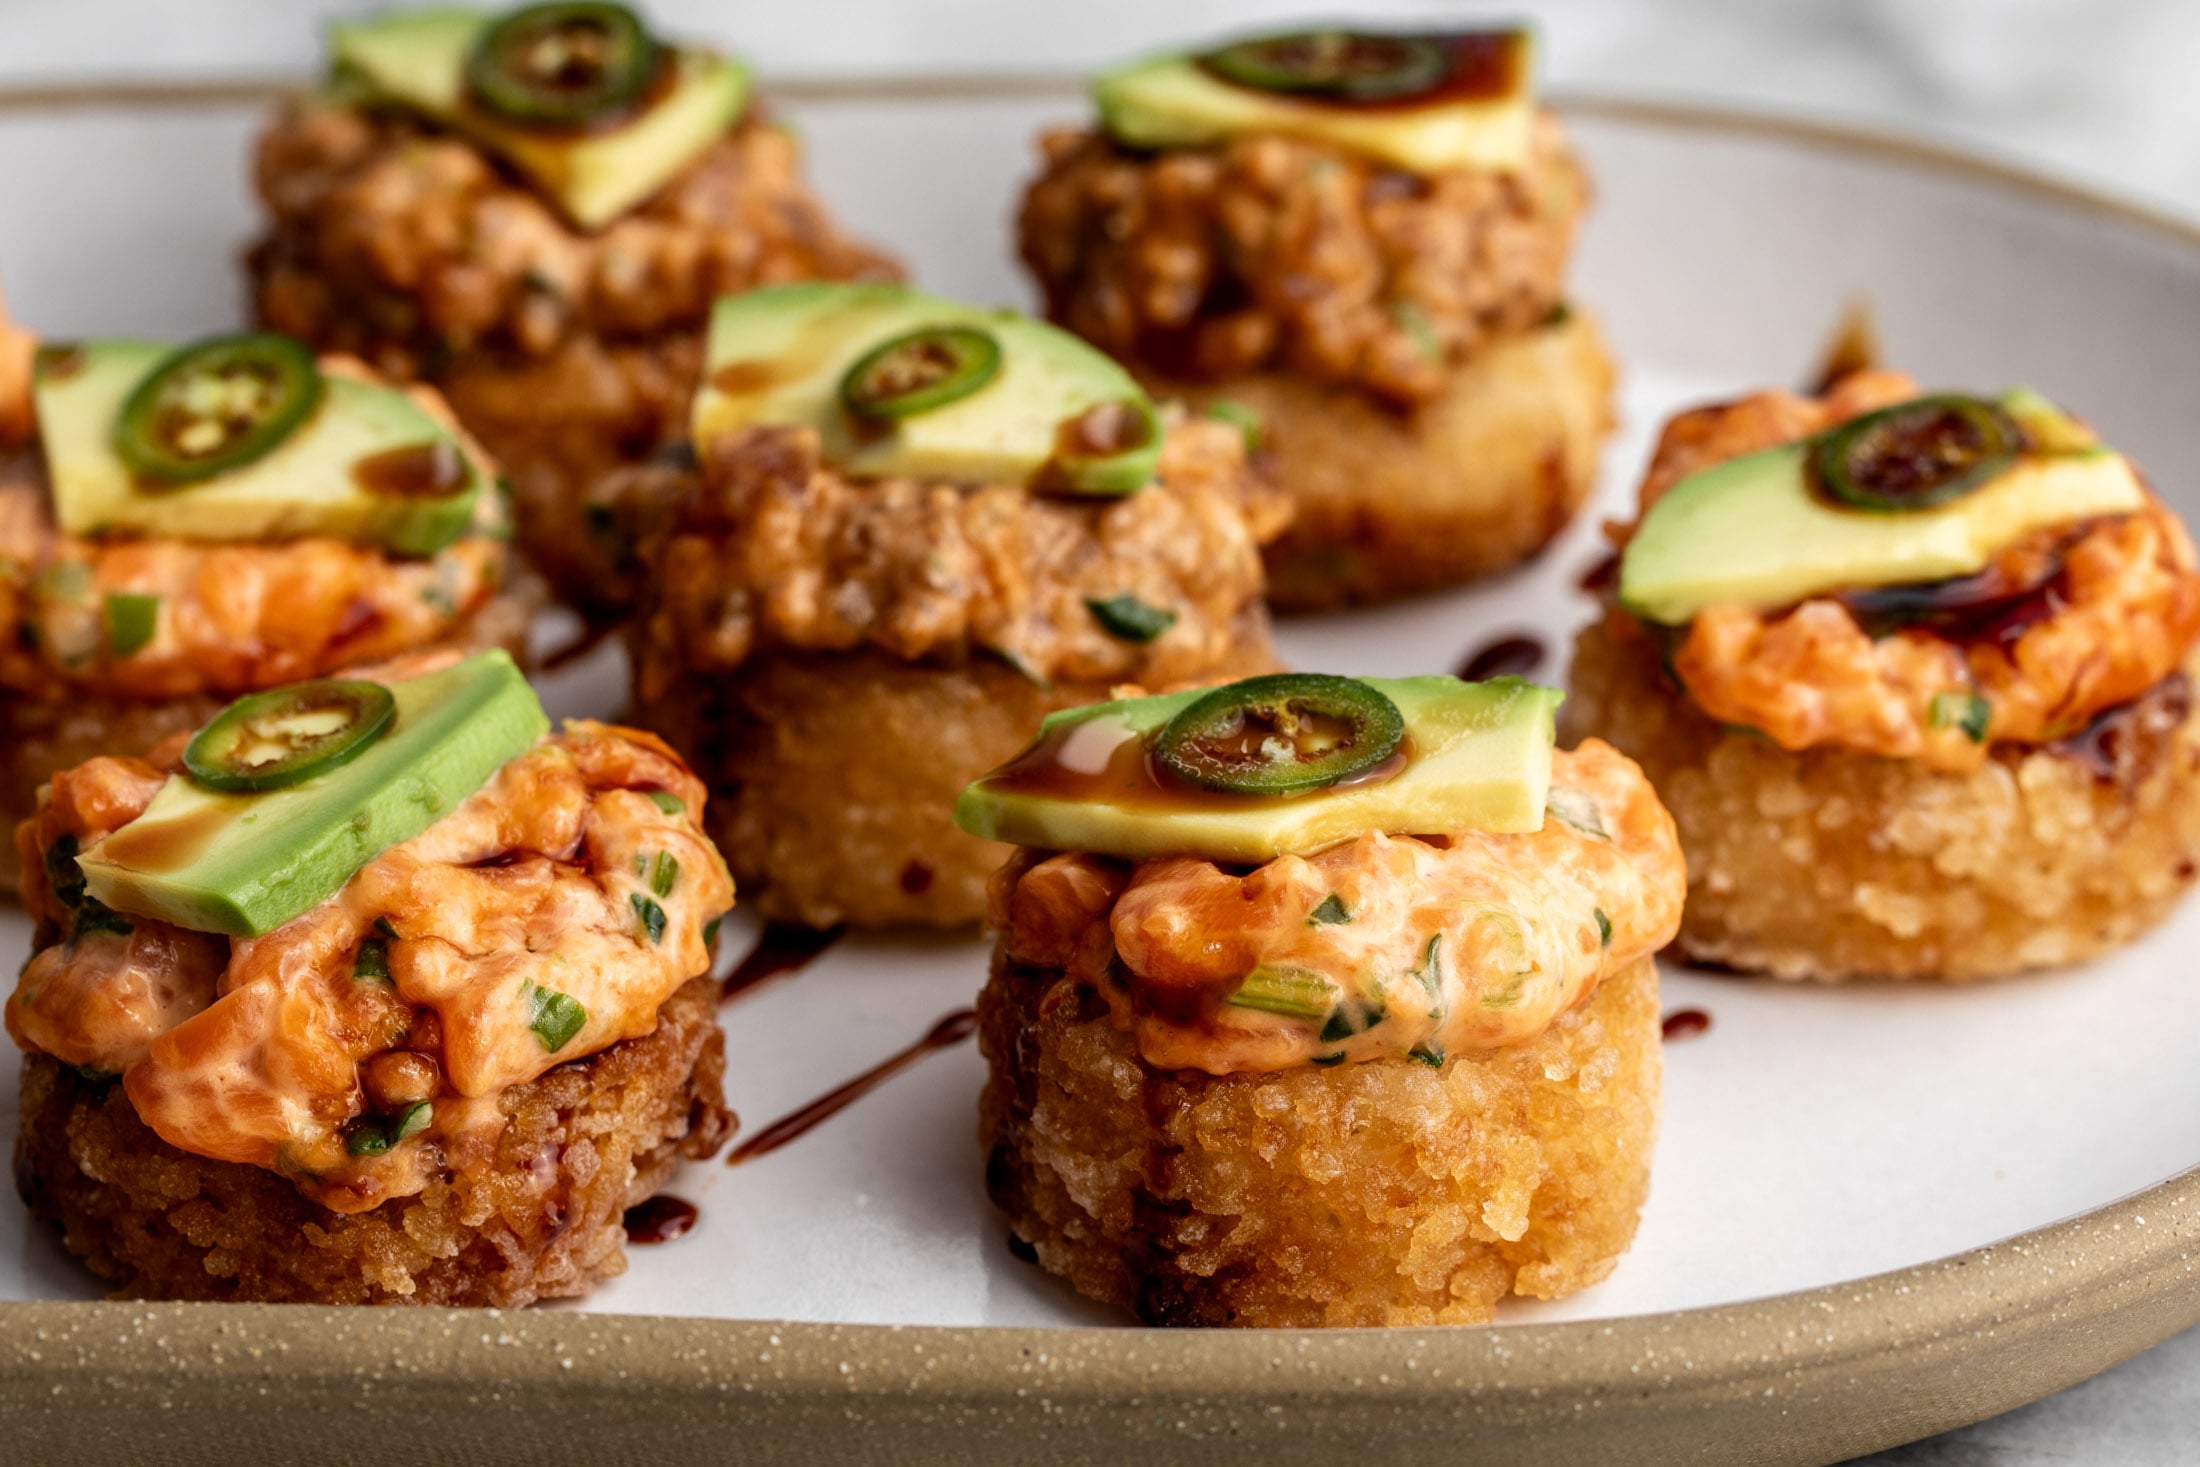
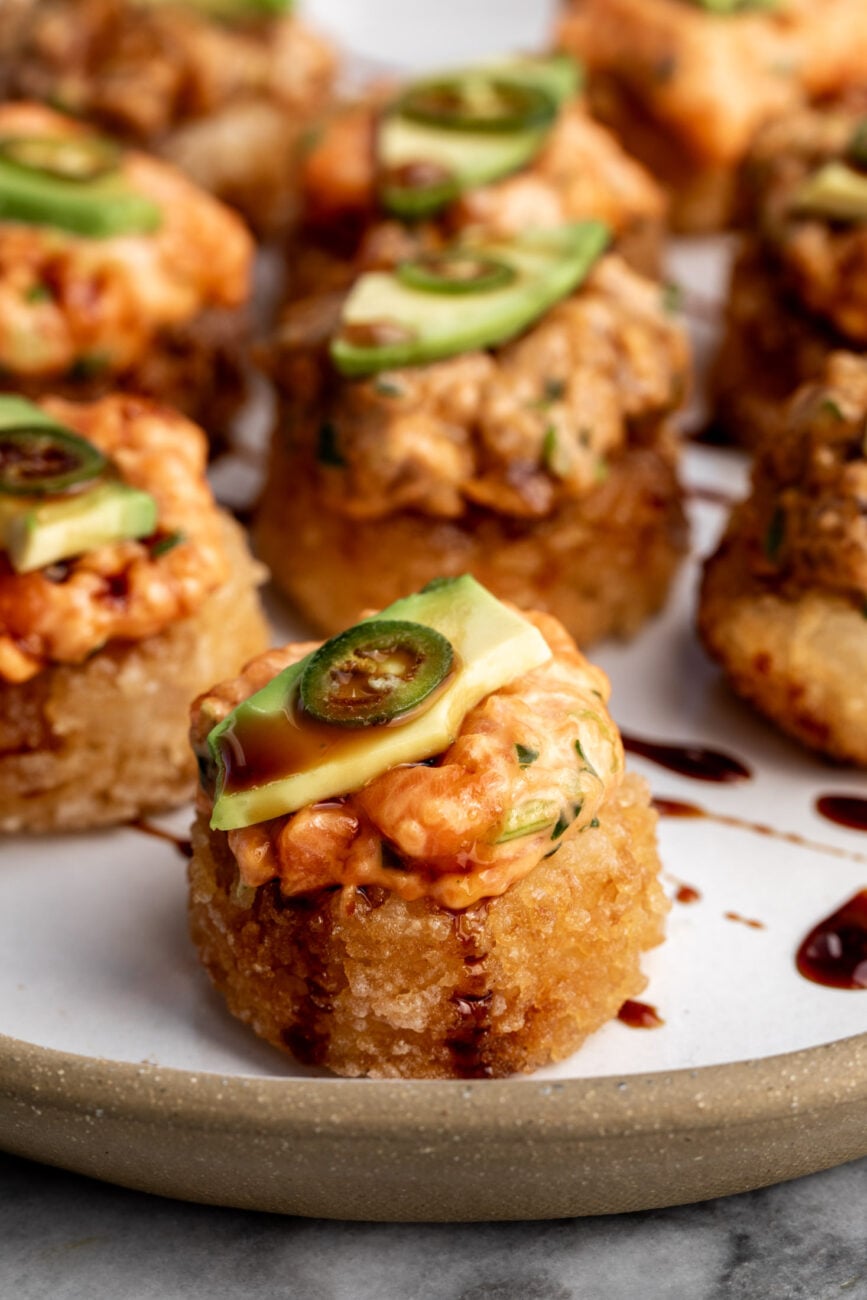
How to Make Crispy Rice (The Nobu Method)
Use this crispy rice as a base for all your favorite toppings from spicy tuna to spicy crab.
jump toRECIPE
This post may contain affiliate links, which means that I make a small commission off items you purchase at no additional cost to you. Please read my policy page.
Crispy rice is made by pressing seasoned short-grain sushi rice into an even layer, chilling it until firm, then pan-frying until each piece is deeply golden and crunchy on the outside with a soft, chewy center. It’s the signature appetizer that made Nobu Matsuhisa famous, and it’s surprisingly simple to make at home with just a few steps and the right rice. Best part? No reservation required, and no $30 price tag.
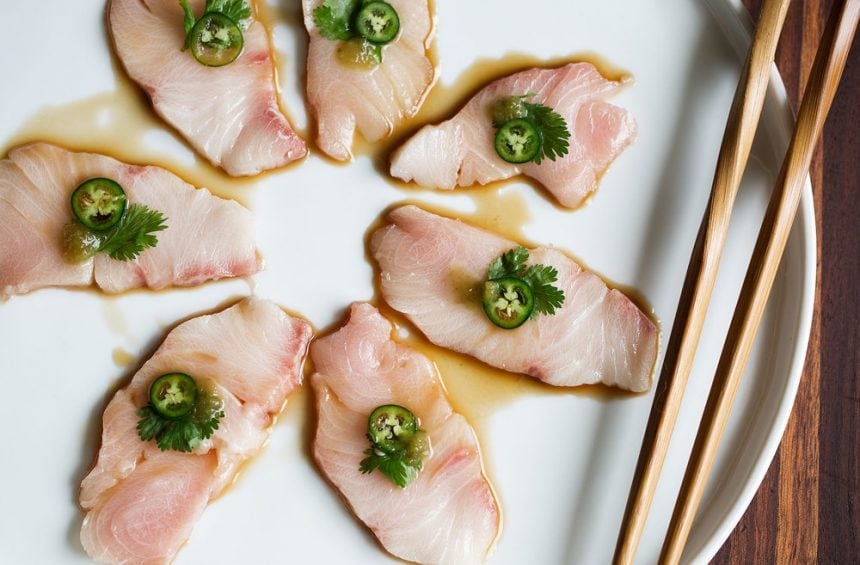
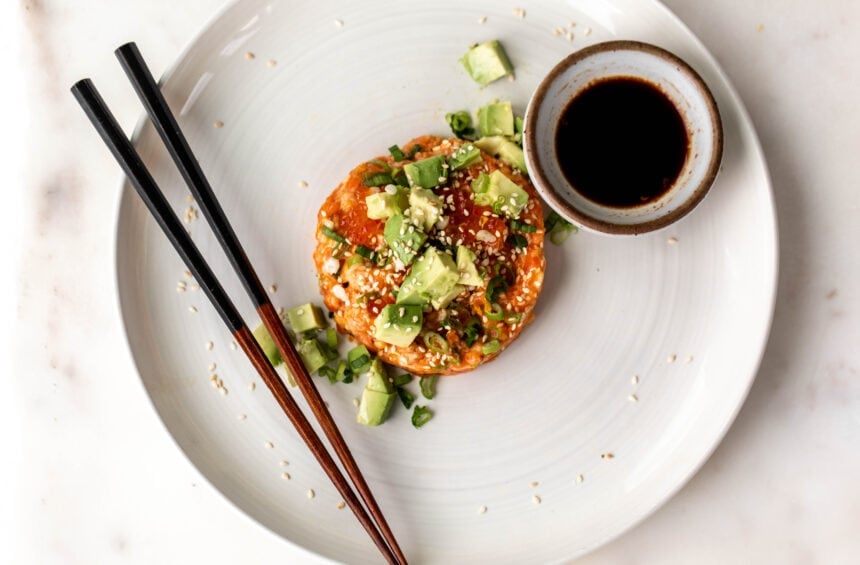
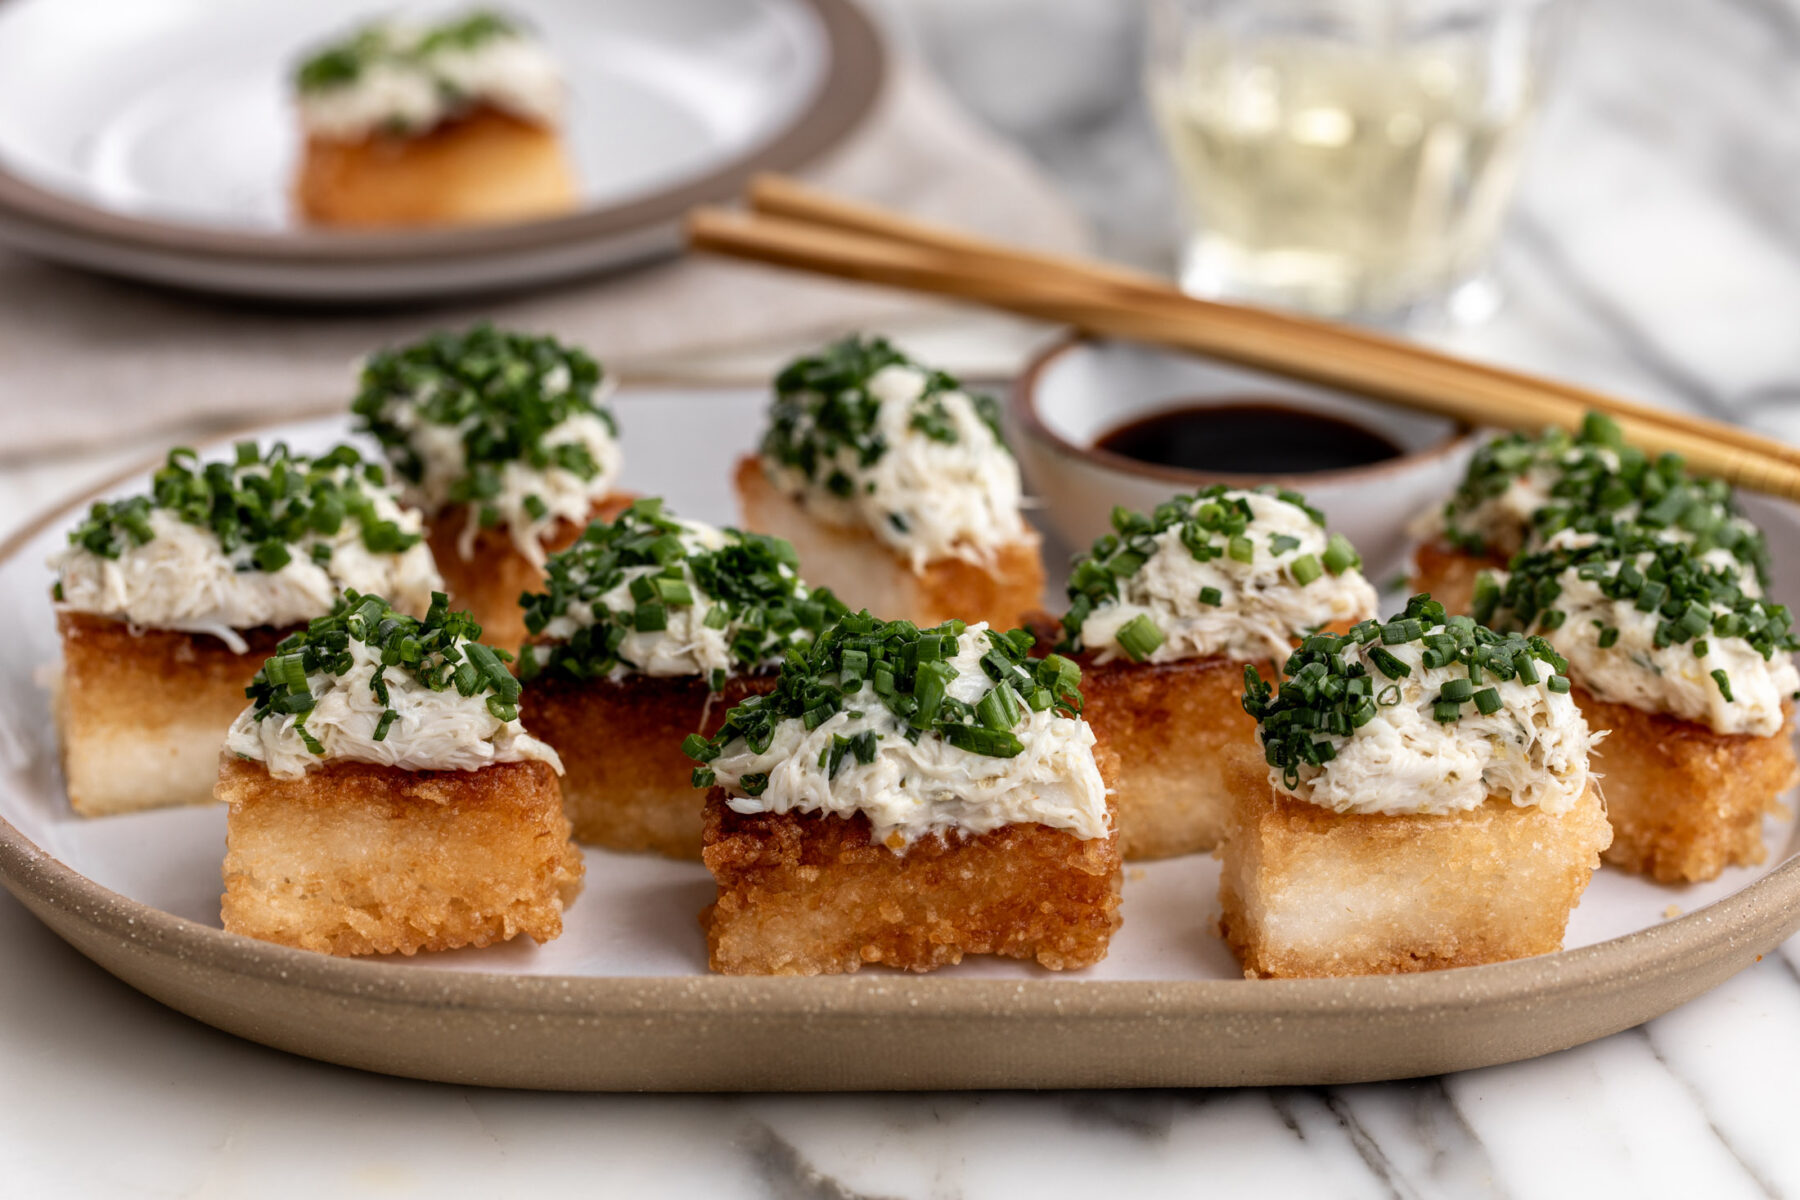
While spicy tuna crispy rice is the classic and most iconic version, I highly recommend trying other toppings like spicy crab crispy rice, crispy rice with salmon and avocado, dynamite lobster crispy rice or my viral crispy rice with spicy shrimp salad.
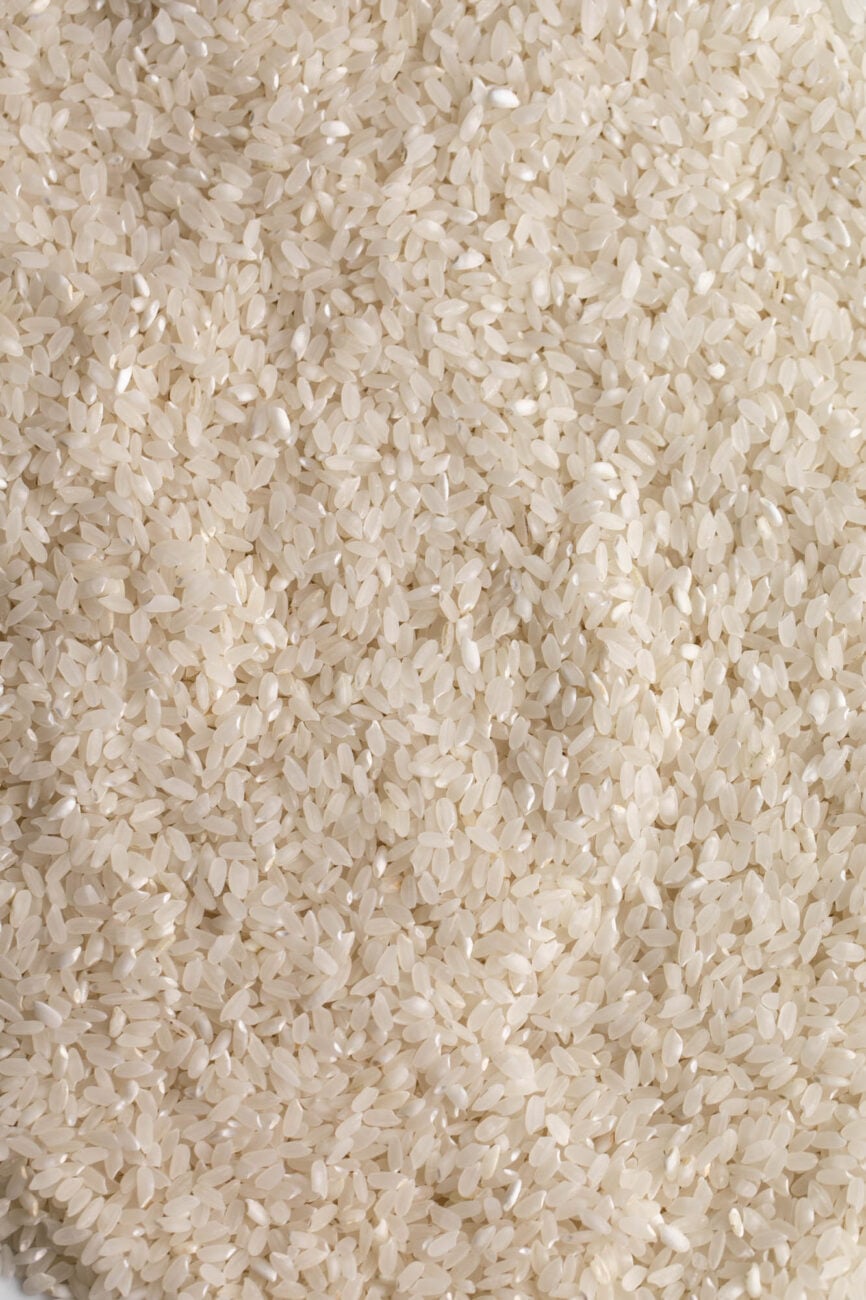
What Kind of Rice do You Use for Crispy Rice?
Short-grain sushi rice is key. It’s important because the starchy and plump grains stick together, creating that perfect crispy base. You can also look for Calrose rice, a California-grown short-grain rice commonly sold in American grocery stores. Don’t use long-grain rice; it will fall apart. I recommend rinsing the rice several times before cooking it. I use a rice cooker for perfectly cooked rice every time.
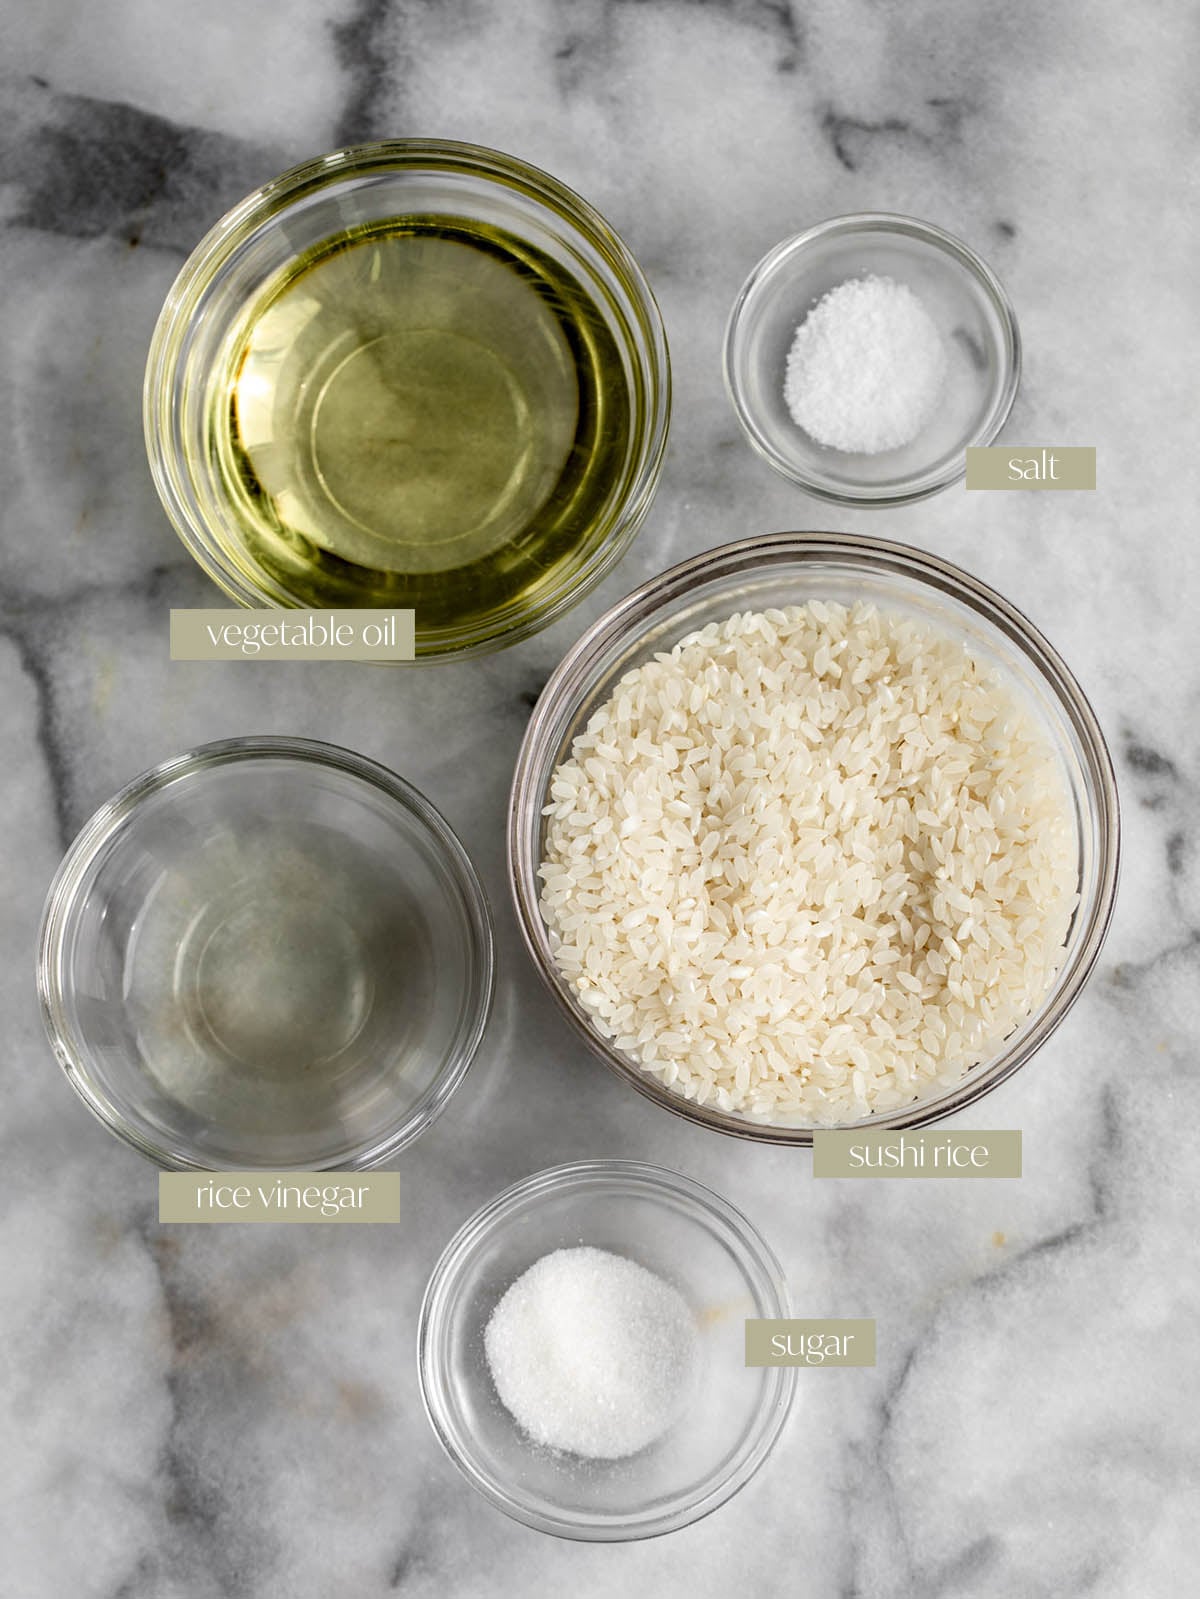
Key Ingredients to Make Crispy Rice
- Rice – The starchy and plump grains of short-grain sushi rice stick together perfectly to create the base.
- Rice vinegar – The cooked rice is seasoned with a combination of rice vinegar, salt and sugar for added flavor, though this step can be skipped if needed.
- Salt – A pinch of salt is used to add flavor to the rice.
- Sugar – A bit of sugar balances the acidity and salt in the rice.
- Vegetable oil – It’s important to fry the crispy rice in vegetable oil or another neutral oil with a high smoke point like avocado oil.
A full ingredient list with exact amounts can be found in the recipe card below.
Pro tip
Press harder than you think you need to. The rice block needs to be dense and compact to hold together during frying.
How do you Fry Crispy Rice Without it Falling Apart?
Press the rice firmly so there are no loose grains. I like sandwiching it between two quarter sheet pans for an even, compact layer.Letting the pressed rice sit for at least an hour in the fridge so it chills also helps it to stay together when frying.
How to Make Crispy Rice Ahead of Time
The rice can be cooked and pressed up to a day ahead of time, but I recommend frying the rice just before serving for the best texture. If you are entertaining and serving large portions, I recommend partly frying the rice so it is a pale golden brown but not quite crispy. Later on, just before serving, quickly fry it once more to crisp the rice in a shorter span of time.
Variations on Crispy Rice
- While I prefer to fry the rice as squares then cut them in half, you can use a 2” circle cookie cutter and cut circles from the rice to fry.
- You can also cut the squares of rice into rectangles and fry the rectangles rather than cutting the squares in half after they are fried.
Toppings for Crispy Rice
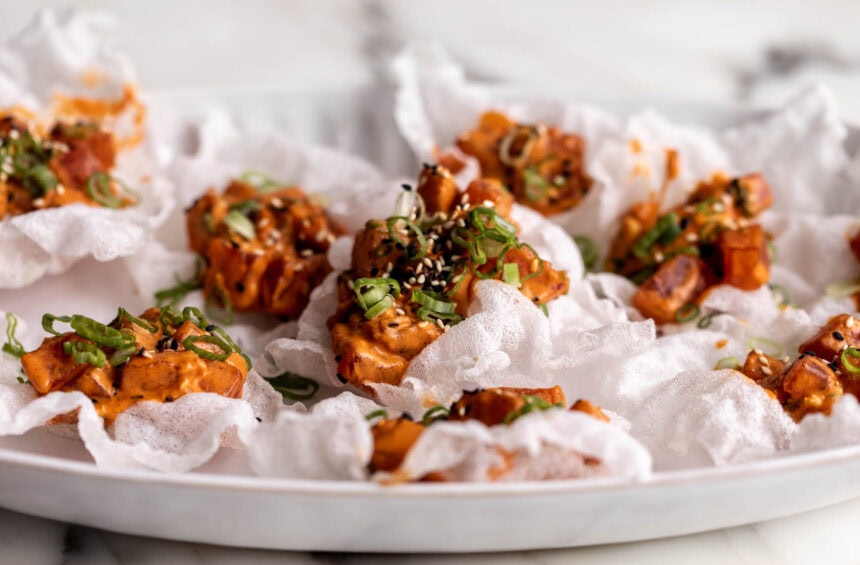
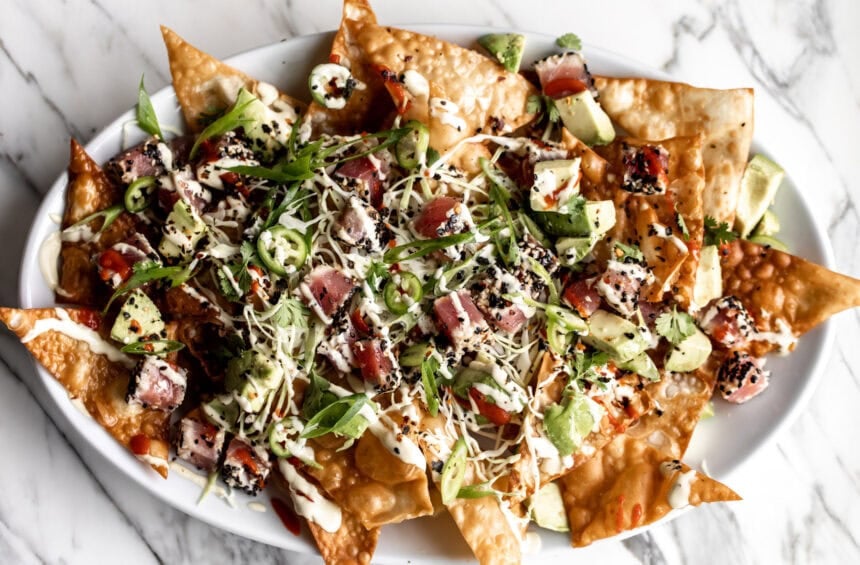
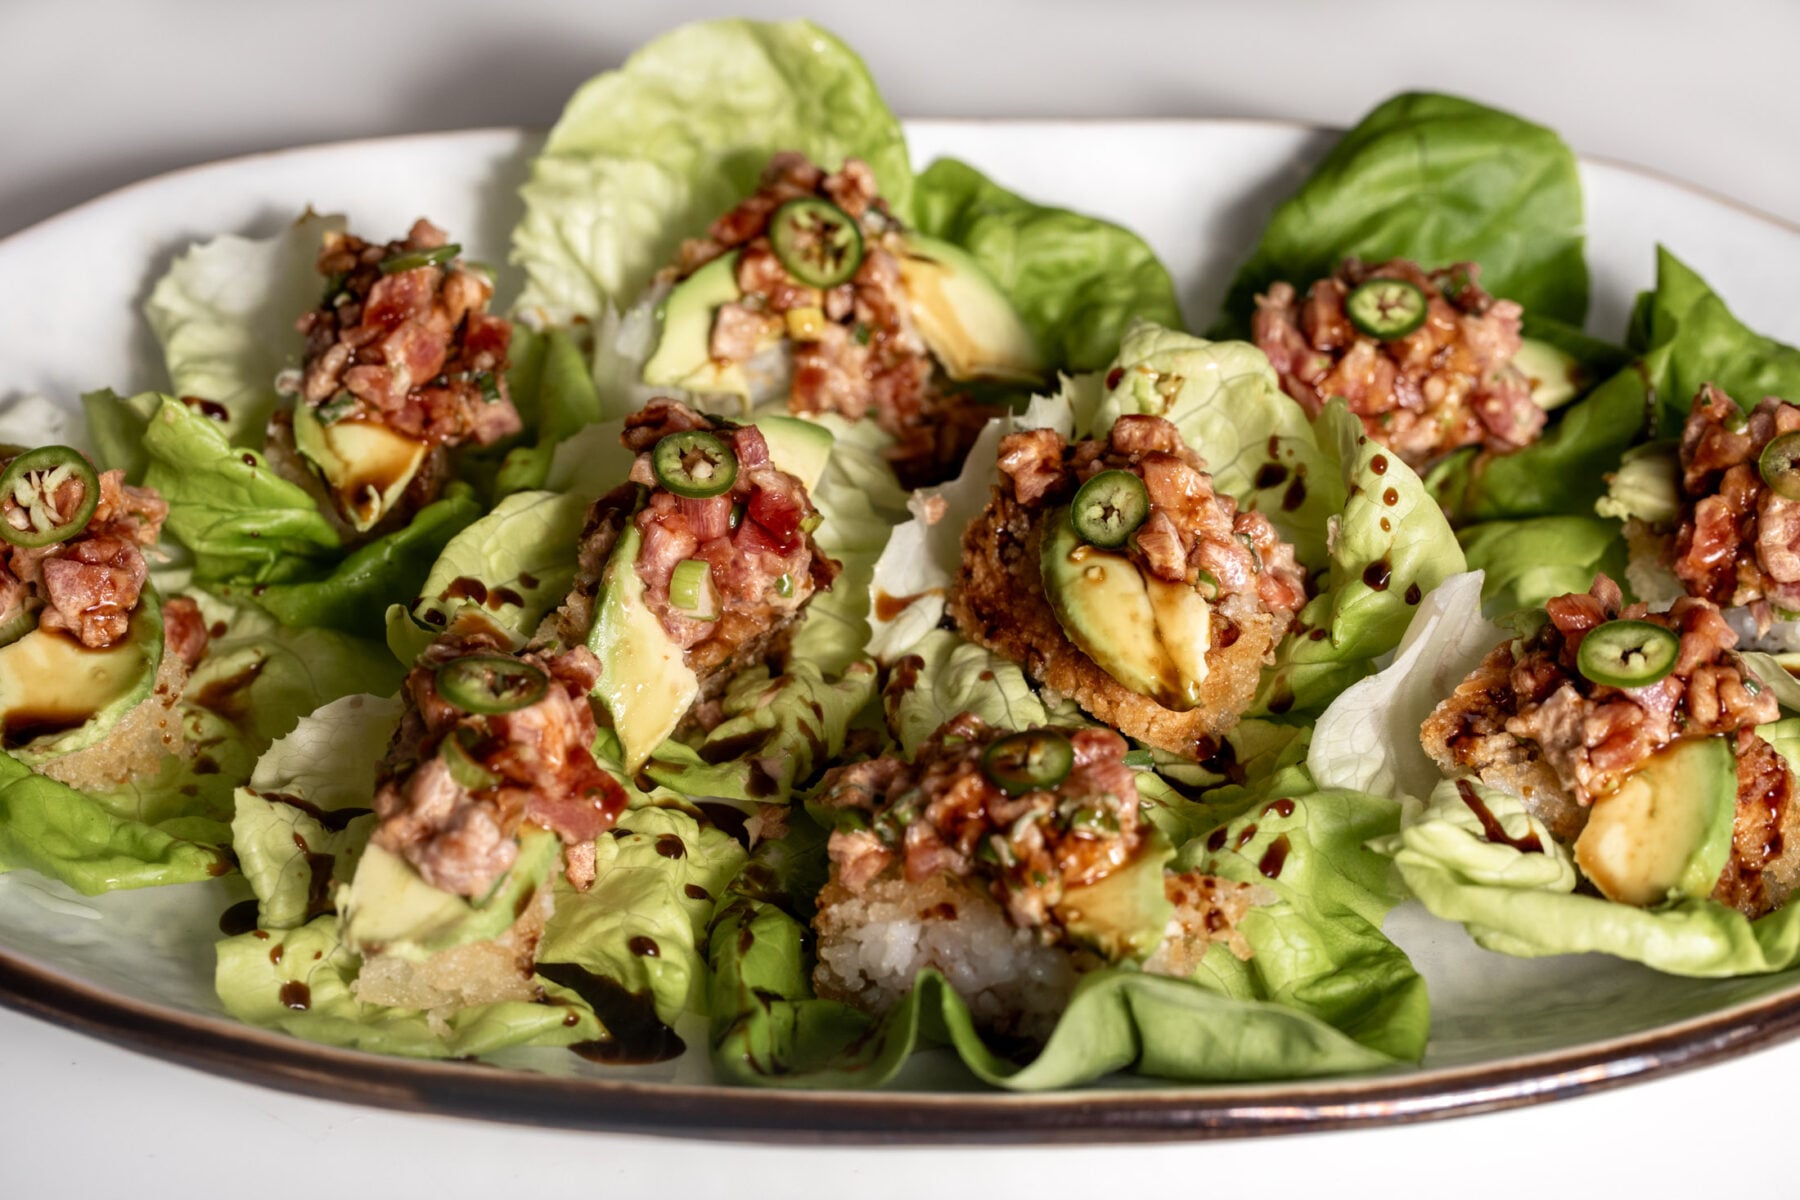
While spicy tuna made with finely chopped ahi tuna and a sriracha mayonnaise is a classic topping for crispy rice, I recommend experimenting with some of these other flavor combinations:
- Crispy rice with spicy shrimp salad
- Spicy crab crispy rice
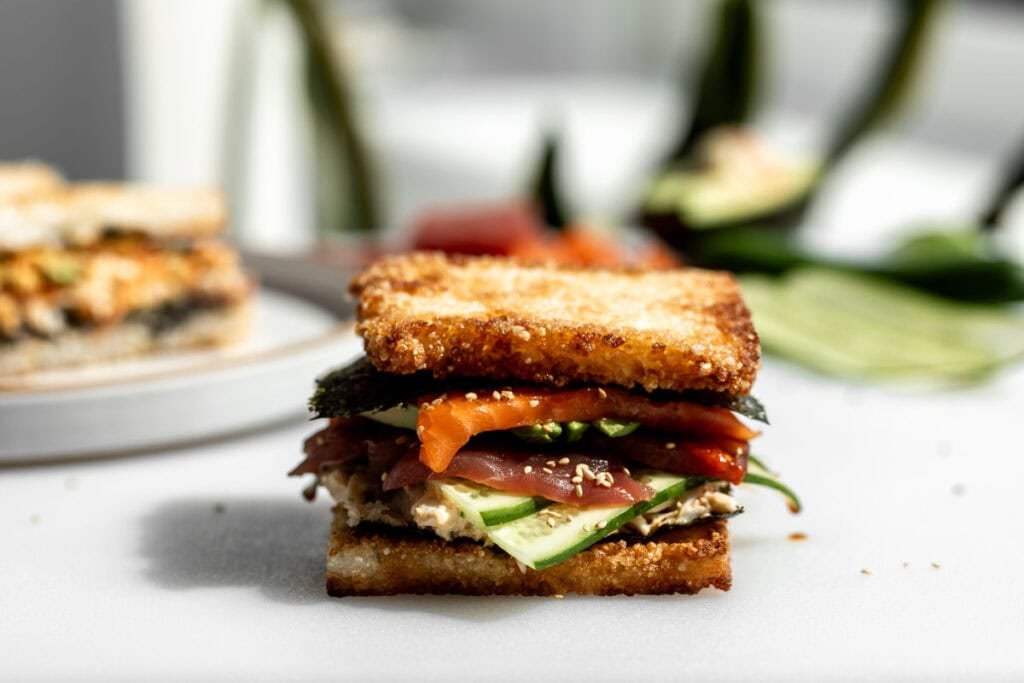
- Crispy rice sushi sandwich
- Finely chopped toro and scallion
- Baked lobster tossed in spicy mayo and torched
- For a vegetarian version, try mashed avocado mixed with a bit of truffle oil
How to Make Crispy Rice (Step-by-Step with Photos)
Place the rice in a fine mesh strainer and rinse until the water that runs out of the bottom is clear. This gets some of the starch out of the rice. In a medium saucepan, combine the rice and 2¼ cups (532g) of water.
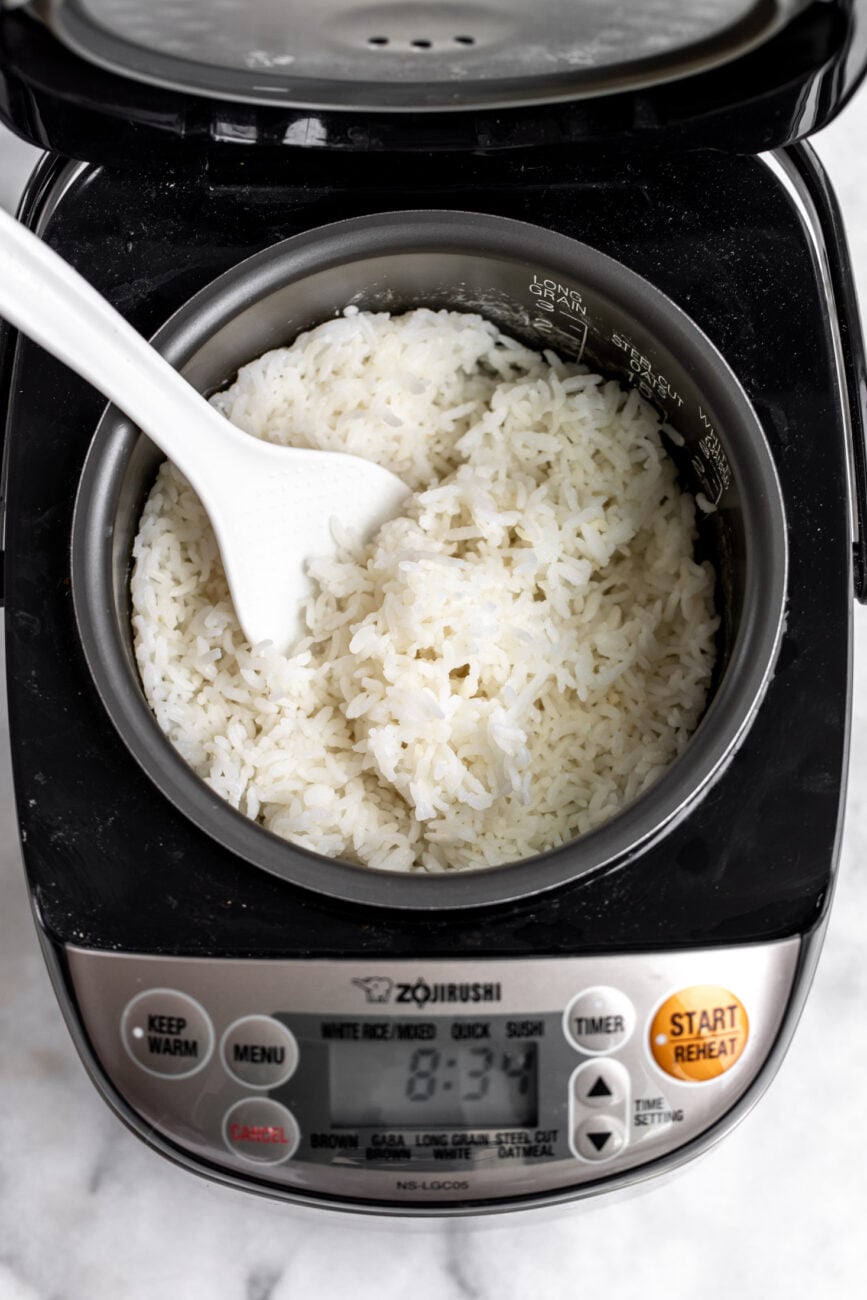
Bring to a boil, then cover and reduce the heat to low. Cook until rice is tender and the water has been absorbed, about 20 minutes. You want to cook the rice slightly longer than you typically would so it holds together well.
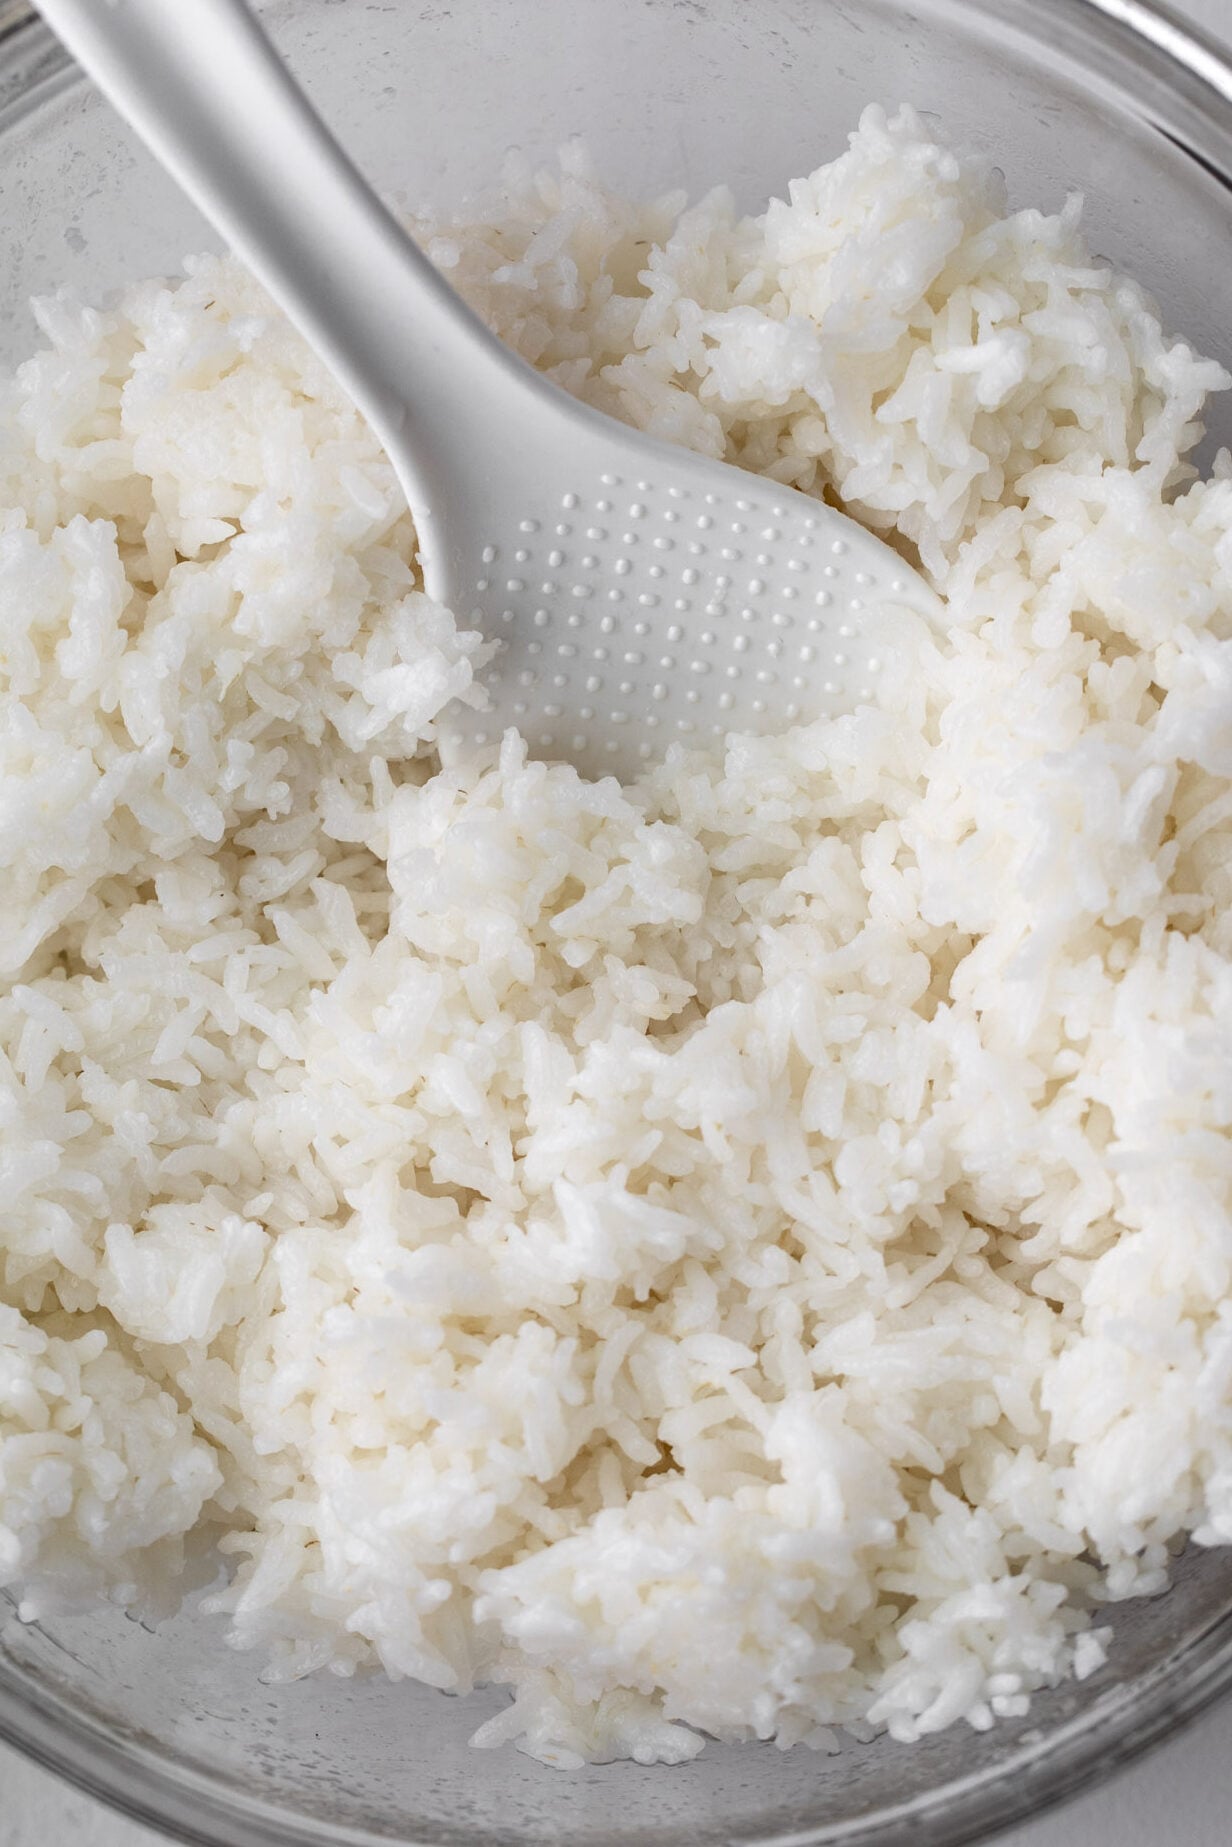
In a small bowl, whisk together the rice vinegar, sugar and salt. Remove from the heat, sprinkle with the rice vinegar mixture, and fluff the rice with a fork and let cool.
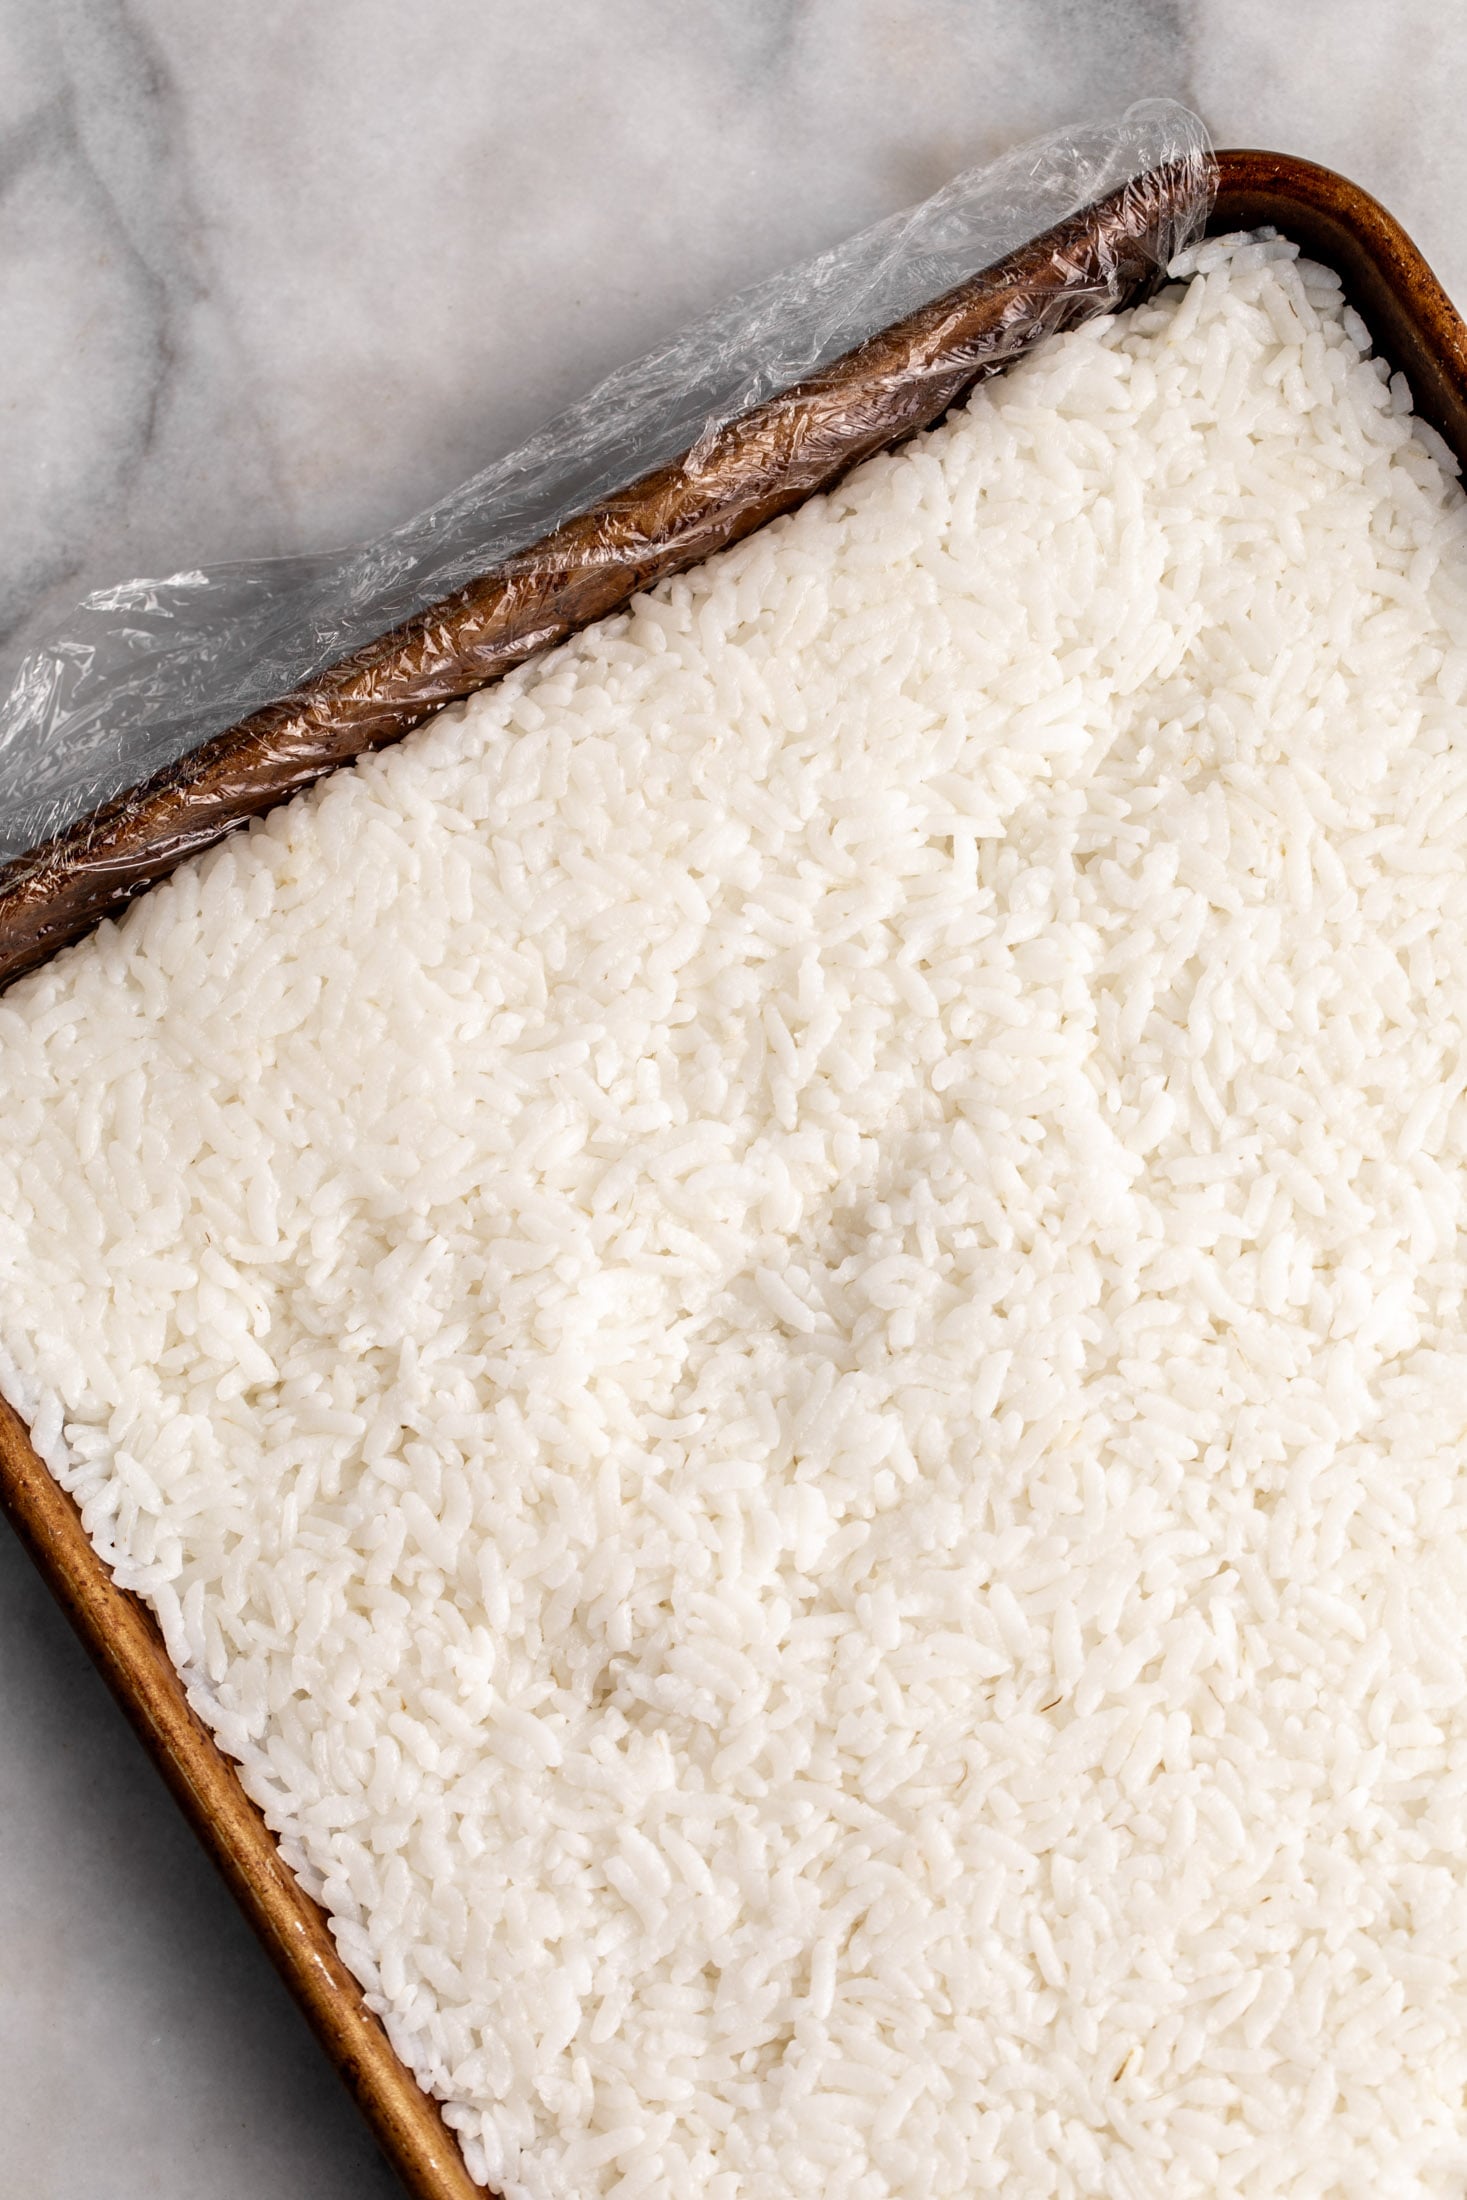
Line a quarter sheet pan (9”x13” / 22cm x 32cm) with plastic wrap, then spread the sushi rice evenly, pressing it down so that it is tightly packed about ½”-thick. Transfer to the refrigerator for at least an hour, and up to overnight.
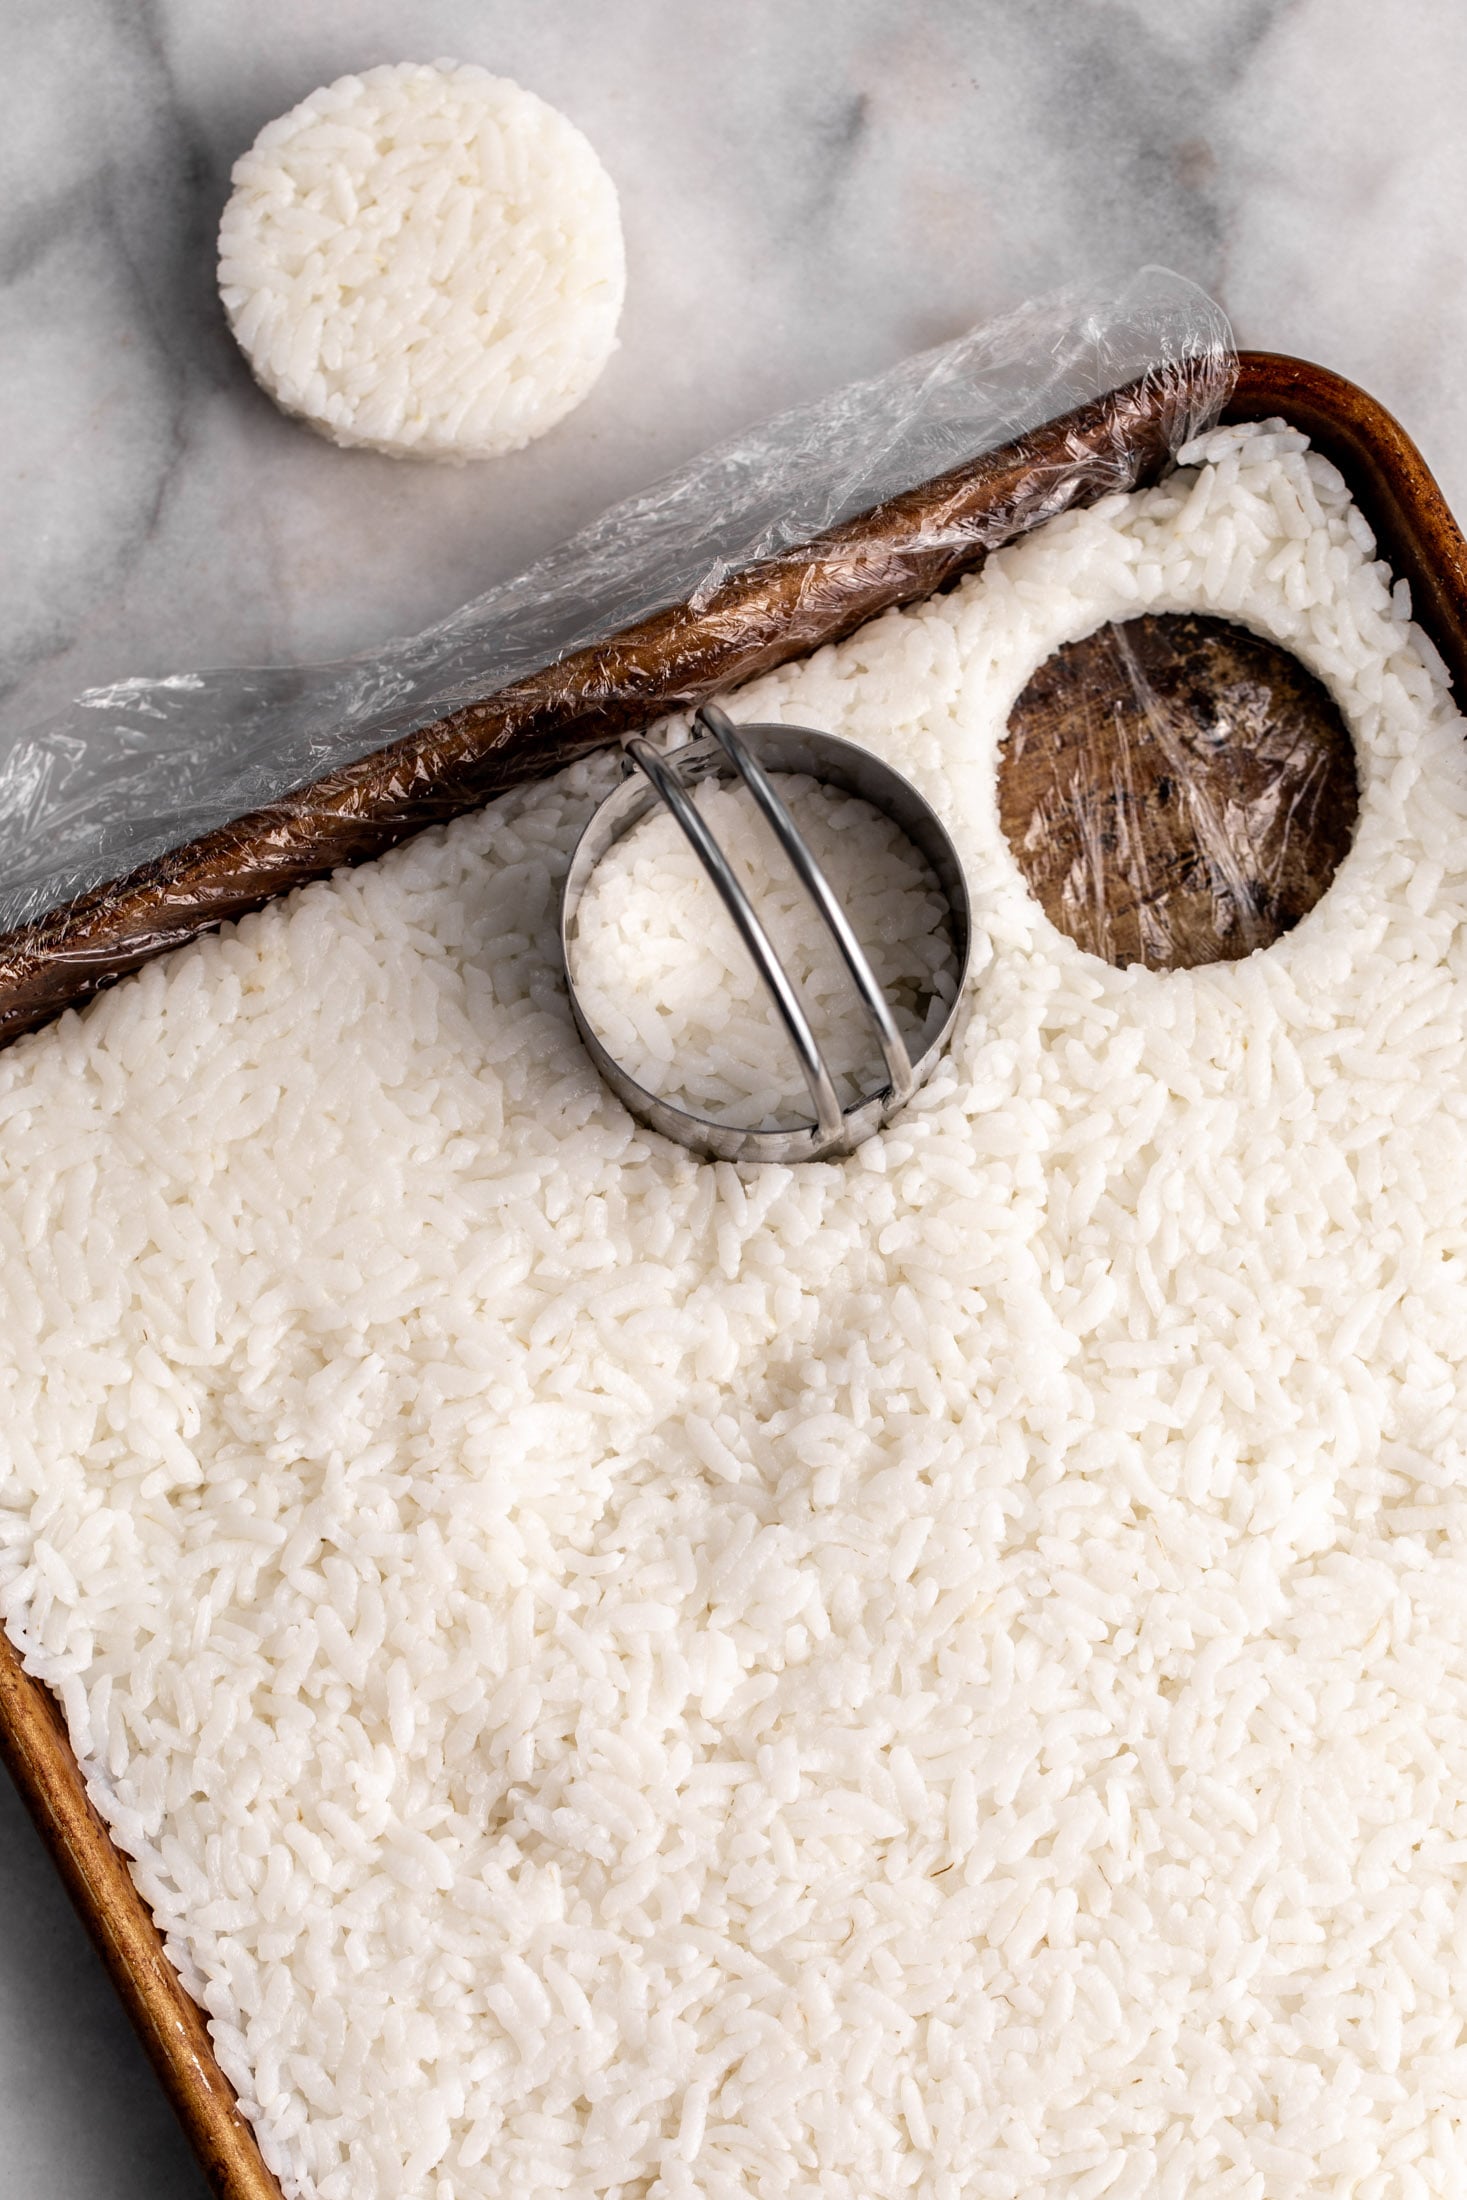
Lift the plastic wrap from the pan, then use a knife to cut it into 12 even squares or a 2” circle cookie cutter to cut out circles.
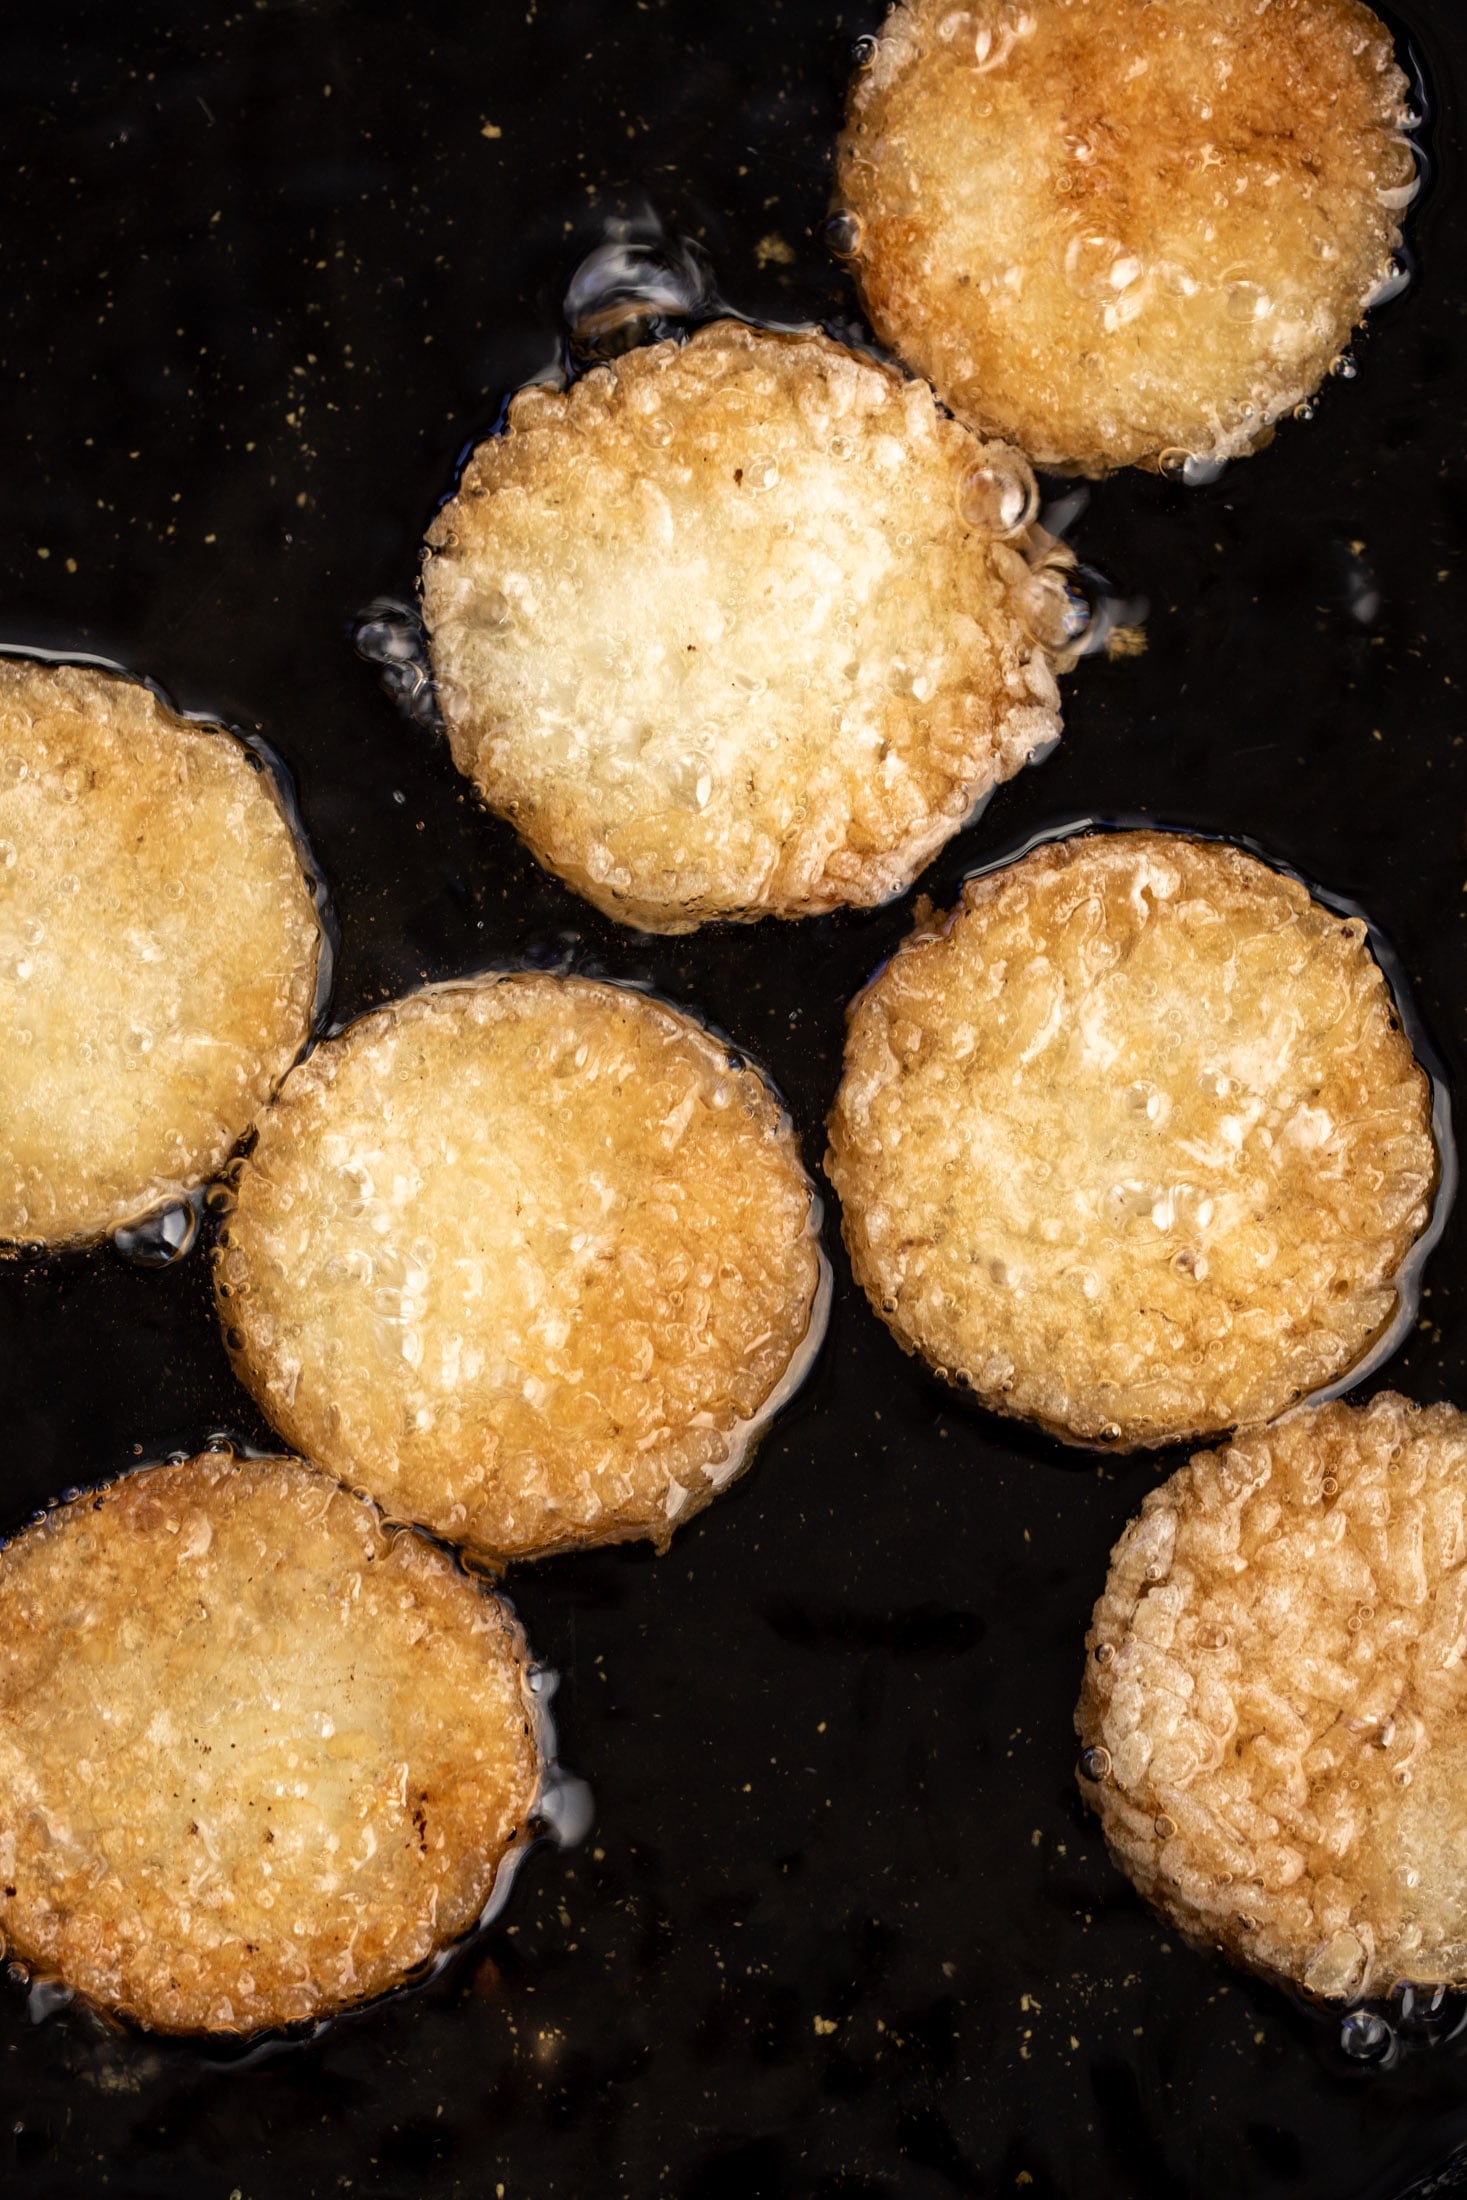
Heat the vegetable oil in a skillet to 375°F (190ºC). Fry only a few pieces of rice at a time in the pan. Cook the rice undisturbed until one side is golden brown and crispy, about 2 minutes. Flip and continue to cook until deeply golden brown and crispy all over, about an additional 2 to 3 minutes.
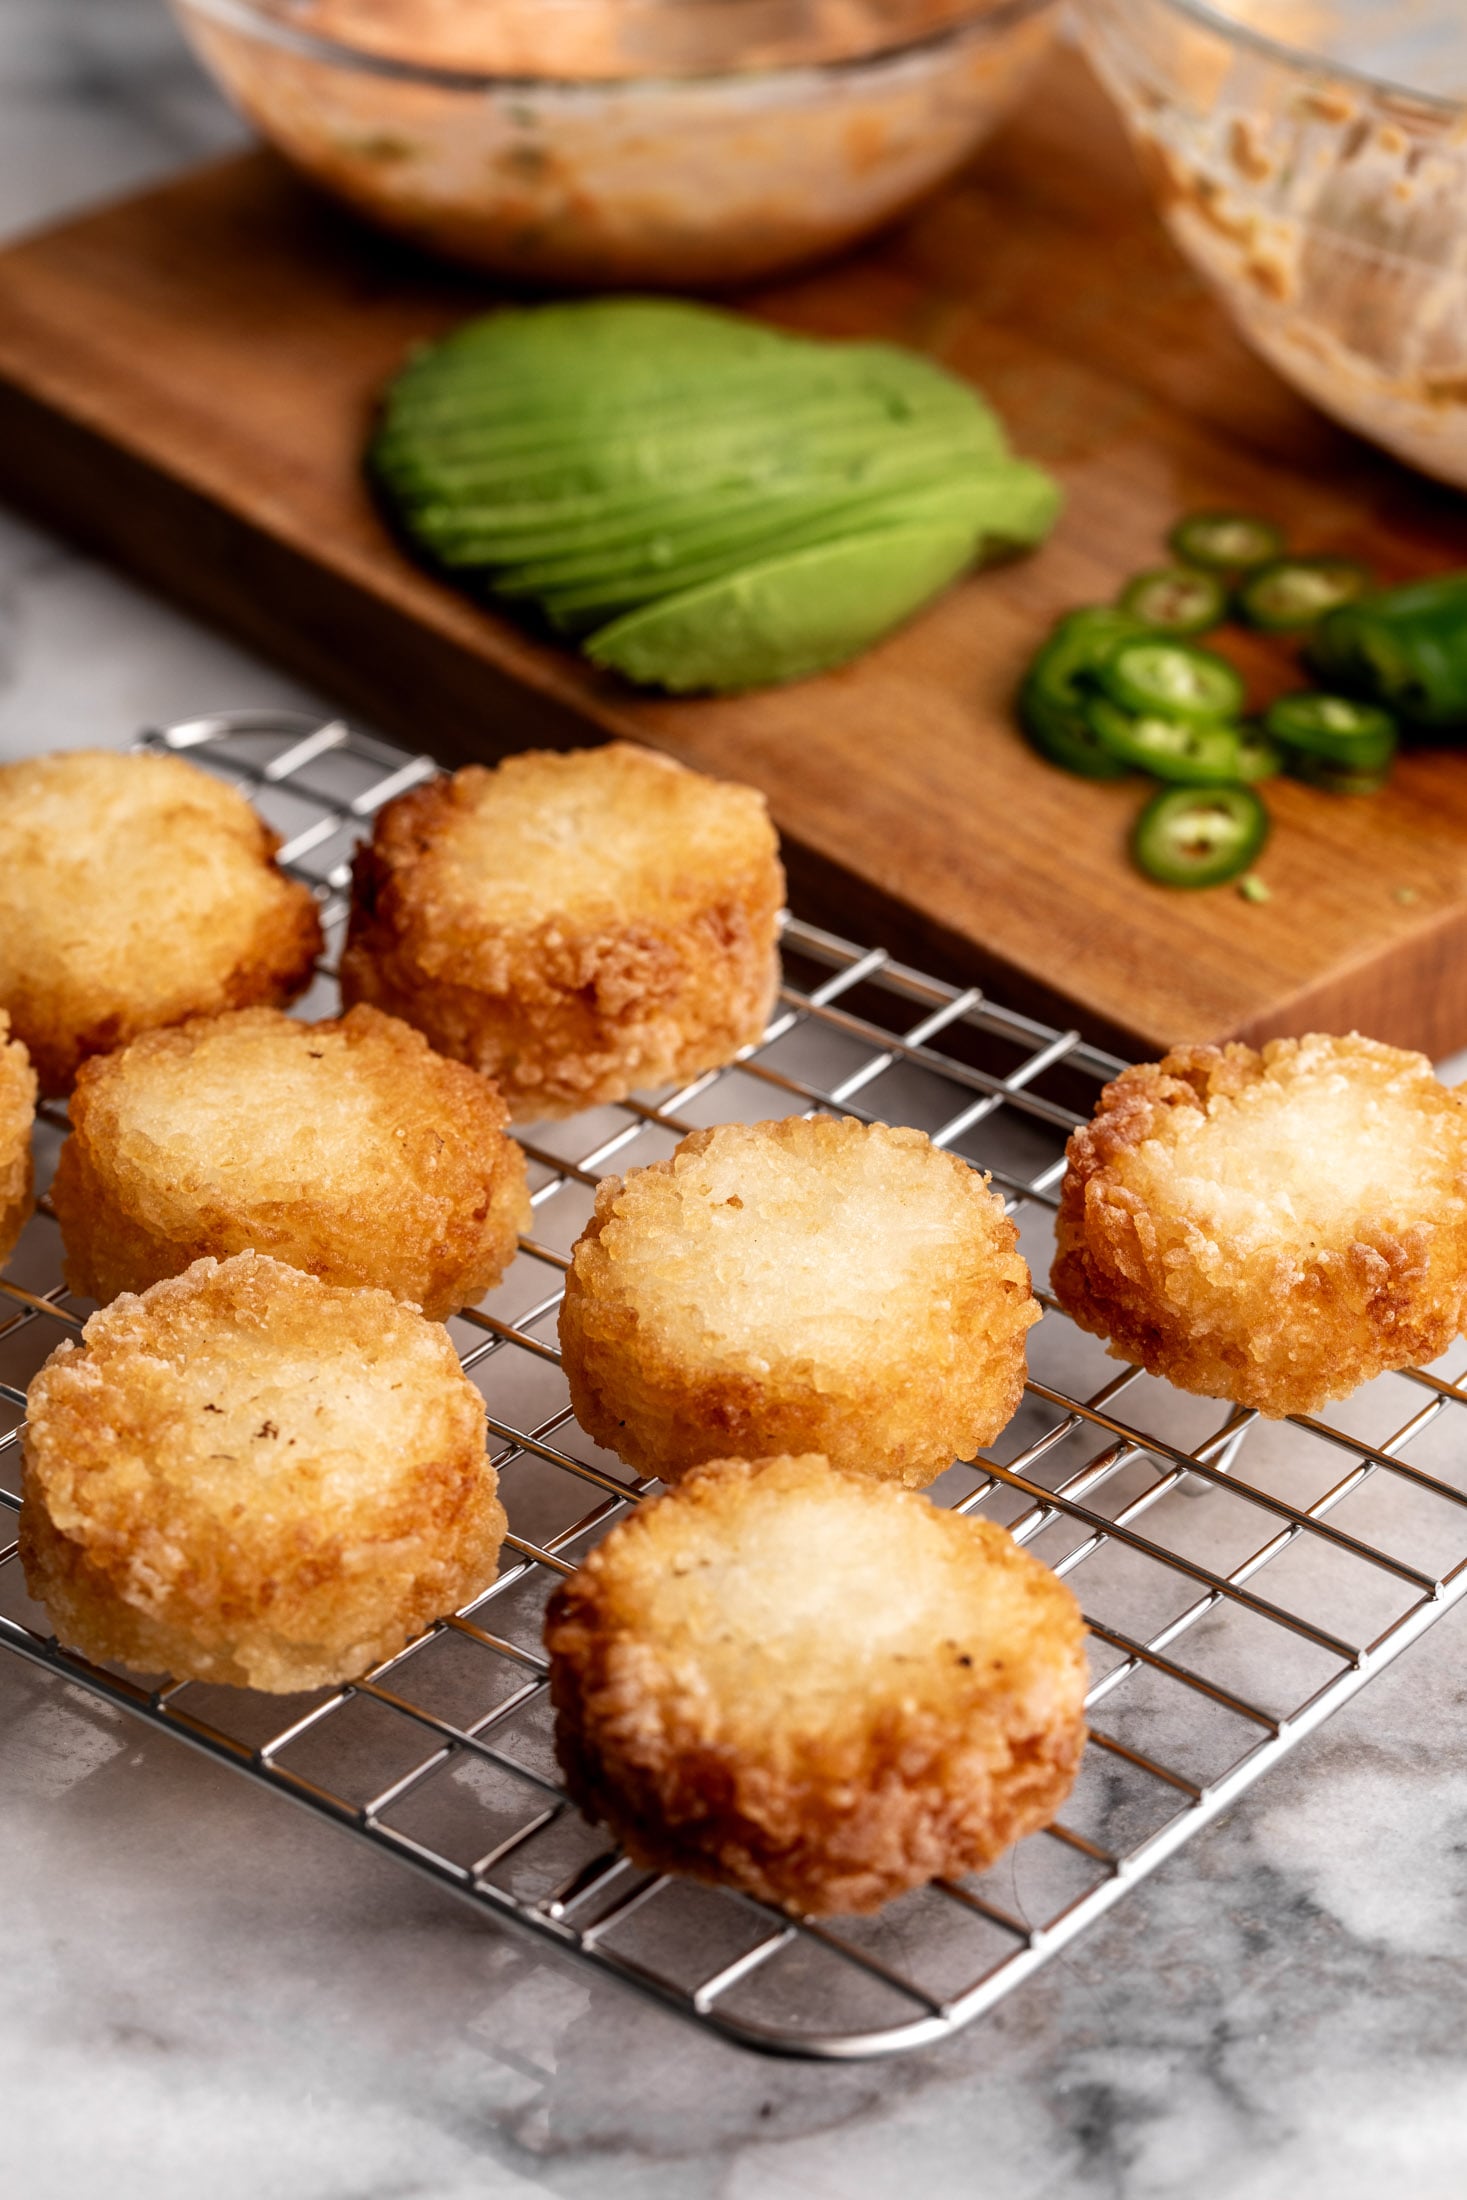
Remove from the pan to a paper towel-lined plate or a cooling rack set over a paper towel-lined baking sheet to drain. If cooking squares, cut each square of crispy rice in half. Add desired toppings to the crispy rice and serve.
Troubleshooting Crispy Rice (Common Problems and How to Fix Them!)
A few small tweaks make the biggest difference between good crispy rice and restaurant-level crispy rice at home.
Why is my crispy rice falling apart?
If your rice is falling apart, it likely wasn’t pressed together well enough! You shouldn’t be able to see any loose rice grains when you fry it. I add slightly more water to the sushi rice than I typically do and cook it slightly longer to ensure it remains soft on the inside.
Why isn’t my crispy rice crispy?
Likely the oil isn’t hot enough. But you can try adding a quick dusting of cornstarch to the pieces of pressed rice – it absorbs excess moisture and helps create that deeply golden crust.
Why is my crispy rice sticking to the pan?
Your oil should be around 375°F (190ºC). If the rice sticks or turns hard instead of crispy or sticks to the bottom of the pan as you’re cooking it, then the oil likely isn’t hot enough. You may also be trying to flip the rice too early, it should release from the pan when it is golden brown.
Can I make crispy rice without a non-stick pan?
Yes! A non-stick pan works well, especially for first-timers new to frying things, but I actually recommend using a high-sided pot or Dutch oven to reduce splatter and keep the oil temperature steady. A heavy-bottomed cast-iron pan also heats oil evenly.
FAQ – Frequently Asked Questions
What is Nobu crispy rice?
The crispy rice spicy tuna is a signature appetizer at Nobu restaurants, created by Chef Nobuyuki Matsuhisa. Bite-sized pieces of sushi rice are topped with a spicy tuna mixture, avocado, a slice of jalapeño or serrano pepper and a drizzle of eel sauce in a piece of butter lettuce. Most home versions of the recipe like this one opt to pan-fry rather than deep-fry the rice for an easier and lighter result.
Can you air fry crispy rice instead of pan-frying it?
Air-frying works well as a lighter alternative with less mess, though it won’t be quite as crispy as pan-frying. I prefer to pan-fry the rice first, then use an air fryer to reheat and re-crisp the rice if needed. To make the crispy rice in an air fryer, lightly brush the rice with vegetable oil and air fry at 350ºF (180ºC) for 7 to 8 minutes, until golden and crisp.
Can you use leftover rice for crispy rice?
Yes, you can use leftover sushi rice as long as it hasn’t dried out or gone stiff. If it feels crumbly or hard I don’t recommend using it because it won’t press or fry properly. Freshly cooked and seasoned rice chilled in a mold will produce better, more consistent results.
How do you cut the rice into even pieces?
Wet your chef knife blade or cookie cutter with cold water before each cut to prevent the rice from sticking. This will give you cleaner edges since the rice is so sticky.
Other Sushi-Inspired Recipes to Try
Tried it? Loved it? Tweaked it? Leave a review below and tell me how it went – I’m all ears (and always hungry).
How to Make Crispy Rice (The Nobu Method)
Rate this Recipe
Equipment:
- Plastic wrap
- Large skillet
Ingredients:
- 2 cups short-grain sushi rice
- 2 teaspoons rice vinegar
- ½ teaspoon granulated sugar
- ¼ teaspoon kosher salt
- 1 cup vegetable oil
Instructions:
- Place the rice in a fine mesh strainer and rinse until the water that runs out of the bottom is clear. This gets some of the starch out of the rice. In a medium saucepan, combine the rice and 2¼ cups (532g) of water.
- Bring to a boil, then cover and reduce the heat to low. Cook until rice is tender and the water has been absorbed, about 20 minutes.
- In a small bowl, whisk together the rice vinegar, sugar and salt. Remove from the heat, sprinkle with the rice vinegar mixture, and fluff the rice with a fork and let cool.
- Line a quarter sheet pan (9”x13” / 22cm x 32cm) with plastic wrap, then spread the sushi rice evenly, pressing it down so that it is tightly packed about ½”-thick. Transfer to the refrigerator for at least an hour, and up to overnight.
- Lift the plastic wrap from the pan, then use a knife to cut it into 12 even squares or a 2” circle cookie cutter to cut out circles.
- Heat the vegetable oil in a skillet to 375°F (190ºC). Fry only a few pieces of rice at a time in the pan. Cook the rice undisturbed until one side is golden brown and crispy, about 2 minutes. Flip and continue to cook until deeply golden brown and crispy all over, about an additional 2 to 3 minutes.
- Remove from the pan to a paper towel-lined plate or a cooling rack set over a paper towel-lined baking sheet to drain. If cooking squares, cut each square of crispy rice in half. Add desired toppings to the crispy rice and serve.
Watch this Recipe
Notes:
Pro tip: Press harder than you think you need to. The rice block needs to be dense and compact to hold together during frying.
Nutrition:
Calories: 842kcal | Carbohydrates: 80g | Protein: 7g | Fat: 55g | Saturated Fat: 8g | Polyunsaturated Fat: 31g | Monounsaturated Fat: 13g | Trans Fat: 0.4g | Sodium: 146mg | Potassium: 76mg | Fiber: 3g | Sugar: 1g | Calcium: 3mg | Iron: 4mg
DID YOU MAKE THIS?
TAG ME ON INSTAGRAM TO BE FEATURED ON MY STORIES! @cookingwithcocktailrings
This recipe is so easy and delicious! Can’t wait to make it again!