
How to Make Butter in a Stand Mixer (1 Ingredient!)
Homemade butter is basically just made by whipping cream past the whipped cream state until it breaks down into solid butter and liquid buttermilk!
jump toRECIPE
This post may contain affiliate links, which means that I make a small commission off items you purchase at no additional cost to you. Please read my policy page.
I recently took a trip to the grocery store and was shocked by the price of one of my favorite brands of butter. With the amount of butter I go through in my cooking, it makes it hard to justify spending the money on some of my favorite brands. I opted to buy a quart of heavy cream and make butter in my stand mixer in under 30 minutes (mostly hands off time)! It is so simple to make, whether you have a stand mixer, hand butter churner or food processor. Plus it’s versatile – use it in all your favorite recipes in place of store-bought butter.
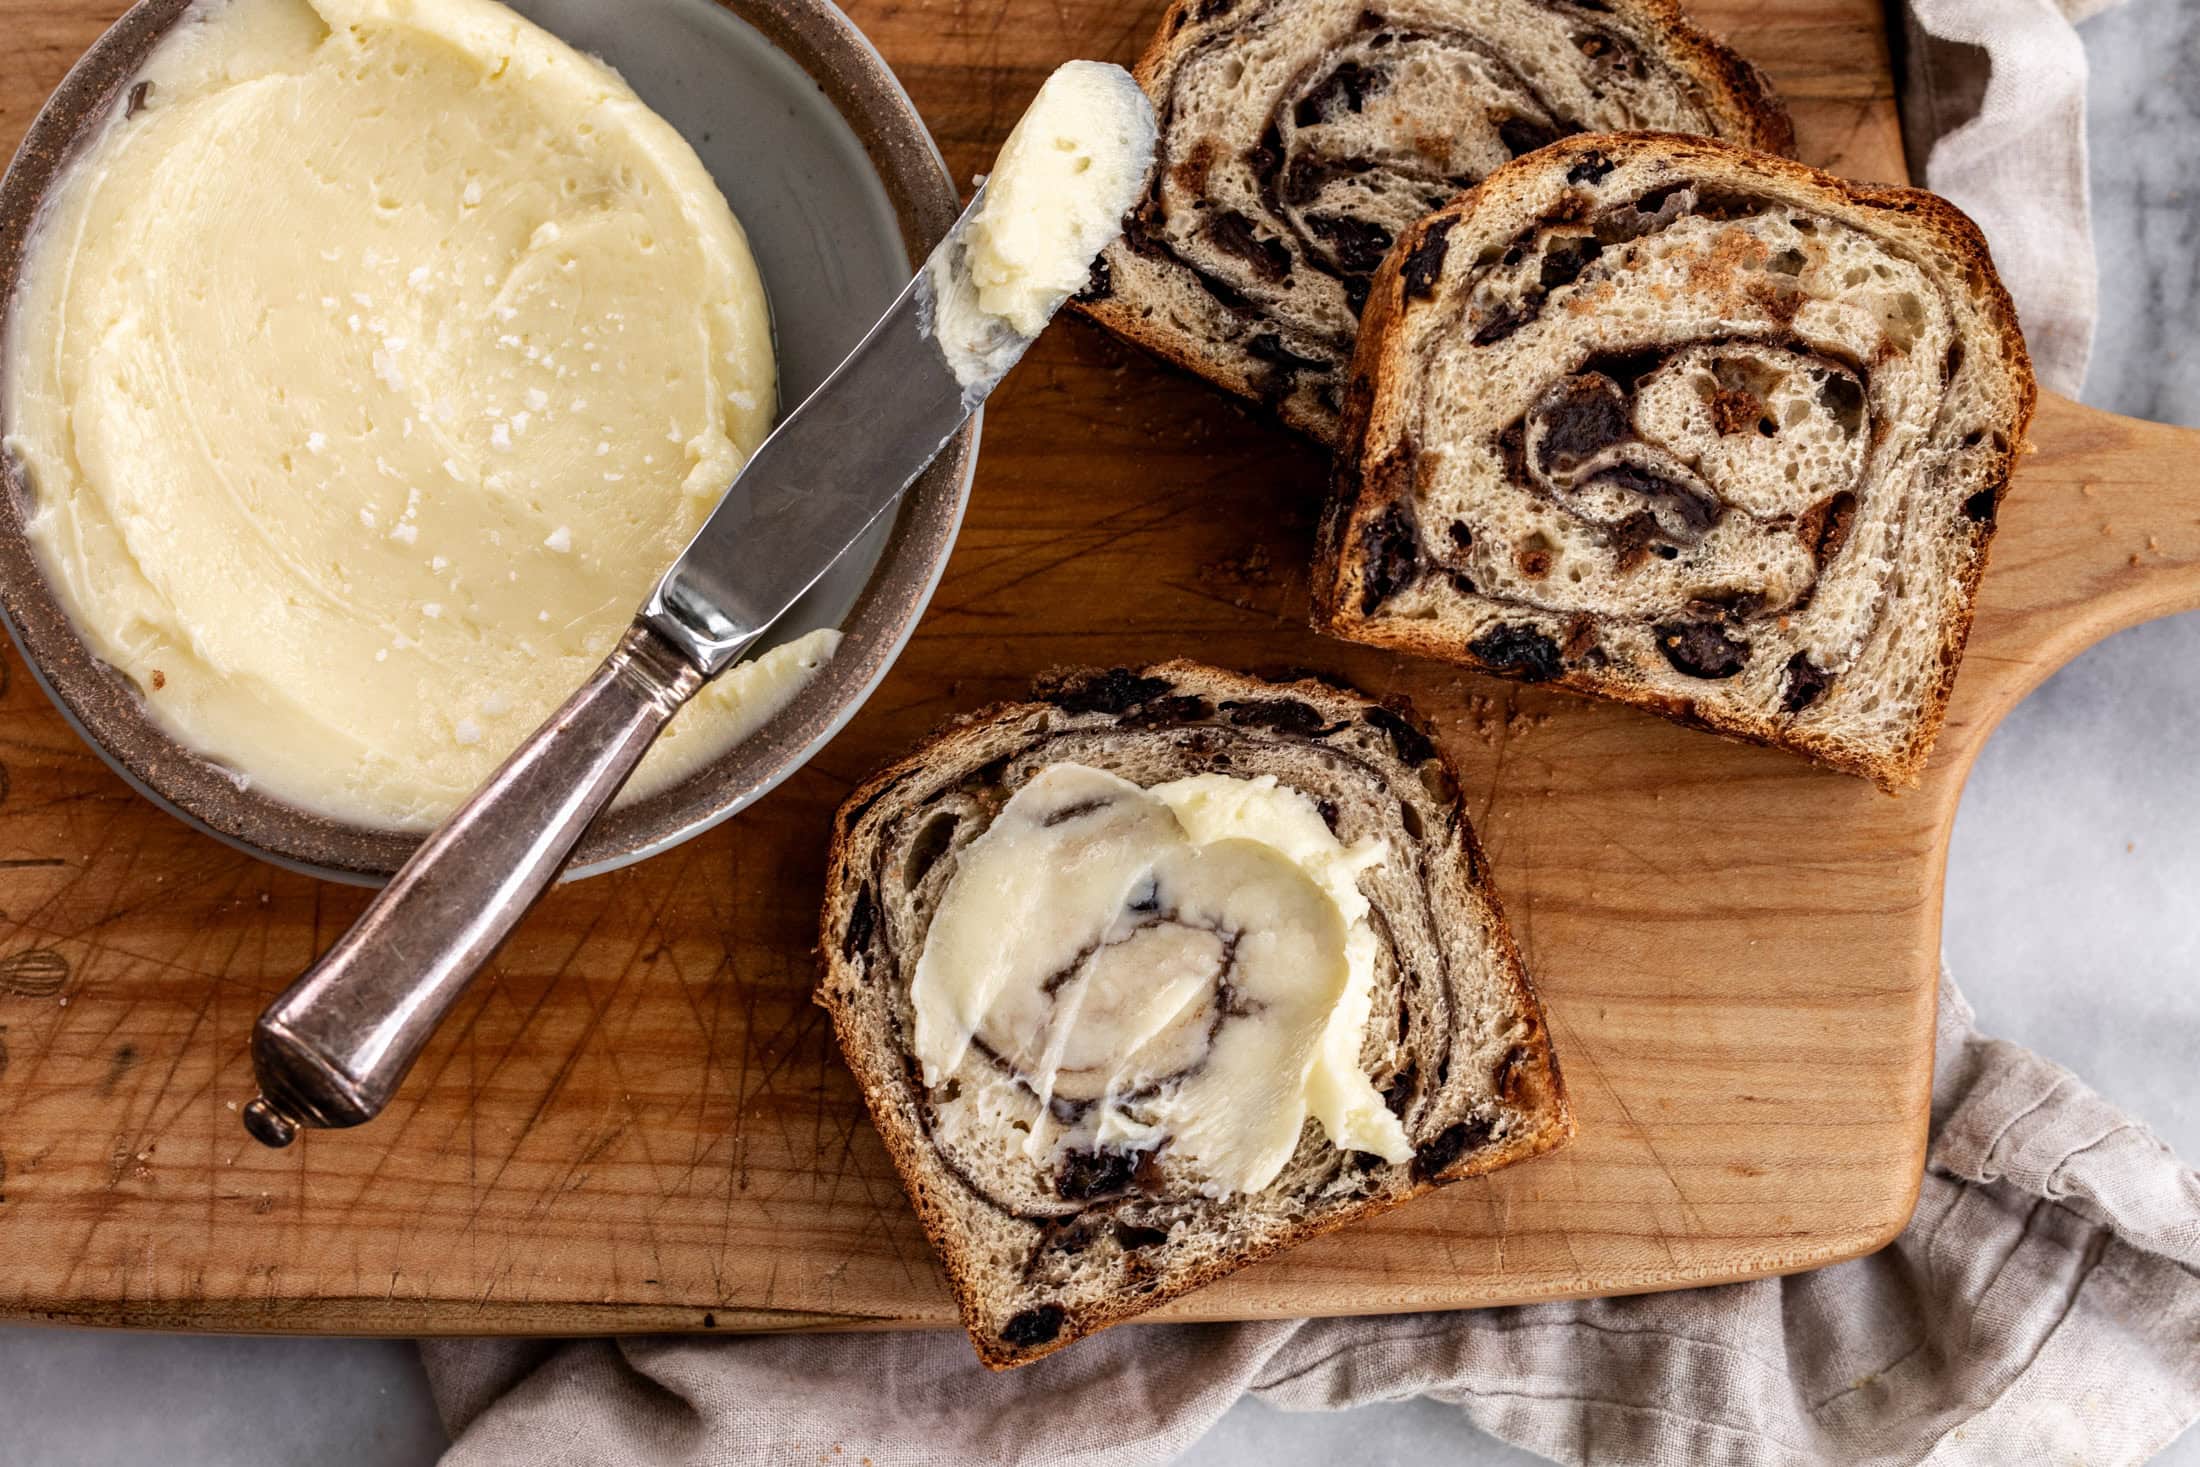
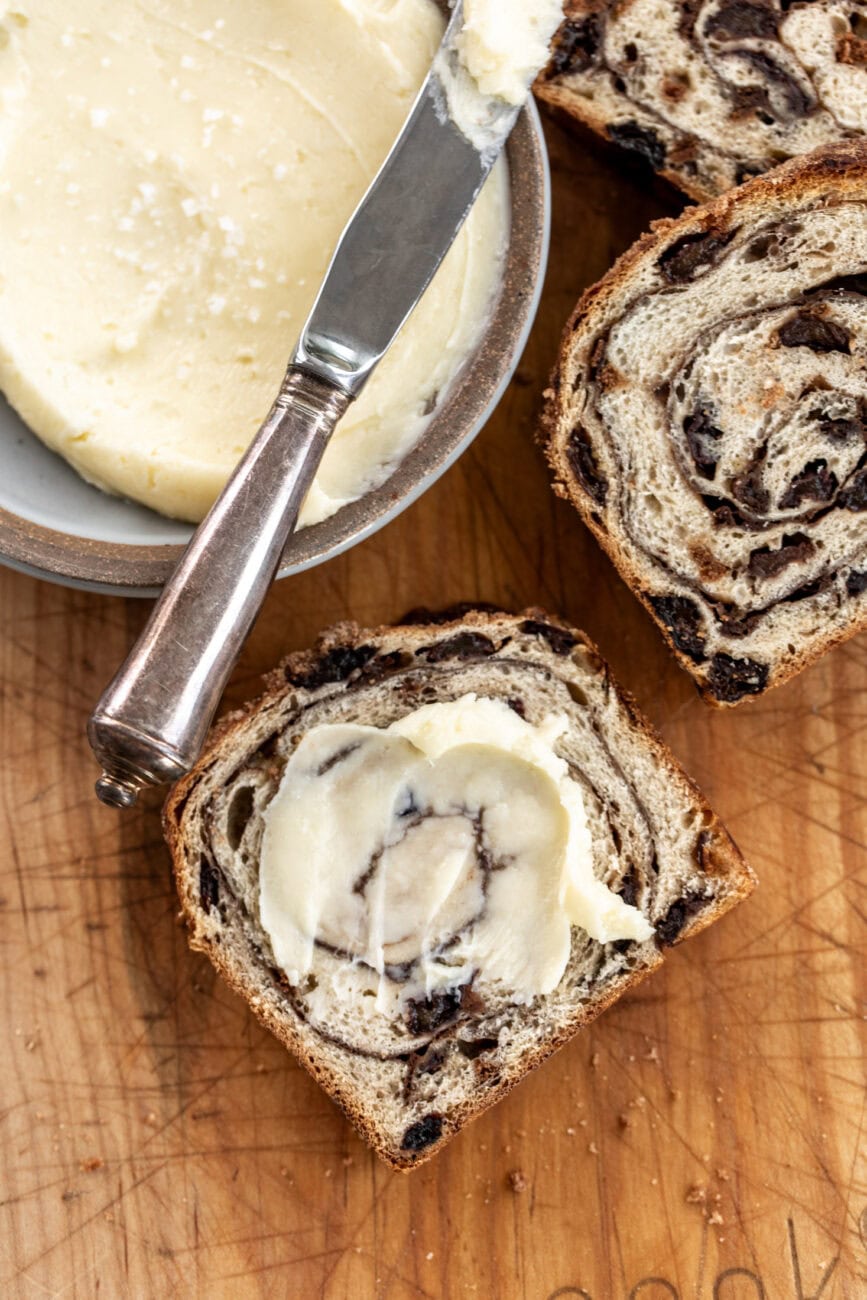
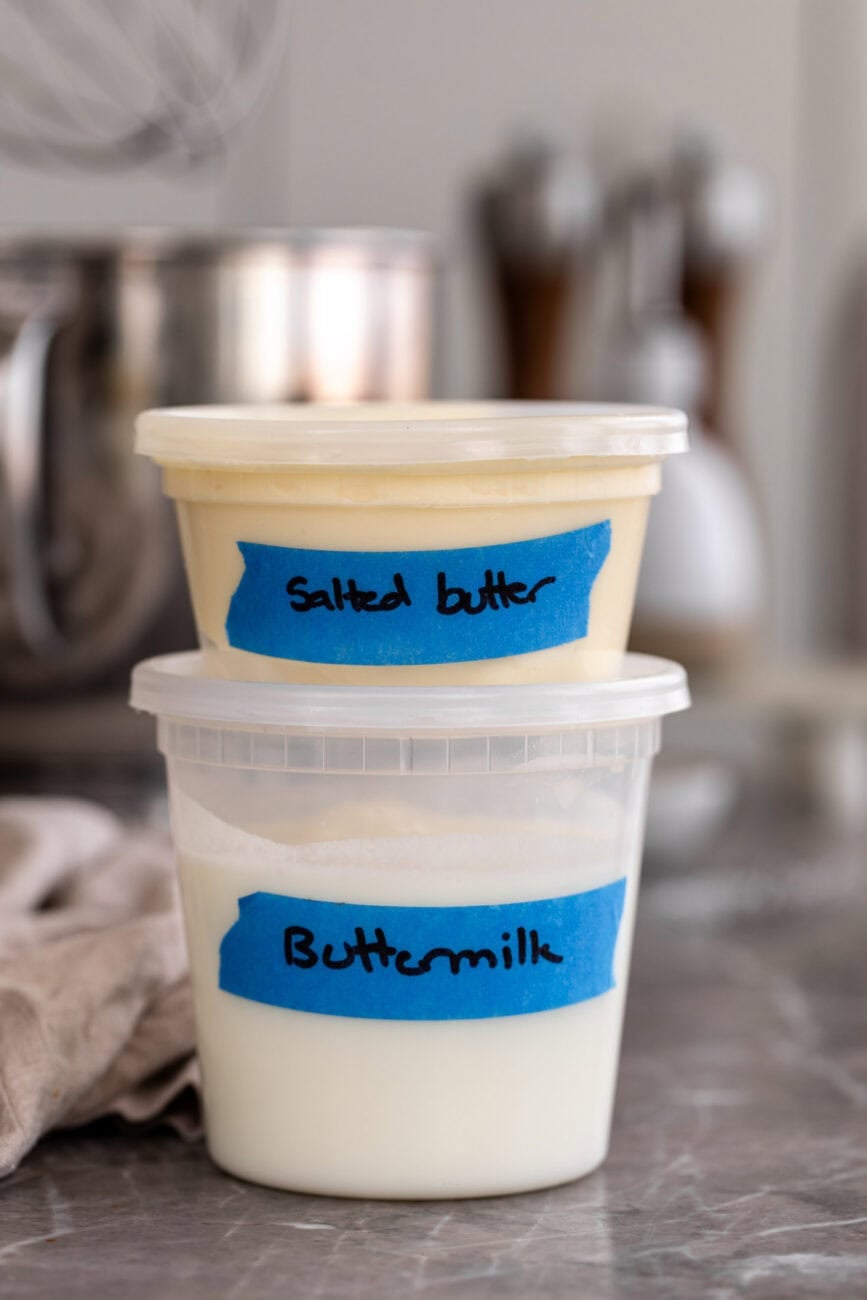
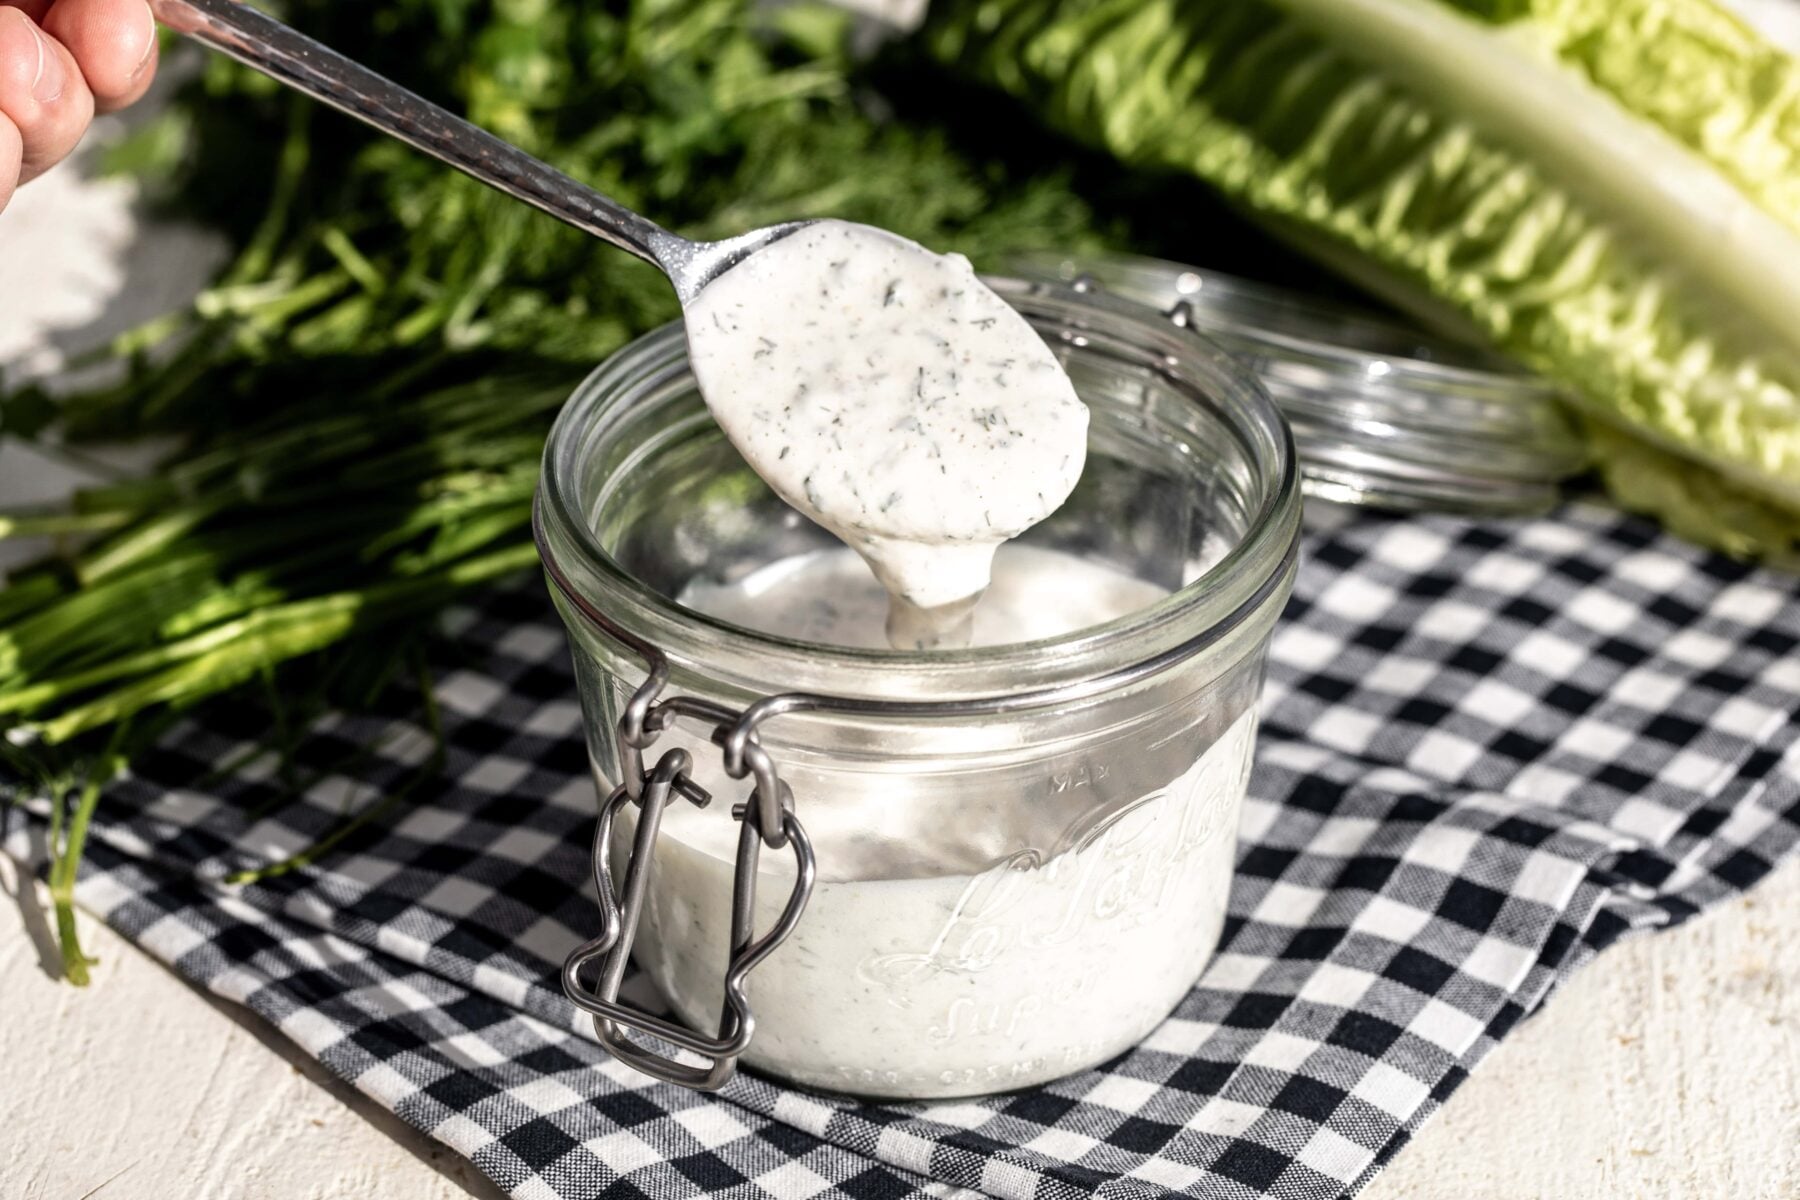
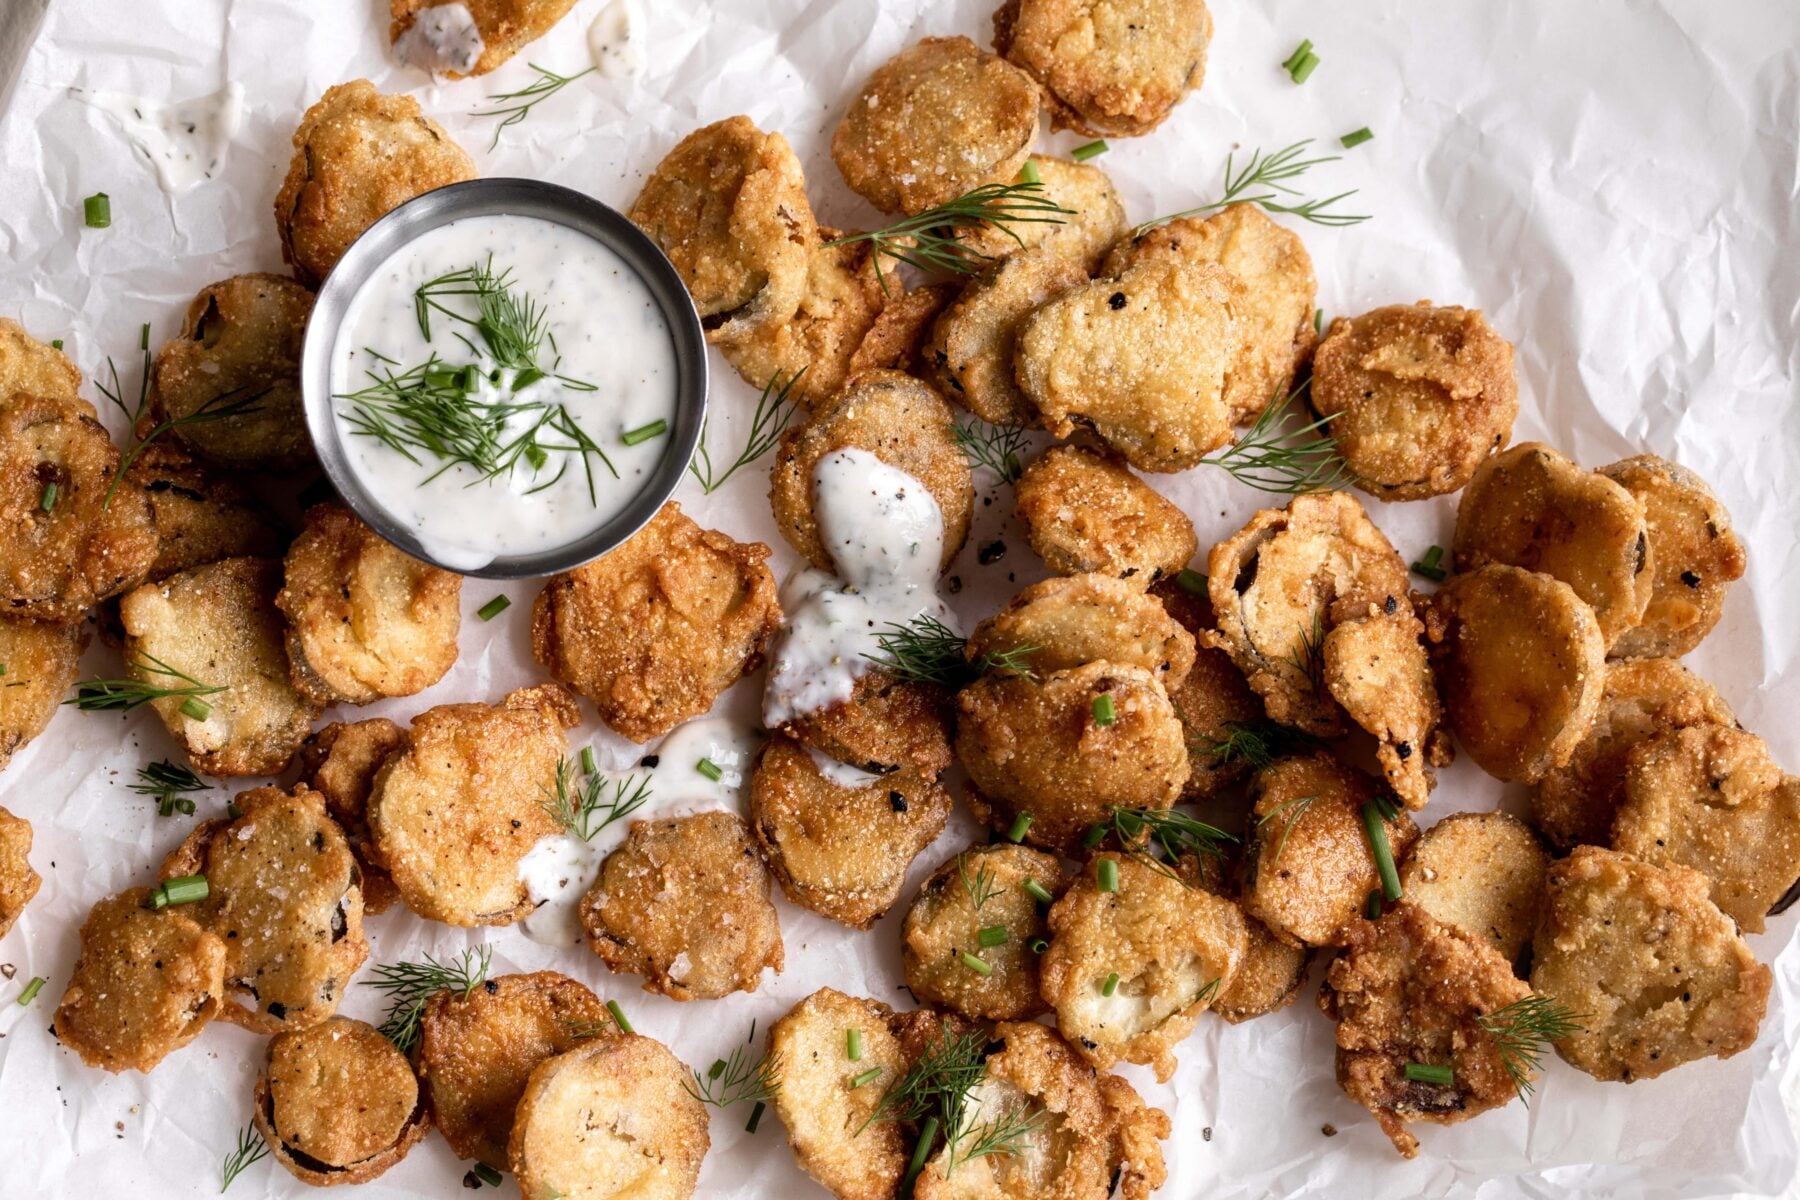
Once the sweet butter is made (butter made from cream) you can add your own twist to it – add salt to make salted butter or add herbs and spices to make different compound butters! One of my favorite byproducts of making my own butter is the buttermilk byproduct that can be used in various recipes like a crispy buffalo fried chicken sandwich, fluffy buttermilk biscuits or homemade buttermilk ranch.
Why You’ll Love This Recipe
- Flavor. Homemade butter tastes incredibly fresh!
- Cheaper alternative. Butter prices have been high so I have enjoyed making my own from heavy cream. A bonus is the buttermilk by-product!
- Easy variations. Once you make your own butter, you can put your own spin on it with a variety of compound butter flavors or stick with regular unsalted butter!
Key Ingredients in This Recipe
- Heavy cream – The best cream for making homemade butter is a high-quality heavy cream with a high fat content (ideally around or above 40% butterfat) for the best flavor and texture.
- Flake sea salt – While this is an optional addition, I like adding a bit of salt to create salted butter.
A full ingredient list with exact amounts can be found in the recipe card below.
Unsalted butter vs. Salted
Unsalted butter is made with just the sweet cream and nothing else. If you are adding salt to your homemade butter, it will act as a preservative and help give it a longer shelf life. I generally prefer to use unsalted butter for cooking and baking (opting to add salt to the recipe itself as needed) and reserving salted butter for spreading directly on bread.
Special Equipment
Stand mixer – This method is pretty hands-off and not too messy! While I love using a stand mixer you can easily make butter in a food processor or hand crank jar as well.
How to Make Homemade Butter in a Stand Mixer (Step-by-step)
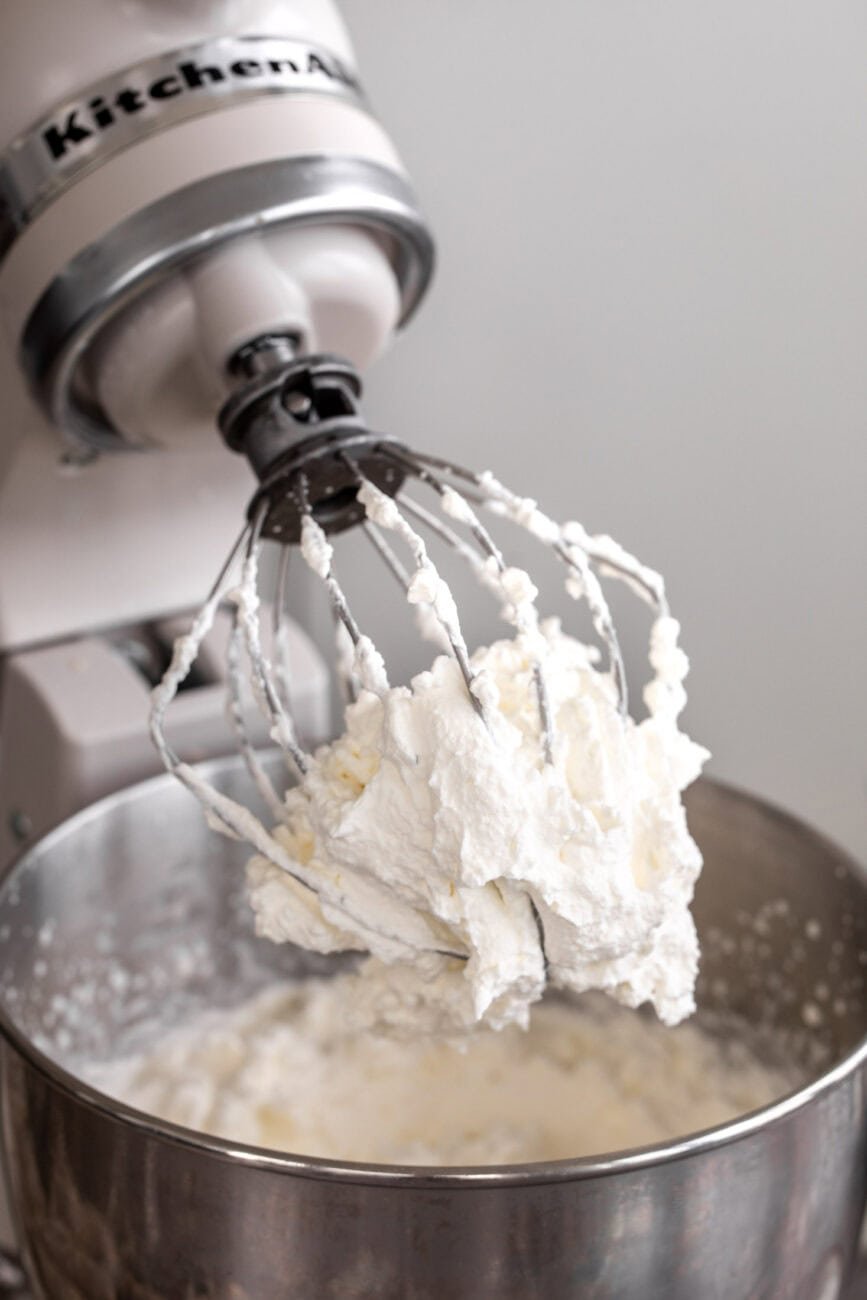
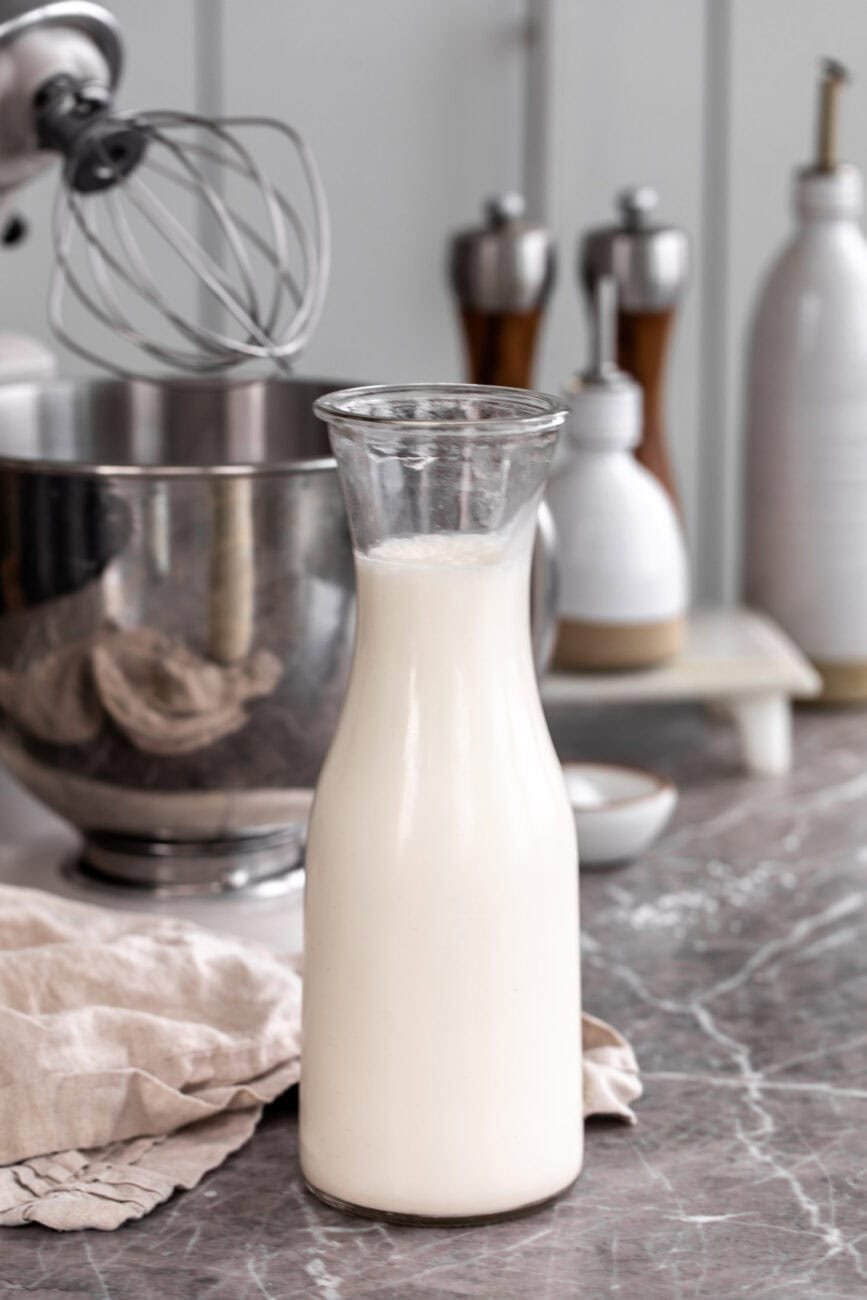
Add the heavy cream to the bowl of a stand mixer fitted with the whisk attachment. Start on the slowest setting, then gradually increase the speed. Continue to whip until soft peaks form, then continue until stiff peaks form, about 6 minutes.
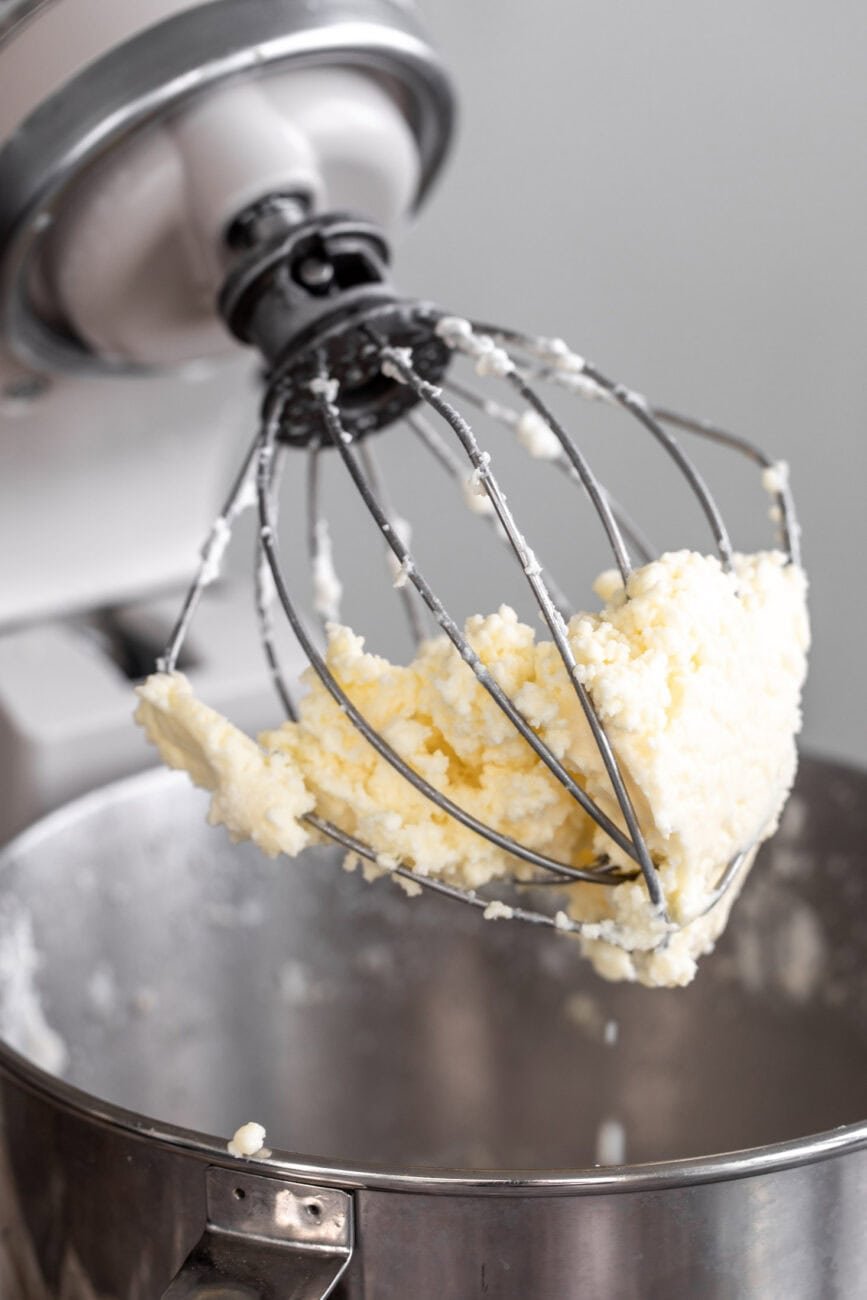
At this point I recommend putting a dish towel over the mixer to keep splatter to a minimum. Keep whisking the heavy cream at high speed, keeping an eye out for the butter solids and buttermilk to separate, about an additional 4 to 5 minutes. Once they separate, pour the buttermilk into another bowl and reserve for another use.
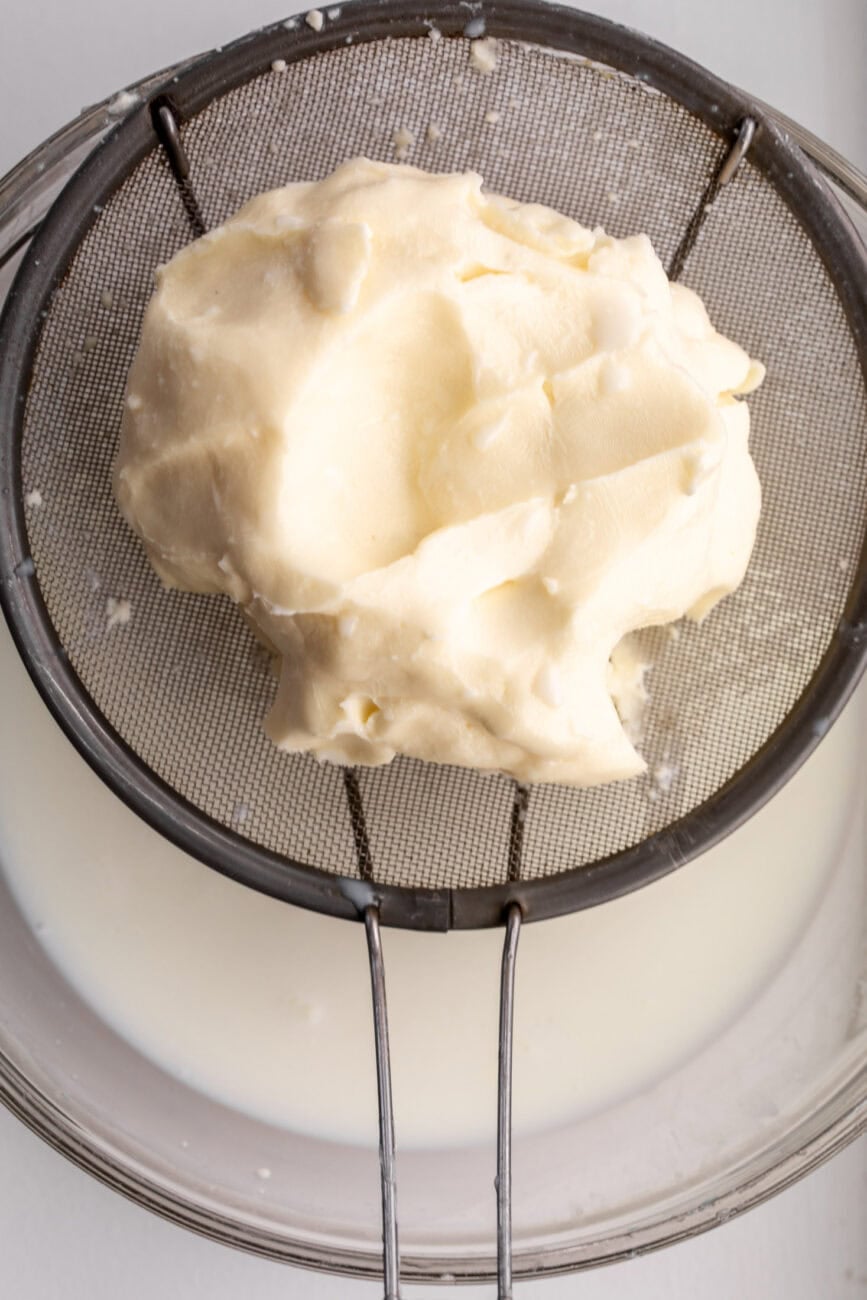
Gather the butter solids together and press through a fine mesh strainer pressing out and removing any leftover buttermilk (this helps the butter to last longer!).
Add ½ cup (118g) of ice water to a bowl. Add the butter and knead or press the butter to agitate it and rinse any remaining buttermilk. Once the water is cloudy, pour it out then repeat the process until the water is clear after agitating the butter.
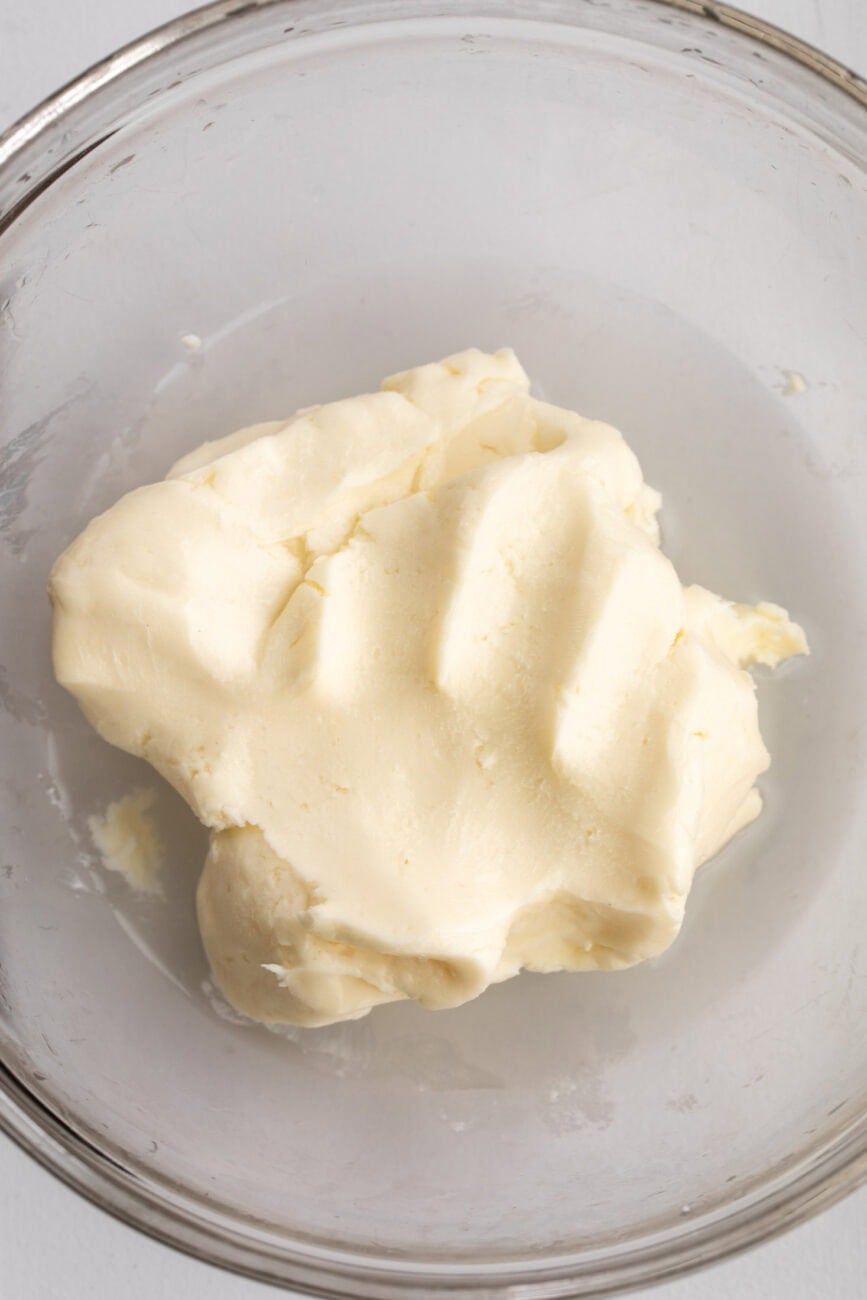
At this point you can either use it as is for unsalted butter, or return it to the mixer and add the salt, mixing until just combined. (You can also add your flavor variations at this point.) Store refrigerated in an airtight container for up to 2 to 3 weeks.
Variations on homemade butter (compound butter)
- Herbs and aromatics. Try adding herbs like chopped chives and parsley alongside garlic or lemon zest. You can even add alliums like in this ramp butter.
- Spices. Try adding spices like chili, garlic powder or onion powder. Chipotle powder and lime zest is a great pairing!
- Miso. I love adding white miso paste to my compound butters! Use it on these miso butter sweet potato spears.
How to Store Homemade Butter
Store refrigerated in an airtight container for up to 2-3 weeks. If storing at room temperature on the counter, I recommend using a butter crock. Salted butter slows the butter from going rancid, and it will last longer.
Uses for Buttermilk By-Product
FAQ – Frequently Asked Questions
What is the best cream for homemade butter?
Look for a high-quality heavy cream with a high fat content (ideally around 40% or higher).
What are the stages to look for when making homemade butter?
First the cream will form soft peaks, then stiff peaks, then the butter solids and the buttermilk will separate! You want to watch for that separation to happen to stop the mixer!
Why is washing homemade butter important?
Leftover buttermilk in the solid butter can cause the butter to ferment and spoil at a quicker rate. Rinsing it gives it a longer shelf life and also leaves you with deliciously rich butter!
How long does homemade butter last?
Store refrigerated in an airtight container for up to 2-3 weeks. If storing at room temperature on the counter, I recommend using a butter crock. Salted butter slows the butter from going rancid, and it will last longer.
How can I store homemade butter on the counter?
If you want to store homemade butter on the counter so it is at room temperature I recommend using a butter crock. It creates an airtight seal, which keeps it fresh for up to 1 month.
Is it worth it to make homemade butter?
Personally, I think so! I love the flavor, and it’s a very hands off process if you are using a stand mixer. 4 cups (946ml) of cream typically cost about $7.50 resulting in 2 cups (454g) of butter (which typically would cost anywhere from $6.50 for 1 pound of sweet cream butter to $12 for European-style butter at the store) plus you get about 1½ cups (340g) – 2 cups (454g) of buttermilk in the process, which would cost about $2.50.
Other techniques to master:
Made your own butter? Be sure to rate the recipe and drop a comment below! Your feedback means everything (and helps others find it too)!
How to Make Butter in a Stand Mixer (1 Ingredient!)
Rate this Recipe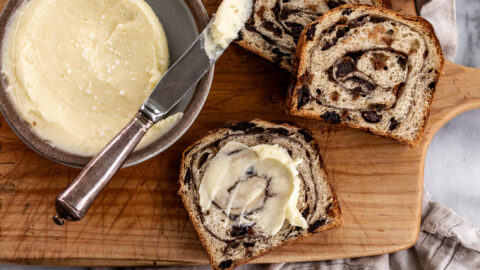
Equipment:
- Stand mixer (or hand crank mixer or food processor)
Ingredients:
- 4 cups heavy whipping cream
- 1 teaspoon flake salt optional
Instructions:
- Add the heavy cream to the bowl of a stand mixer fitted with the whisk attachment. Start on the slowest setting, then gradually increase the speed. Continue to whip until soft peaks form, then continue until stiff peaks form, about 6 minutes.
- At this point I recommend putting a dish towel over the mixer to keep splatter to a minimum. Keep whisking the heavy cream at high speed, keeping an eye out for the butter solids and buttermilk to separate, about an additional 4 to 5 minutes. Once they separate, pour the buttermilk into another bowl and reserve for another use.
- Gather the butter solids together and press through a fine mesh strainer pressing out and removing any leftover buttermilk (this helps the butter to last longer!).
- Add ½ cup (118g) of ice water to a bowl. Add the butter and knead or press the butter to agitate it and rinse any remaining buttermilk. Once the water is cloudy, pour it out then repeat the process until the water is clear after agitating the butter.
- At this point you can either use it as is for unsalted butter, or return it to the mixer and add the salt, mixing until just combined. (You can also add your flavor variations at this point.) Store refrigerated in an airtight container for up to 2 to 3 weeks.
Notes:
Look for a high-quality heavy cream with a high fat content (ideally around 40% or higher).
Nutrition:
Calories: 1618kcal | Carbohydrates: 14g | Protein: 14g | Fat: 172g | Saturated Fat: 109g | Polyunsaturated Fat: 7g | Monounsaturated Fat: 43g | Cholesterol: 538mg | Sodium: 1291mg | Potassium: 452mg | Sugar: 14g | Vitamin A: 6997IU | Vitamin C: 3mg | Calcium: 315mg | Iron: 0.5mg
DID YOU MAKE THIS?
TAG ME ON INSTAGRAM TO BE FEATURED ON MY STORIES! @cookingwithcocktailrings
I wanted to see how making my own butter would affect my cookie recipes. It was so easy to make and it actually made a huge difference in the taste and loft of my cookies. I can’t wait to use it in other recipes.
When my father was a boy back in 1919, he lived on a farm and each afternoon when he came home from school, one of his chores was to churn butter. This recipe provides a much easier way and the taste is exceptional!