
Juicy Pork & Chive Pan-Fried Dumplings
jump toRECIPE
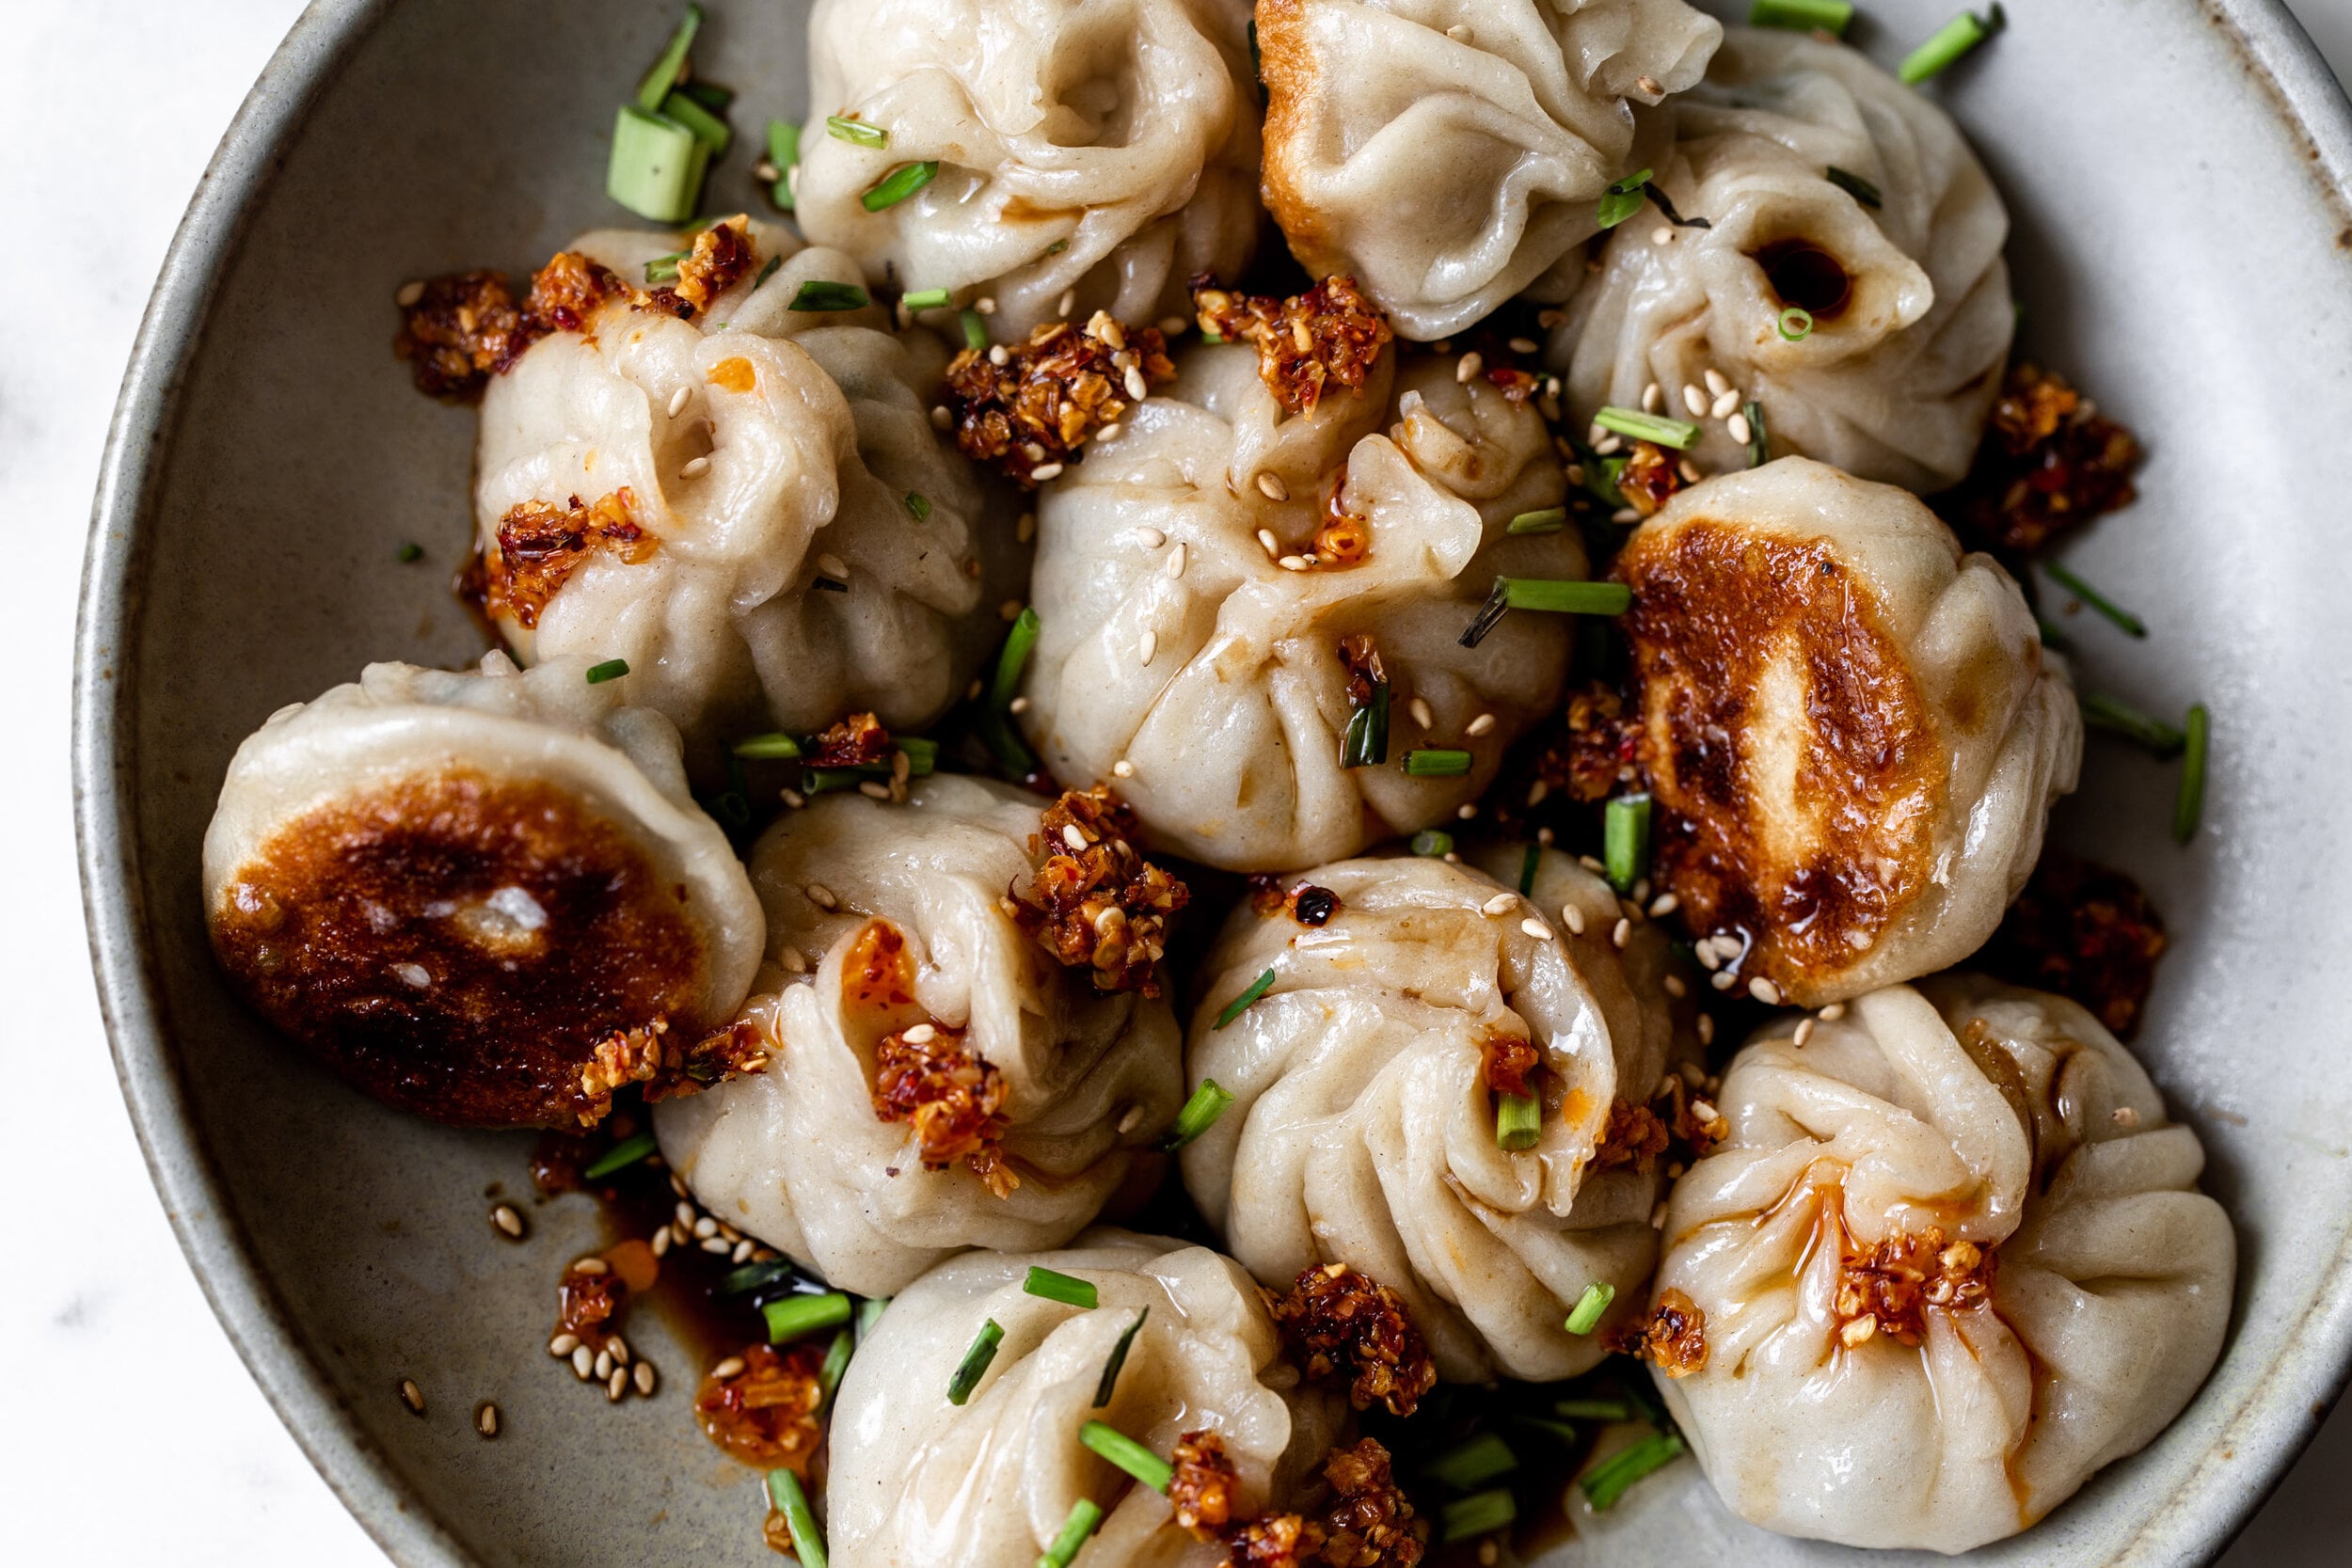
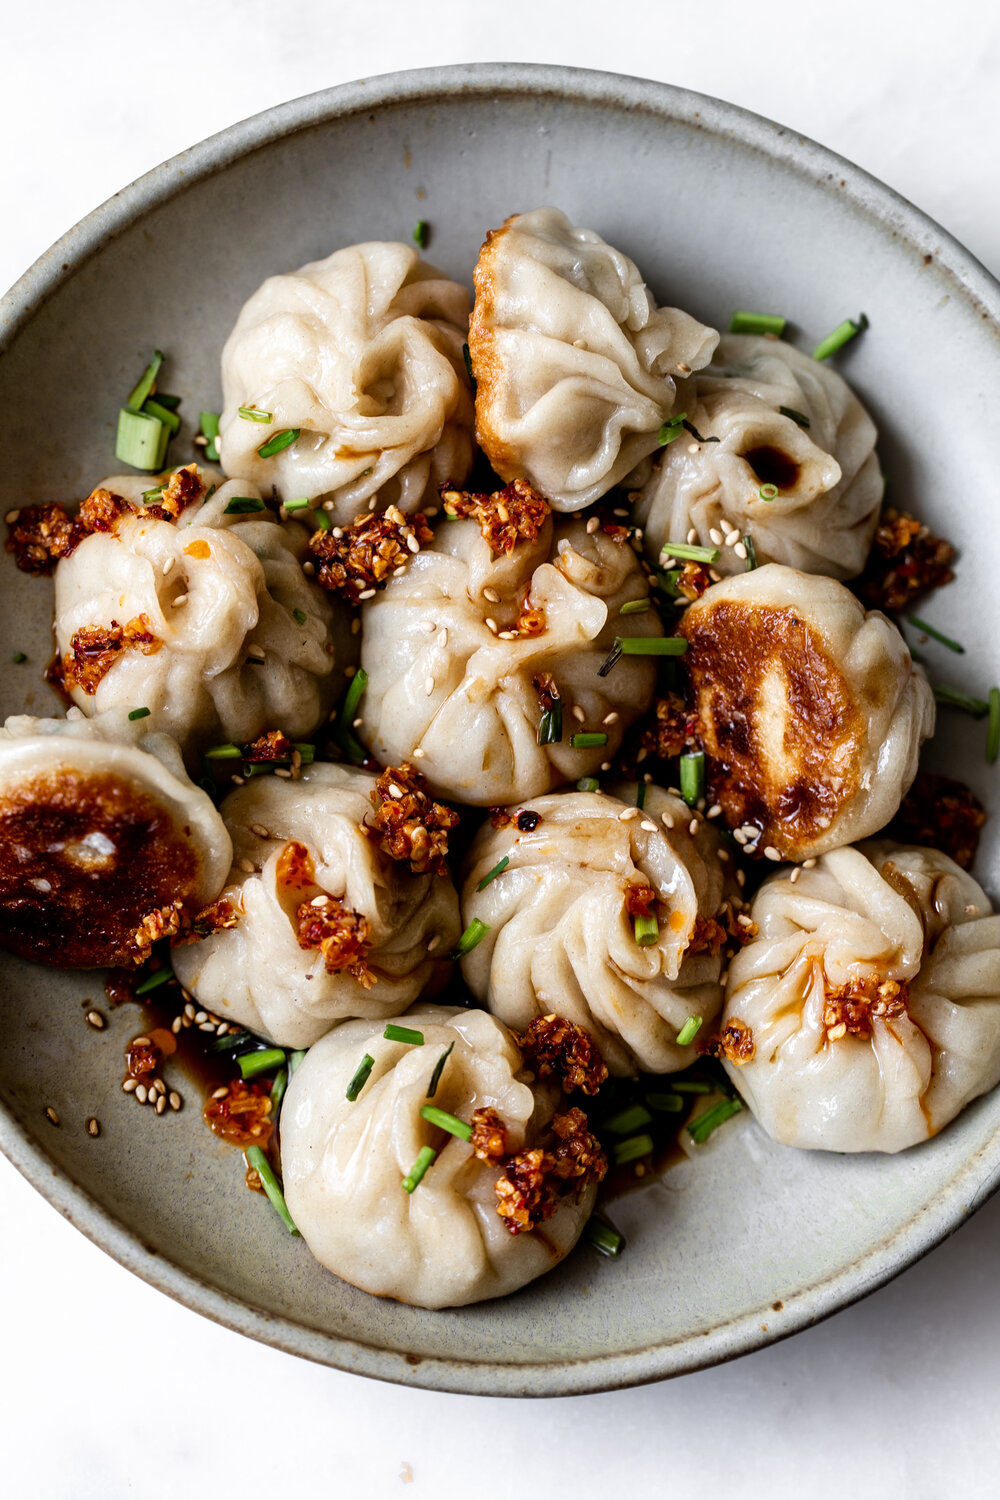
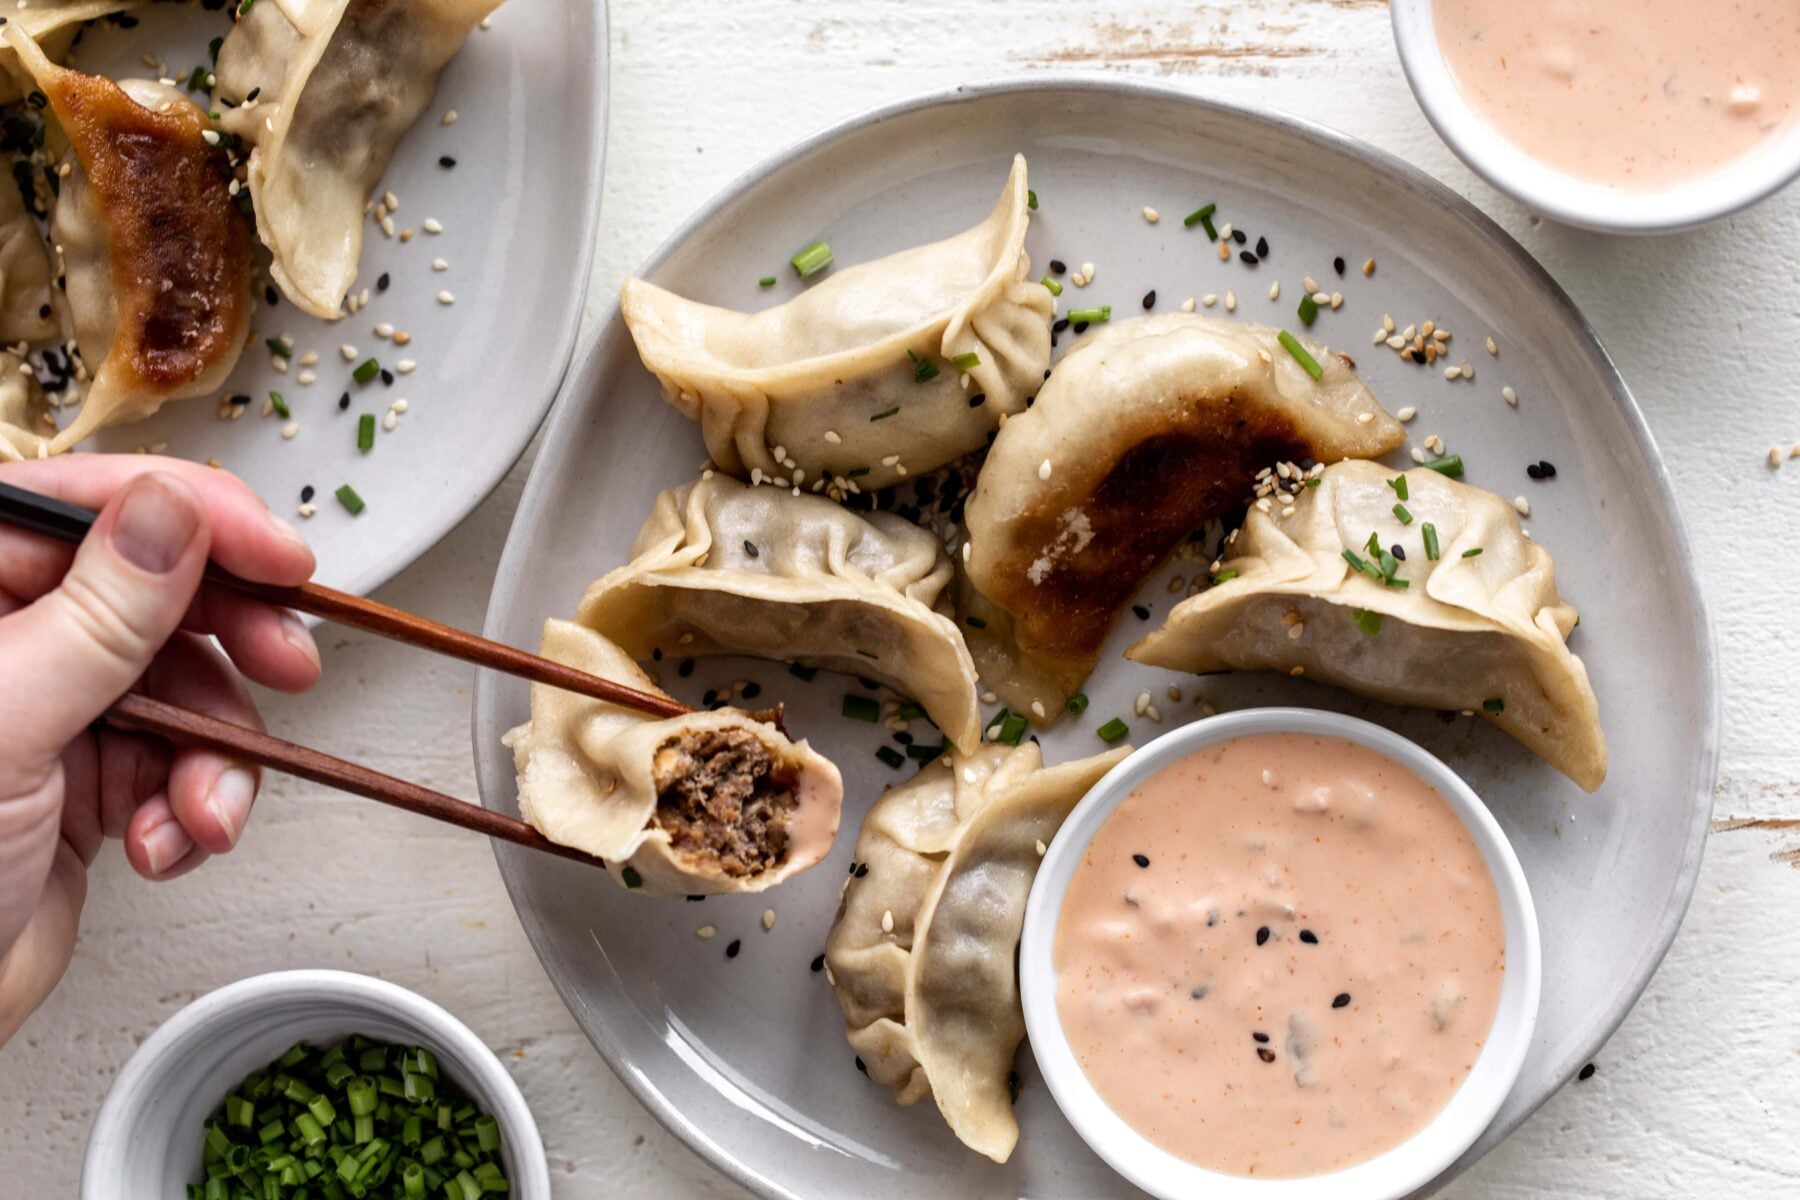
These juicy pork and chive dumplings are pan-fried until golden and crispy on the bottom then steamed, with a tender wrapper that gives way to a savory, yet simple filling of ground pork, fresh chives, cabbage, and ginger. Inspired by the texture of sheng jian bao, these pan-fried pork dumplings combine a crisp-chewy exterior with a rich, juicy center. I like to serve them drizzled with soy sauce or black vinegar and topped with extra chives, sesame seeds, and a spoonful of spicy chili crisp. Perfect as an appetizer, snack, or part of a homemade dumpling night, they deliver restaurant-quality flavor right from your skillet. If you enjoy these flavors, I recommend giving these pork wontons with peanut and chili sauce and sweet and sour ground lamb dumplings.
Why You’ll Love This Recipe
- Crispy bottom & juicy texture – Golden, crispy bottoms with a tender wrapper and juicy pork filling.
- Restaurant-quality at home – They taste like your favorite dumpling spot but are totally doable in your own kitchen.
- Freezer-friendly – Make a big batch and freeze for easy weeknight meals.
Key Ingredients in Juicy Pork & Chive Pan Fried Dumplings
- Ground pork – Ground pork typically comes from minced pork shoulder meat and is incredibly versatile.
- Diced chives – The chives add a subtle, herby flavor in the filling though diced green onions work as well.
- Cabbage – I recommend using a mandolin to finely shred the cabbage. If any pieces are cut thicker it can make it difficult to fill the dumplings.
- Ginger – Peel away the skin of the ginger with a spoon, as it helps to navigate the uneven texture before grating it using a microplane.
- Rice vinegar – A bit of rice vinegar adds a bit of acidity to the filling.
A full ingredient list with exact amounts can be found in the recipe card below.
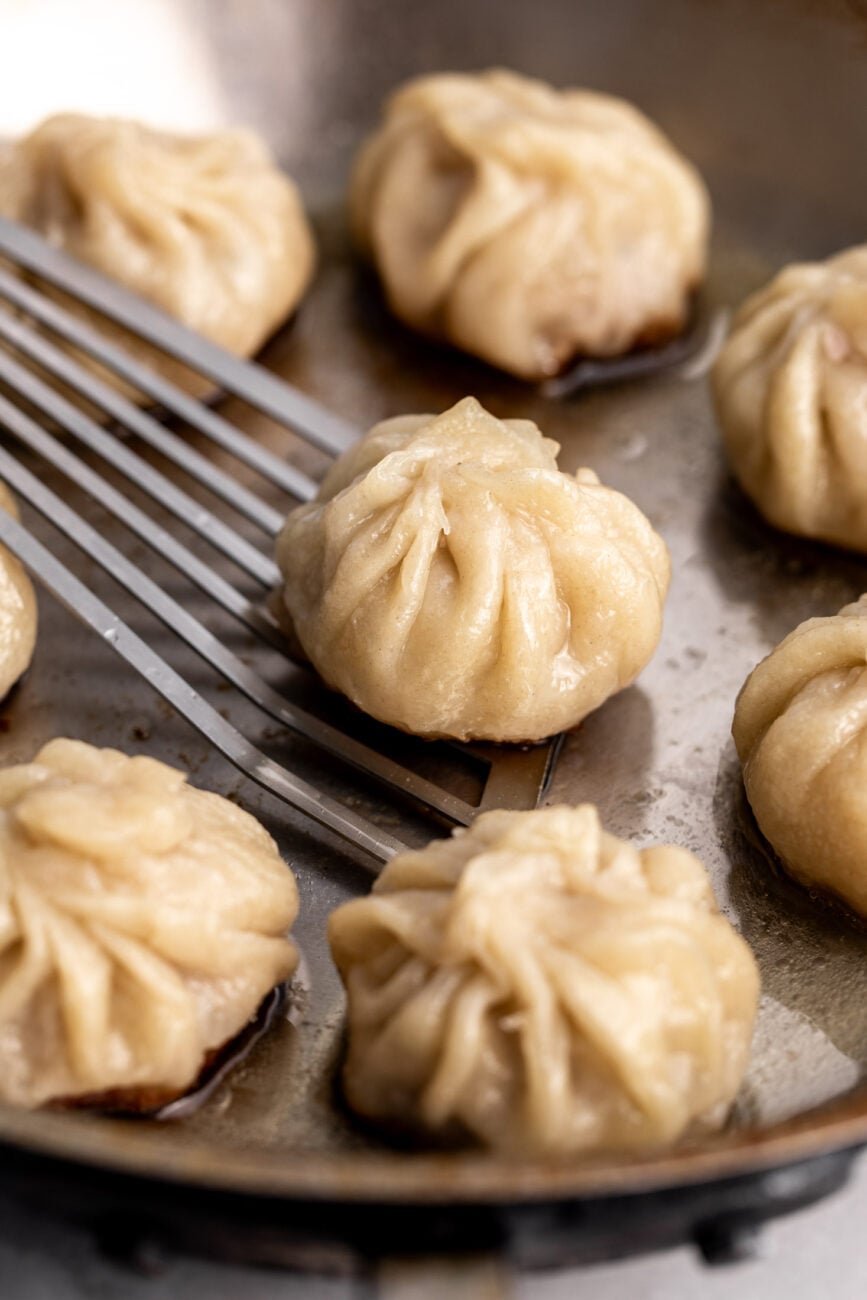
How to Pan-Fry Dumplings
First the folded dumplings are fried until they’re golden brown and crispy on the bottom. Then water is added to the pan and covered so the dumplings steam. The skin will become chewy while the water evaporates and the bottoms of the dumplings easily release from the pan.
Swaps and substitutions
- Pork: Try swapping the ground pork for another lean ground meat like turkey or chicken in this recipe. You can also swap the pork for shrimp – chop it finely for a juicy seafood variation.
- Dumpling wrappers: While you can use store-bought wrappers, these are much more forgiving to fold.
- Chives: Green onions also work great for a more onion-y flavor.
- Steam: You can skip the pan-frying and steam the dumplings in bamboo steamer baskets for a softer, lighter dumpling.
Tips and Tricks for folding dumplings
- Wet the dough with a little water to help the dough stick.
- Make sure you hands are clean when folding the dough around the meat filling.
- To fold them like I have in the photos, I hold the wrapper with the filling in the middle in one hand. Then make the pleats with the first three fingers of my other hand (i’m lefty so I use my left hand to pleat). Turn the dumpling in the right hand as I pull the dough together.
- An easier way is to fold it with the dumpling wrapper on a surface and use your thumb and index fingers of both hands to pull the dough together to make the pleats.
- Once the circle is completed I do a little pinch to make sure it is totally sealed. You don’t want any filling spilling out during cooking. Flatten the top with my thumb to make that top little indent circle.
How to Make Juicy Pork & Chive Pan-Fried Dumplings (Step-by-step)
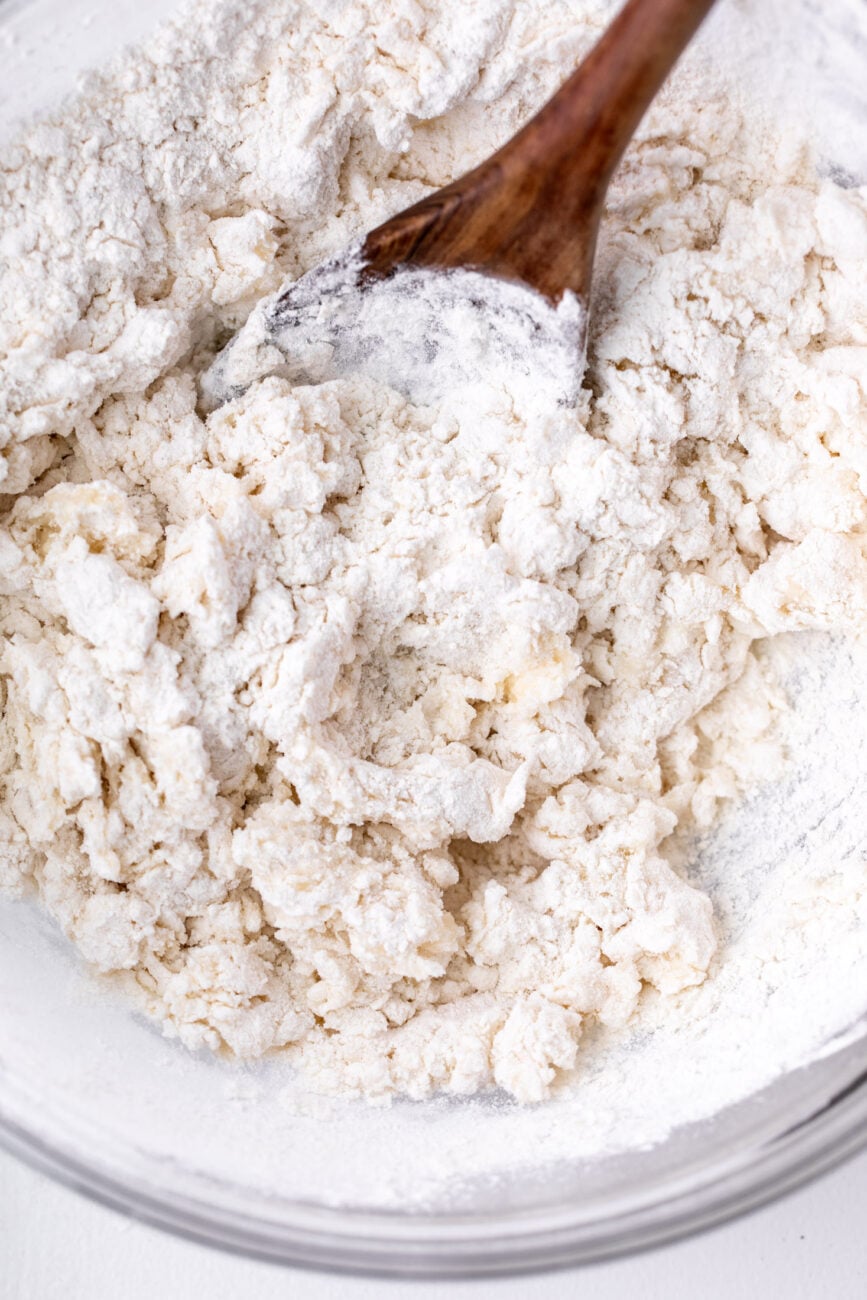
Sift the flour into a medium bowl; set aside. In a separate bowl or liquid measuring cup, combine the boiling water and salt, and stir until the salt is completely dissolved. Slowly stir ½ cup of the hot, salted water into the flour, stirring with a rubber spatula (add additional water one tablespoon at a time if the dough is too dry).
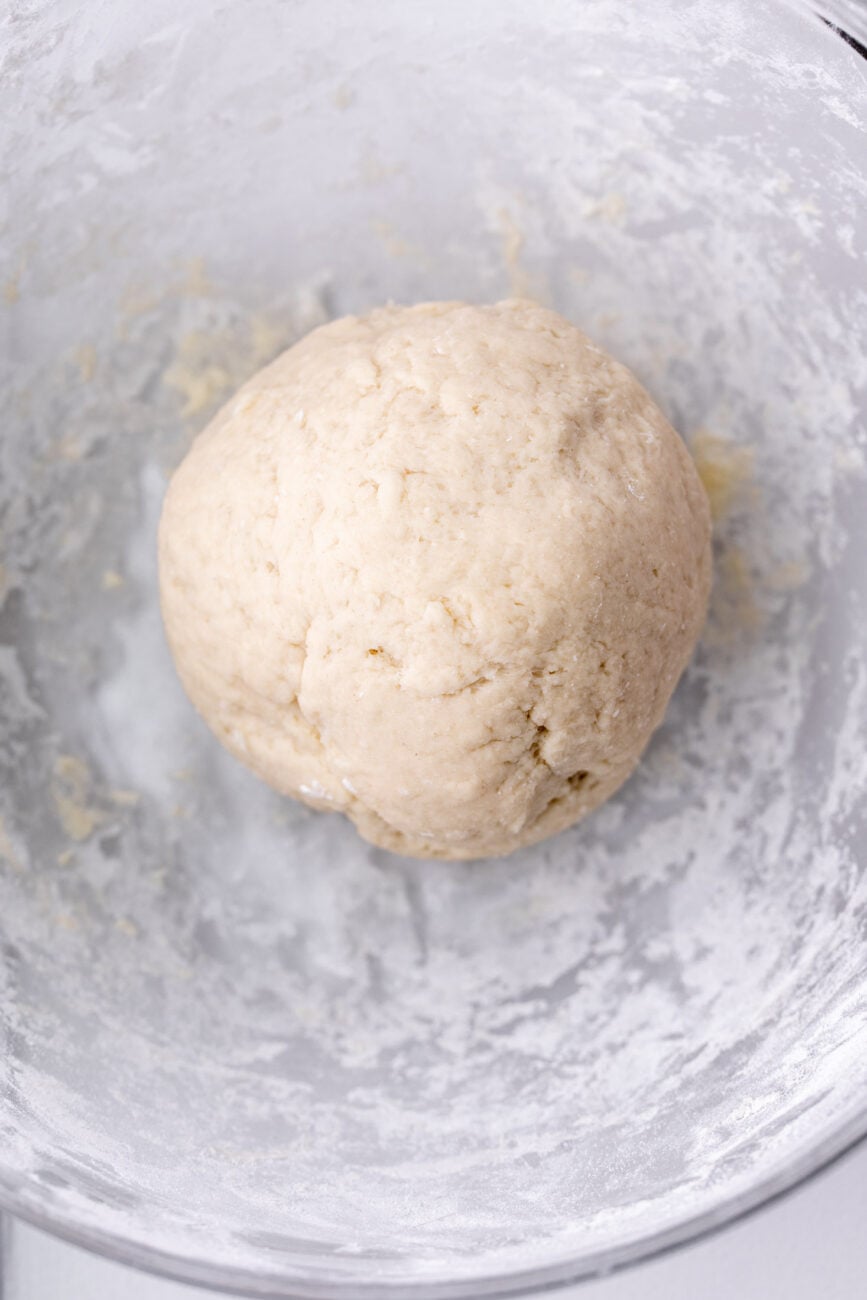
Once the dough begins to come together, use your hands to form the dough into a ball. Transfer the dough to a clean work surface and knead for about 10 minutes, until the dough is smooth and pliable. Cut the dough in half and wrap each with plastic wrap and let sit for 30 minutes.
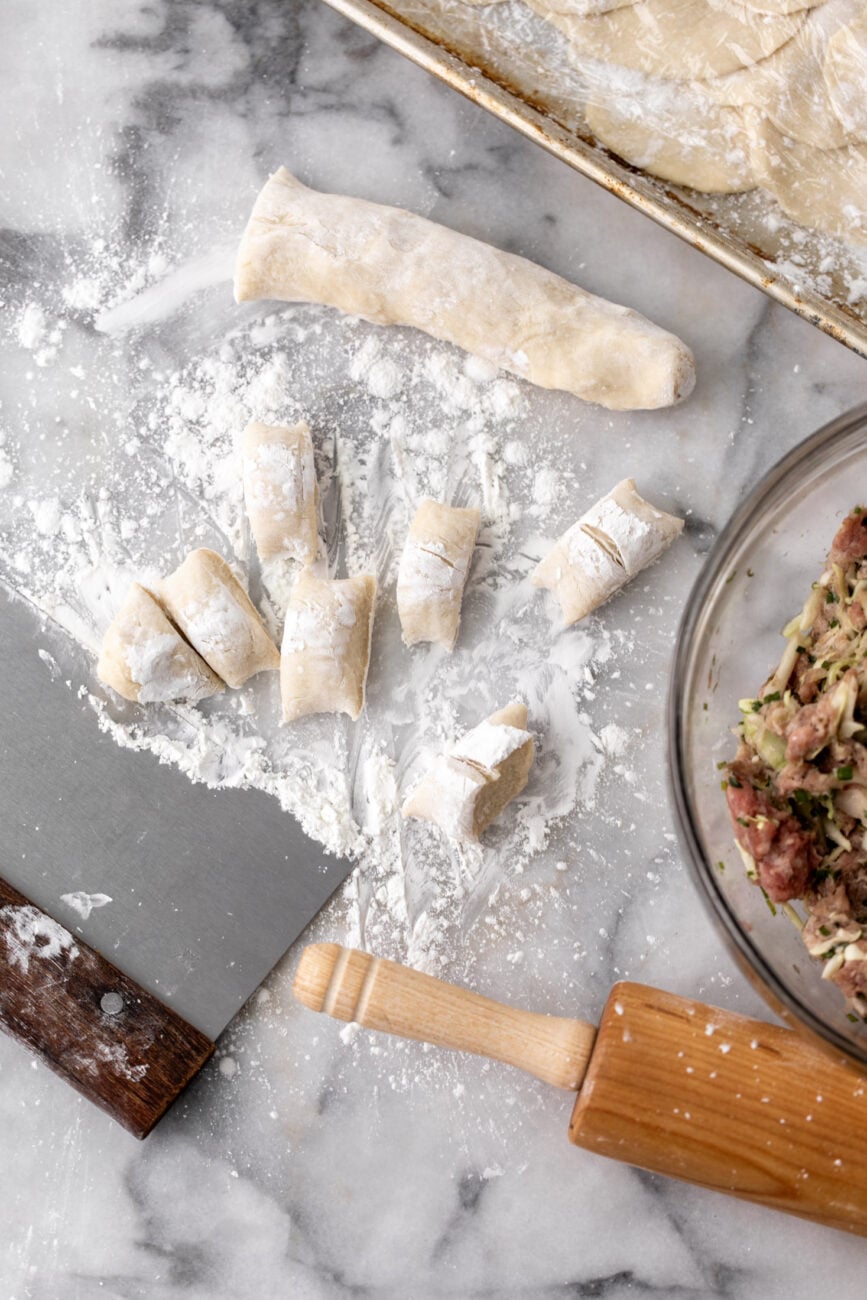
Sprinkle a workspace with cornstarch and unwrap the dough. Roll each half into a long log about 1” in diameter. Cut each log crosswise into 14 one-inch wide pieces. Cover the pieces of dough with a damp kitchen towel so the dough does not dry out.
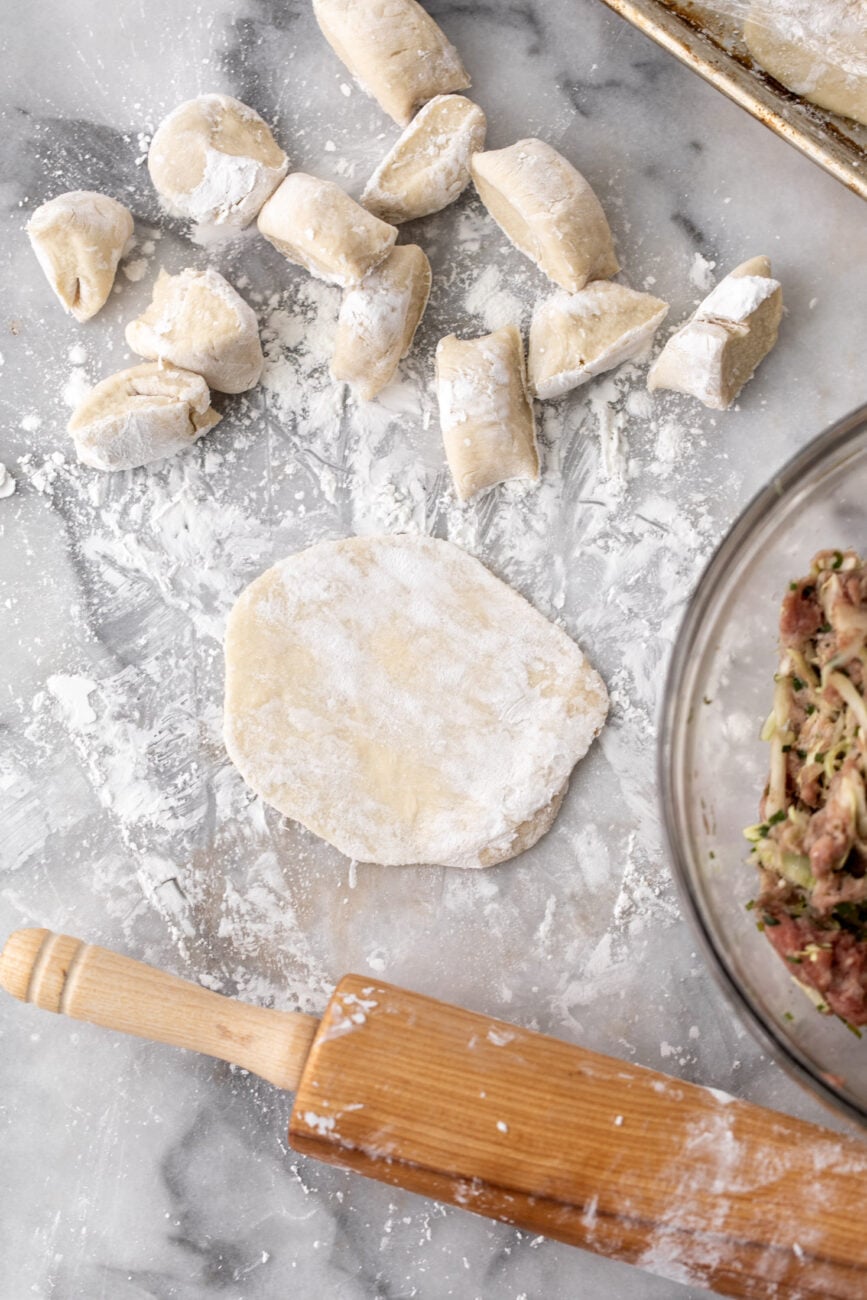
Form each piece into a ball, flatten slightly, then use a rolling pin to roll the dough into a circle. Sprinkle the dough lightly with additional cornstarch if it begins to stick. Use a 3 ½-inch circle cookie cutter to cut a perfect circle from the dough. Remove the excess dough and discard. Sprinkle the finished wrapper lightly with cornstarch.
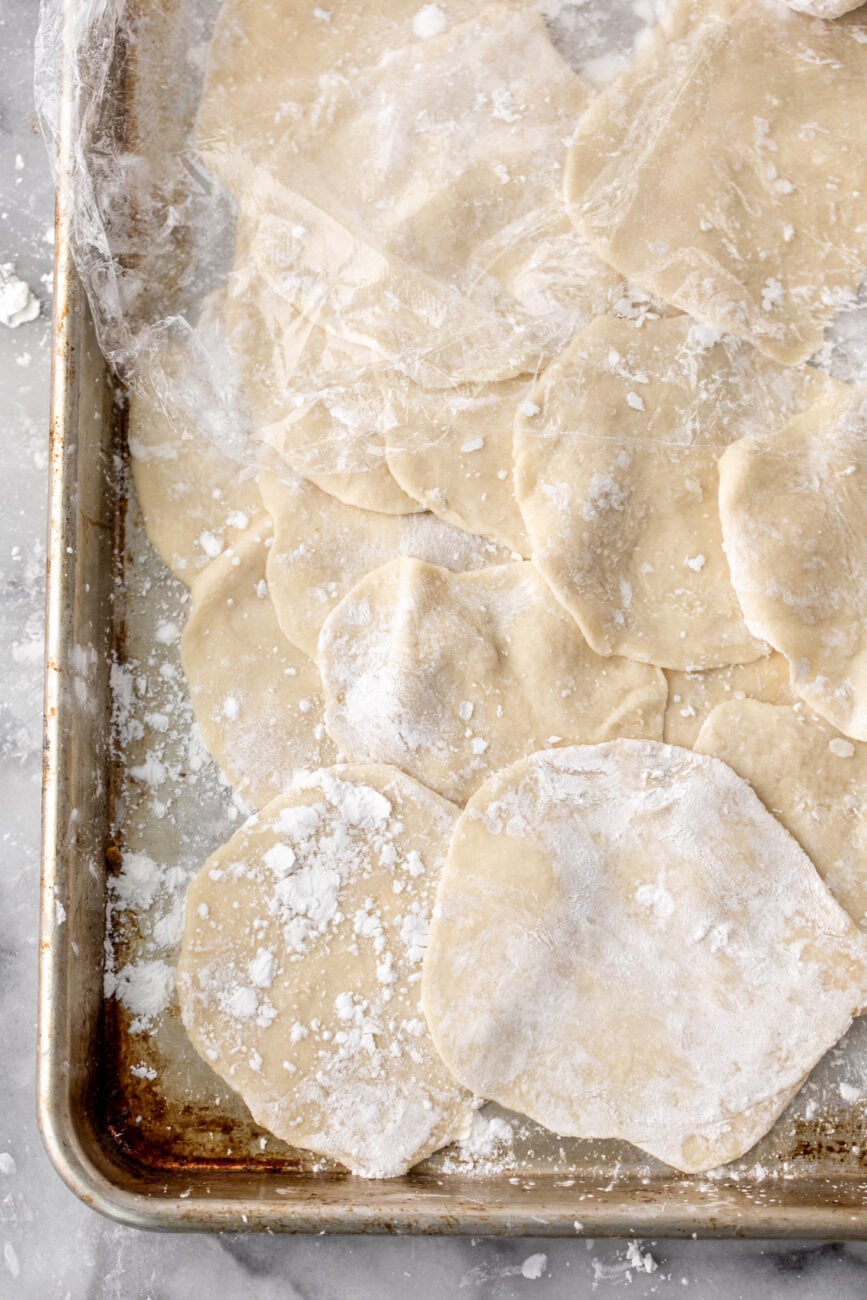
Cover with a damp towel and repeat the process, stacking each wrapper on top of the previous one until all of the dough has been used. Keep the wrappers under the damp towel while combining the filling.
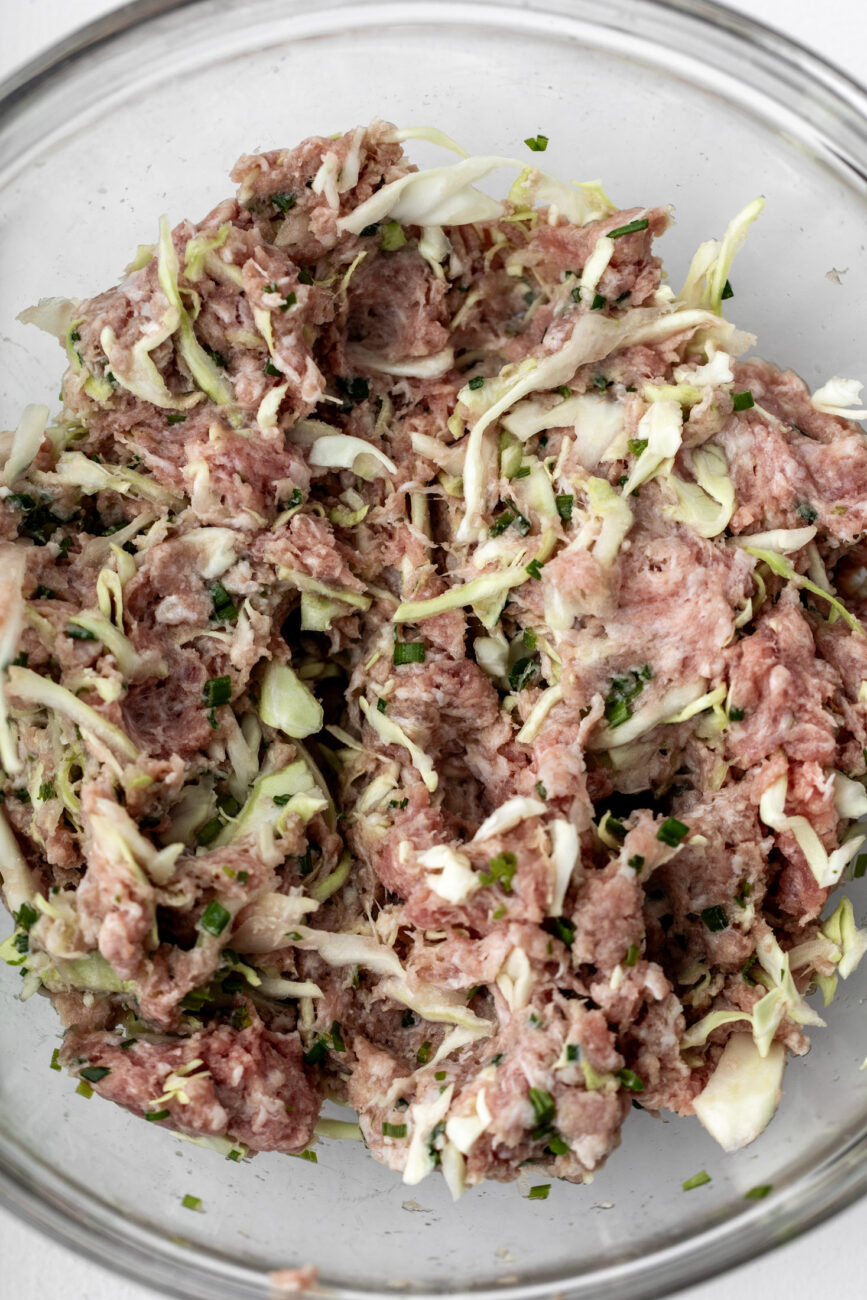
In a large bowl combine the pork, chives, cabbage, ginger and rice vinegar. Season with salt and mix by hand until just combined. Let sit for about 15 minutes so the cabbage wilts just a bit.
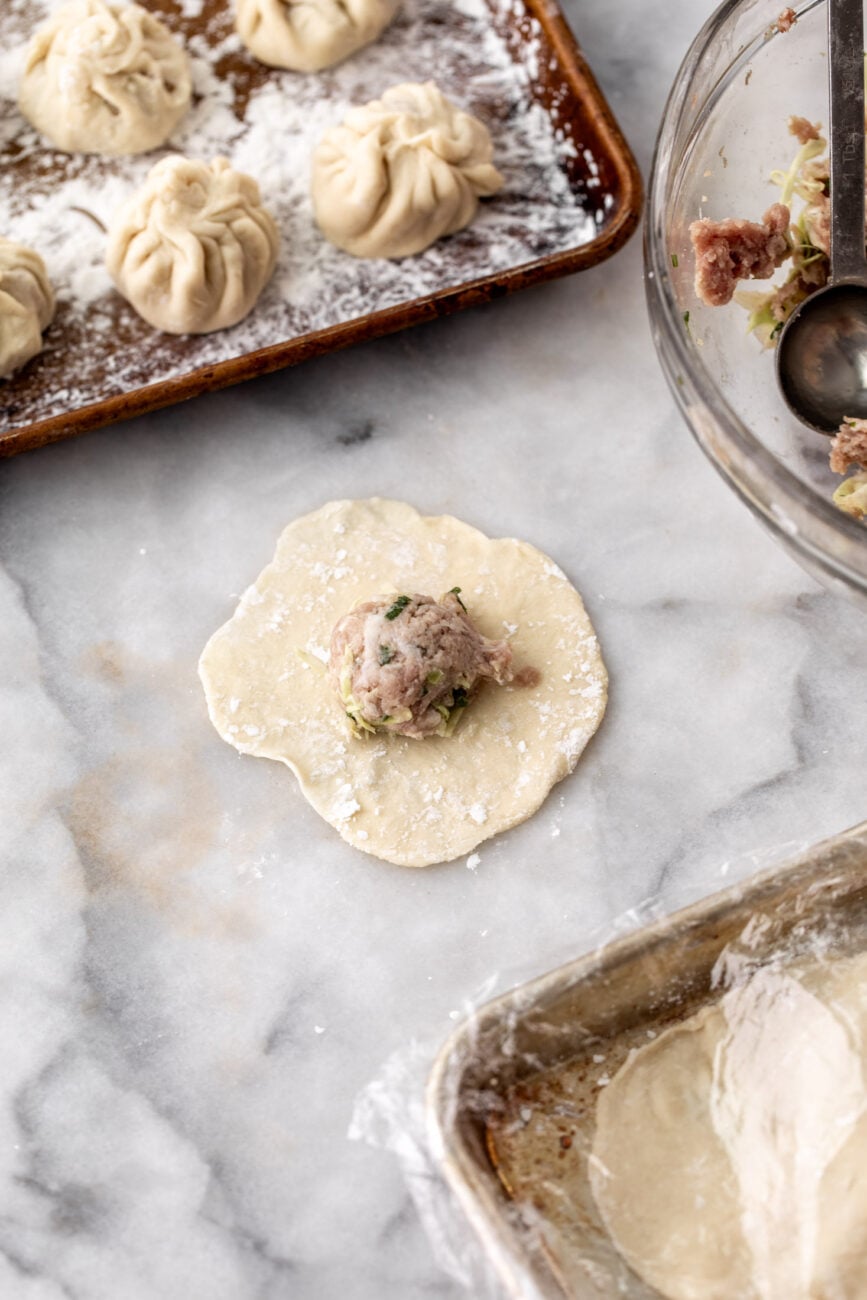
Working one wrapper at a time, scoop about 1 tablespoon of the pork filling in the center of one of the dough wrappers.
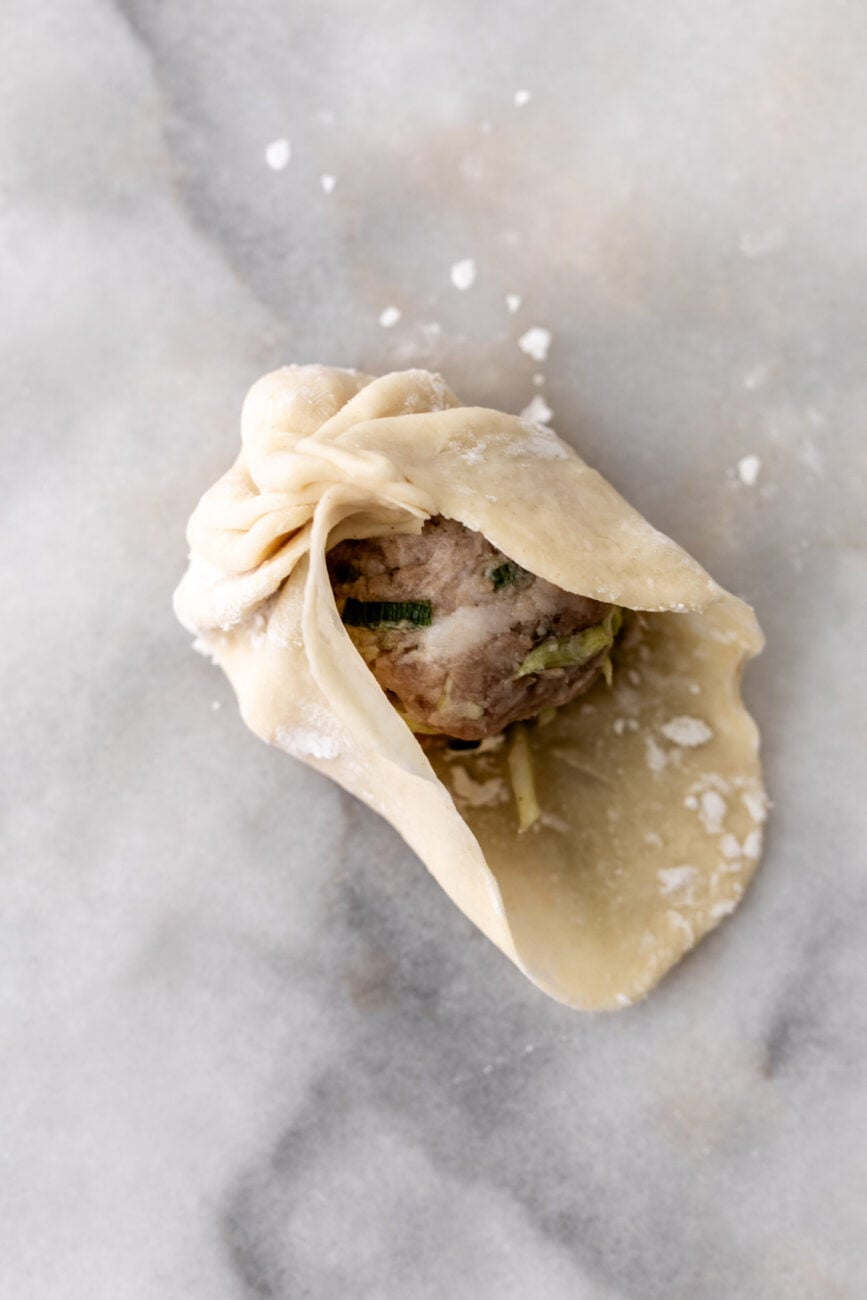
Fold the dough up and around the filling, pleating and pinching around the top until sealed.
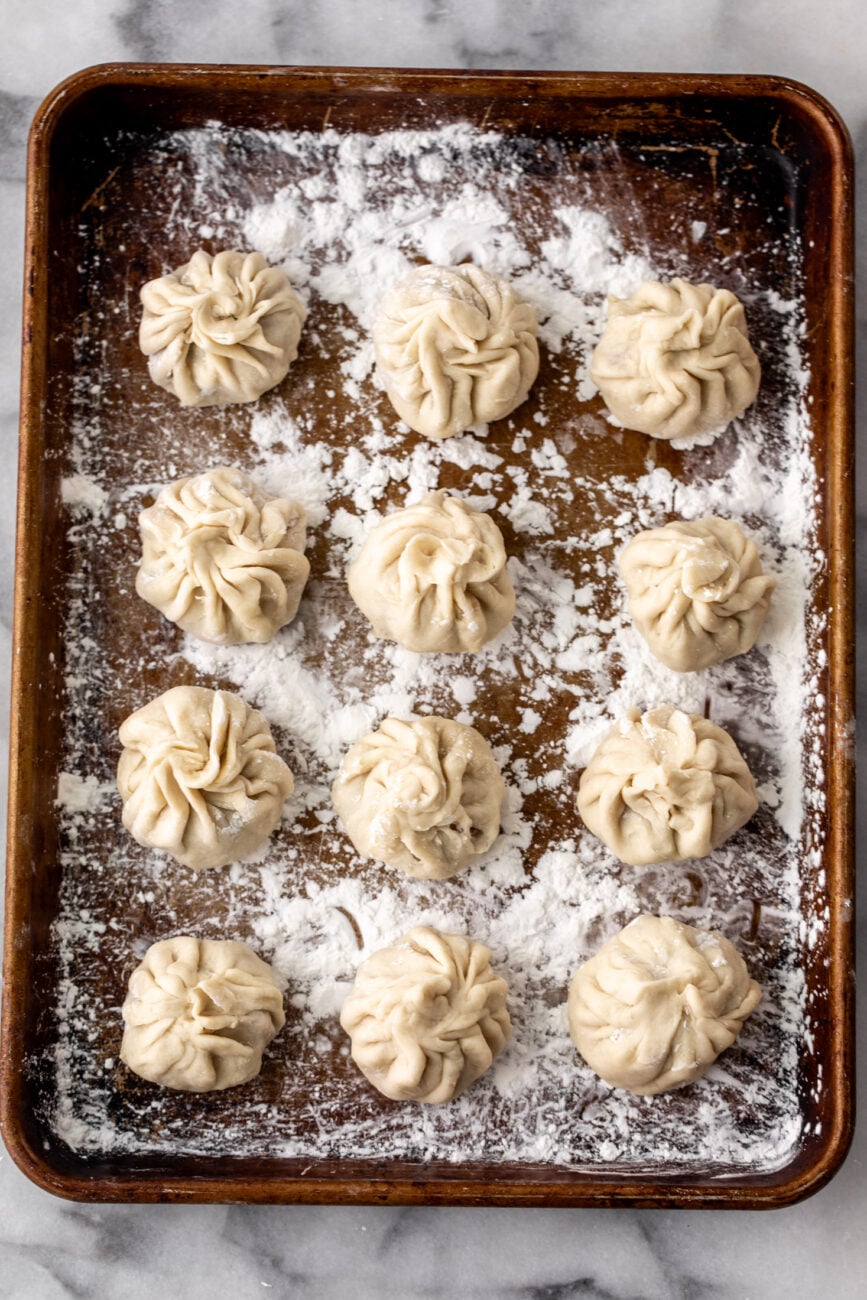
Place on a parchment paper- lined baking sheet with a bit of cornstarch so the dumplings don’t stick. Repeat with the remaining filling and wrappers. At this point either proceed to cooking the dumplings or freeze them until ready to use.
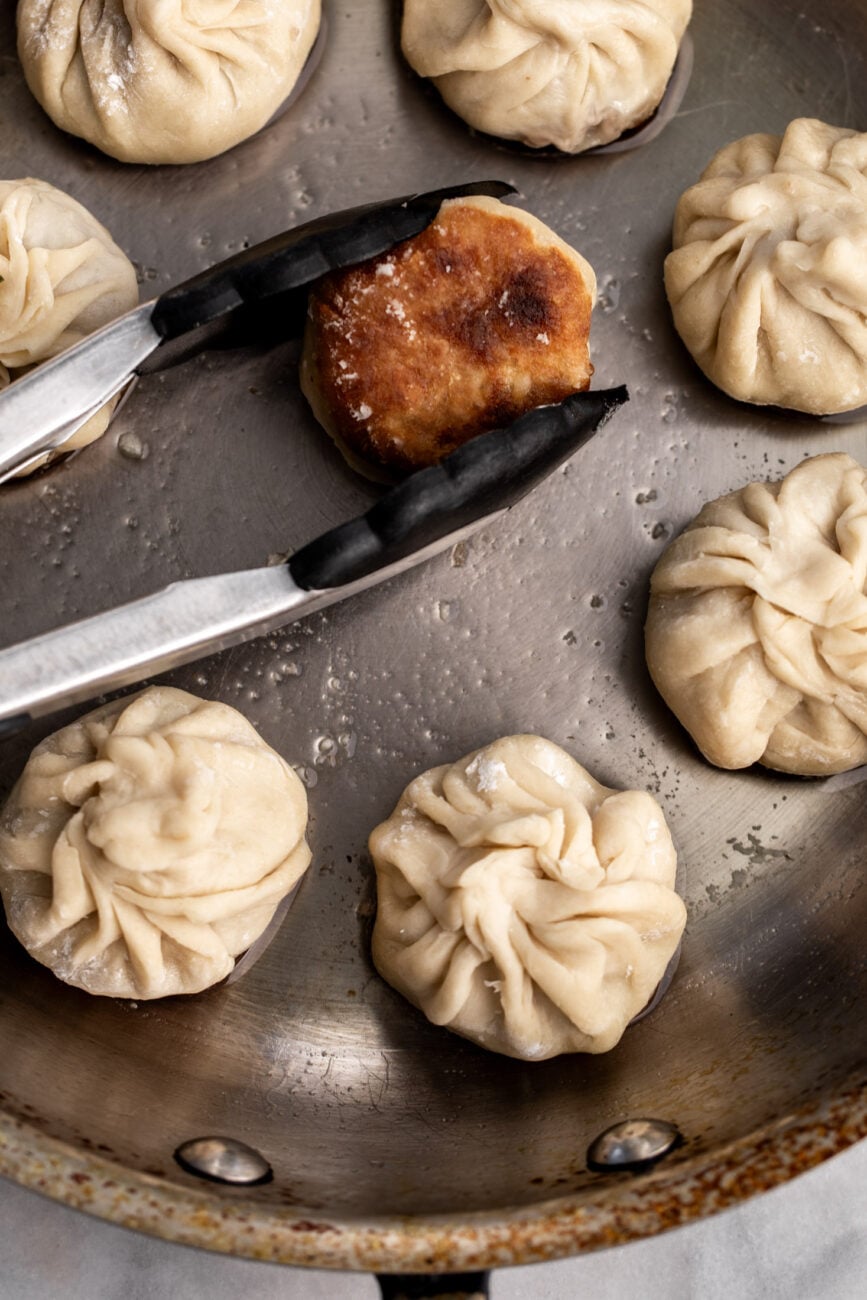
When ready to cook, place a large sauté pan with a lid over medium heat, add 2 tablespoons of the vegetable oil and heat through. Working in batches, arrange the dumplings in the pan, flat side down, so they are packed in but not touching. Fry the dumplings, uncovered, until the bottoms of the dumplings are golden brown, about 2 to 3 minutes.
Add ½ cup water to the pan, then cover tightly with a lid (do this quickly, as the liquid will splatter) and cook until most of the liquid has been absorbed and the bottoms of the dumplings are crisp and golden and the meat inside is cooked through, about 7 minutes.
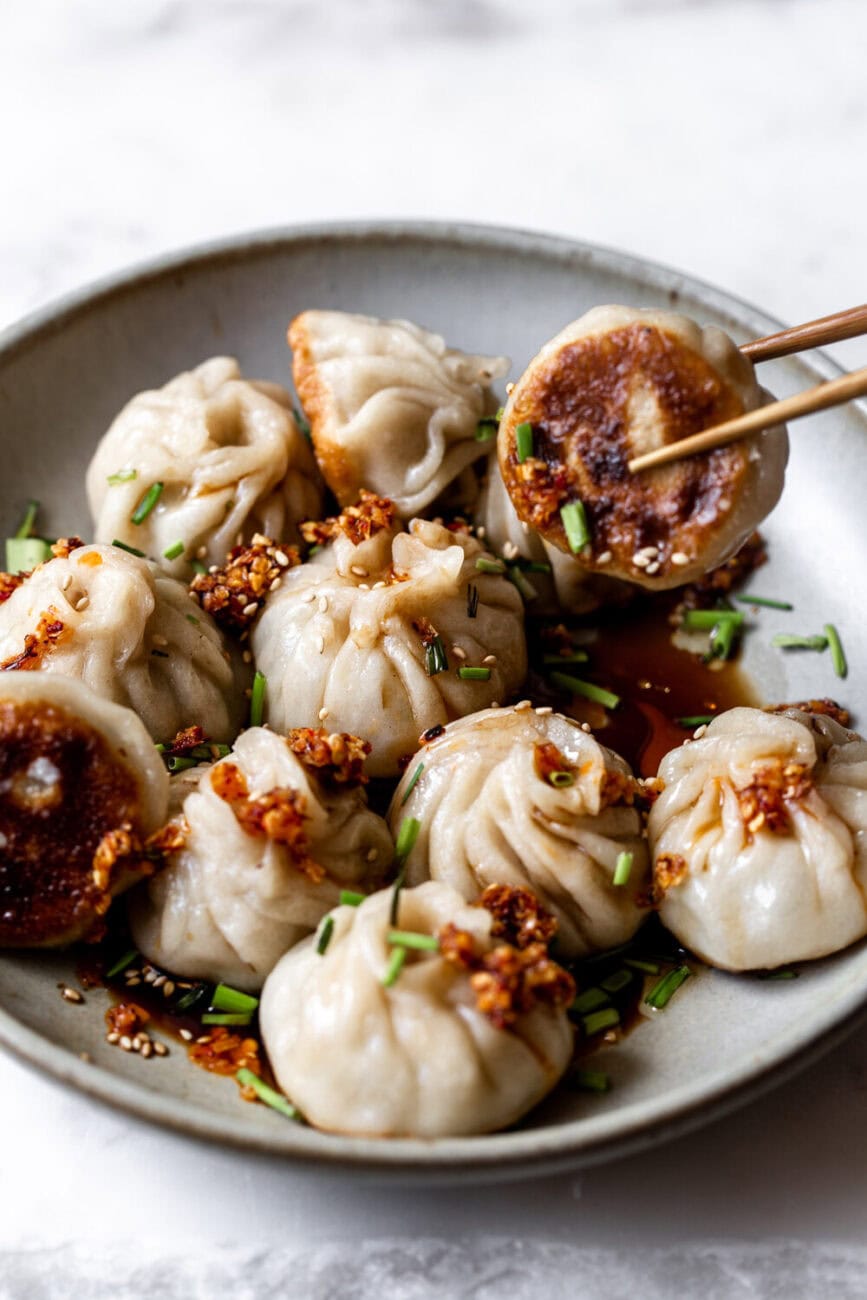
Use a spatula to remove the dumplings from the pan. Repeat with the remaining dumplings and oil. Serve topped with diced chives, white sesame seeds, sesame oil, and spicy crunchy chili oil with soy sauce for dipping.
Best sauces to serve with dumplings
- Soy sauce – an easy and classic option. Dress it up with a little garlic or ginger.
- Black vinegar – Chinese black vinegar or Chinkiang vinegar is made from fermented sticky rice. It’s mildly acidic and just a bit sweet making it a great pairing for dumplings.
- Crunchy chili oil – You can easily use store-bought or you can find my recipe for the crunchy, flavorful easy chili crisp recipe topping.
- Chili oil – found in stores or made by heating red pepper flakes and sesame oil together and straining out the red pepper.
How to Freeze Dumplings
If you aren’t eating the dumplings right away, be sure to freeze them so they don’t stick to the plate. They take just about the same amount of time to cook from frozen as from fresh. You can take them directly from the freezer and proceed with the cooking directions.
FAQ – Frequently Asked Questions
This usually happens from overfilling, trapped air pockets, or not sealing the edges tightly. Use about 1 tablespoon of filling and press out any air before sealing. Also make sure to evenly roll out your dumpling wrappers.
Yes! Steam for a softer texture or boil until the dumplings float and cook through. Pan-frying gives the most texture contrast.
Store in an airtight container for up to 3–4 days. Reheat in a skillet to re-crisp the bottoms.
Other Recipes to Try
If you enjoy this pan-fried dumpling recipe, give these a try:
Made this dish? Be sure to rate the recipe and drop a comment below! Your feedback means everything (and helps others find it too)!
Juicy Pork & Chive Pan-Fried Dumplings
Rate this Recipe
Ingredients:
For the dumpling dough:
- 2 cups all-purpose flour
- 1 cup boiling water
- ½ teaspoon table salt
- Cornstarch, as needed
For the pork & chive filling:
- 1 pound ground pork
- ¼ cup diced chives
- 1½ cups finely shredded cabbage
- 1 tablespoon grated ginger
- 1 tablespoon rice vinegar
- Kosher salt, as needed
For assembly and serving:
- ¼ cup vegetable oil, divided
- 1 teaspoon diced chives
- ½ teaspoon white sesame seeds
- 2 teaspoons toasted sesame oil
- ¼ cup Crunchy chili oil (or your favorite chili crisp)
- Soy sauce, as needed (or black vinegar)
Instructions:
For the dumpling dough:
- Sift the flour into a medium bowl; set aside. In a separate bowl or liquid measuring cup, combine the boiling water and salt, and stir until the salt is completely dissolved. Slowly stir ½ cup of the hot, salted water into the flour, stirring with a rubber spatula (add additional water one tablespoon at a time if the dough is too dry).
- Once the dough begins to come together, use your hands to form the dough into a ball. Transfer the dough to a clean work surface and knead for about 10 minutes, until the dough is smooth and pliable. Cut the dough in half and wrap each with plastic wrap and let sit for 30 minutes.
- Sprinkle a workspace with cornstarch and unwrap the dough. Roll each half into a long log about 1” in diameter. Cut each log crosswise into 14 one-inch wide pieces. Cover the pieces of dough with a damp kitchen towel so the dough does not dry out.
- Form each piece into a ball, flatten slightly, then use a rolling pin to roll the dough into a circle. Sprinkle the dough lightly with additional cornstarch if it begins to stick. Use a 3 ½-inch circle cookie cutter to cut a perfect circle from the dough. Remove the excess dough and discard. Sprinkle the finished wrapper lightly with cornstarch.
- Cover with a damp towel and repeat the process, stacking each wrapper on top of the previous one until all of the dough has been used. Keep the wrappers under the damp towel while combining the filling.
For the pork & chive filling:
- In a large bowl combine the pork, chives, cabbage, ginger and rice vinegar. Season with salt and mix by hand until just combined. Let sit for about 15 minutes so the cabbage wilts just a bit.
For assembly and serving:
- Working one wrapper at a time, scoop about 1 tablespoon of the pork filling in the center of one of the dough wrappers.
- Fold the dough up and around the filling, pleating and pinching around the top until sealed.
- Place on a parchment paper- lined baking sheet with a bit of cornstarch so the dumplings don’t stick. Repeat with the remaining filling and wrappers. At this point either proceed to cooking the dumplings or freeze them until ready to use.
- When ready to cook, place a large sauté pan with a lid over medium heat, add 2 tablespoons of the vegetable oil and heat through. Working in batches if needed, arrange the dumplings in the pan, flat side down, so they are packed in but not touching. Fry the dumplings, uncovered, until the bottoms of the dumplings are golden brown, about 2 to 3 minutes.
- Add ½ cup water to the pan, then cover tightly with a lid (do this quickly, as the liquid will splatter) and cook until most of the liquid has been absorbed and the bottoms of the dumplings are crisp and golden and the meat inside is cooked through, about 7 minutes.
- Use a spatula to remove the dumplings from the pan. Repeat with the remaining dumplings and oil. Serve topped with diced chives, sesame seeds, spicy crunchy chili oil and soy sauce or black vinegar for dipping.
Watch this Recipe
Notes:
Nutrition:
TAG ME ON INSTAGRAM TO BE FEATURED ON MY STORIES! @cookingwithcocktailrings
Any tips or techniques on pinching/folding? Would love to get more specifics if possible!
Homemade dumpling wrappers are way easier to work with luckily – they have a lot more give.
To fold them like I have in the photos, I hold the wrapper with the filling in the middle in one hand and make the pleats with the first three fingers of my other hand (i’m lefty so I use my left hand to pleat) turning the dumpling in my right hand as I pull the dough together.
An easier way is to fold it with the dumpling wrapper on a surface and use your thumb and index fingers of both hands to pull the dough together to make the pleats.
Once the circle is completed I do a little pinch to make sure it is totally sealed (you don’t want any filling spilling out during cooking) and kind of flatten the top with my thumb to make that top little indent circle.
I hope this helps! I will try to add some additional step photos next time I make them! Practice makes perfect!!!
These were SO delicious!! I made them with your Dan Dan noodles for an incredible Asian feast. My family has been using the leftover spicy crunchy chili oil on anything from avocado toast to sauteed veggies — YUM! Thank you for all of your fantastic recipes!
I am so happy to hear that, thank you for sharing Jennifer! The crunchy chili oil is my favorite too! I put it on absolutely everything!
Those are sooo good and much easier than I thought! I substituted chives for green onions because I couldn’t find any and it tasted delicious anyway! I also served them with black vinegar and ginger, dumpling style, sooo good! Thanks Kylie, will definitely make again!
I am so happy to hear they were easier than expected!! And green onions are a wonderful substitute! I love serving with black vinegar and ginger. For anyone who is having trouble finding black vinegar I get it on amazon: https://amzn.to/34WuH1g
These look delicious! If I freeze them, what are the reheating instructions? Should they thaw prior to cooking?
You can actually just cook them when they are frozen! It’s easiest to do it this way so they don’t stick as they defrost. I would just add a minute or two to the steaming time but other than that just cook as instructed above! Hope you enjoy!
Made the recipe, it’s very good! I would suggest really limiting salt as everything in the sauce is very salty…I’d like to try it with roast or possibly chicken
I Love this dumpling recipe! The flavor is just what i like and it makes so many that i just pop most of them in the freezer and cook them when I want some. Super beginner friendly, as with anything home cooked, its a labor of love but so so worth it.
That makes me so happy Sasha! I love popping them in the freezer for easy meals too! Thanks for sharing!